“Relax your shoulders”
There probably isn’t a single yoga teacher out there, myself included, who hasn’t used the verbal cue “relax your shoulders away from the ears.” This cue can be totally innocent and helpful to point out unconscious patterns related to stress or posture, but it can also lead to some serious shoulder injuries when the arms are overhead. Shoulder Impingement is common amongst dedicated yogis, and many people have blamed chaturanga as the culprit. It has become more and more obvious, however, that downward dog is where most students are creating the issue. To be clear, downward dog is not the issue, it is the way in which many students do the pose that causes shoulder impingement.
When we take one arm up overhead, eventually the shoulder blade and collar bone have to lift and rotate in order to maintain space in the joint. If you pull your shoulders down while your arms go up, you are not allowing the necessary rotation that allows you to maintain space. As a result, you will cause pinching or friction in the joint space where muscles, tendons, and subacromial bursa run through. If you continue to force this action repeatedly you can expect pain or injury.
You are most likely fine in standing poses simply because you’re not likely to force your arm up high enough to create the compression or impingement. Most people unconsciously bend their elbows when they reach up with their arms in poses like tree pose or warrior one – this gives the illusion or feeling that the arms are reaching up vertically while still keeping their shoulders soft.
On the other hand, in poses like downward dog, the shape itself in combination with its relationship to gravity makes it challenging to maintain space in the joint unless you understand how to elevate your shoulder blades toward your ears, and protract them away from each other. These two actions in combination with external rotation of the upper arm bone (triceps/armpits turn toward face) will create upward rotation and help to maintain space in the joint. Rather than offering the cue “relax your shoulders”, many yoga teachers give an amazing hands-on adjustment that indirectly creates more space in the shoulders. If you have had your hips pushed up and back or thighs pulled back then you know the feeling, but you probably were sensationally distracted by the stretch in your hamstrings. What actually moves your hips up and back if you don’t have the assistance of your teacher is the elevation of your scapula – think shrugging your shoulders.
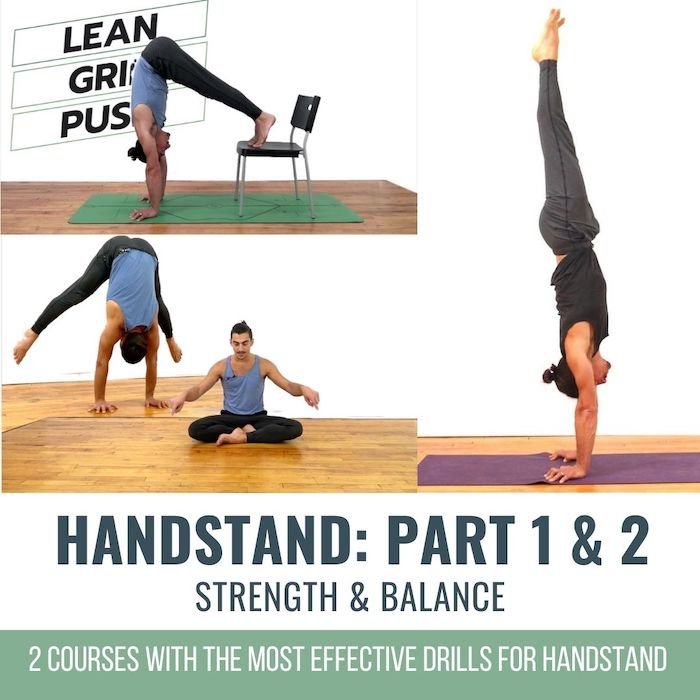
HANDSTAND TRAINING
2 PART COURSE FOR STRENGTH & BALANCE
- Part 1: Get strong in key areas for Handstand
- Part 2: Learn to Balance Handstand
- Techniques, anatomy and drills to gain mastery on your hands
- Easy to follow, step by step approach
- Find weak points and make them your strengths
- The most efficient & effective course to access handstand
- Option to purchase each course separately or together
CURRENT SALE PRICE FOR BOTH
$298.00 $148.00
When you elevate and upwardly rotate your shoulder blades you will not only bypass impingement, but you will increase your range of motion. This is also the key to getting out of the banana back handstand or forearm stand. With these actions, you give yourself the opportunity to have enough range of motion or “flexibility” that allows for the arms and rib cage to be at the same angle. This is definitely easier said than done. When you are upside down and have the entire weight of your body, you have to be strong enough to elevate your scapula. Picture this, you are standing on your feet, you reach your arms up overhead and then you shrug your shoulders up toward your ears. Then your entire body weight is placed on your hands. Your shoulders would want to fall down. This is basically what it feels like to do a handstand at first. With the right exercises, you will get stronger. If you are looking for exercises to help build strength and awareness in your shoulders I highly recommend The Handstand Strength Training video, which provides amazing exercises to build strength specific to poses with arms overhead.
To sum it up, try allowing your shoulders to rise up whenever you lift your arms overhead. Watch the video above to gain a clearer understanding of these actions
So Why Have I been told to relax my shoulders?
The cue to relax your shoulders is great when we are in postures where the arms are out to the side or lower. In Warrior 2, depressing the shoulder blades down the back can be stabilizing and strengthening. Postures like chaturanga and other various arm balances are also great opportunities to work on the depression of the scapula. When the arms are overhead such as down dog, handstand, and forearm stand there is fairly great risk in pulling your shoulders down, and there is a great opportunity to develop health in the trapezius muscles when you elevate the shoulders upward.
Other Helpful Muscle Engagements
Research also shows that activating both the biceps and triceps at the same time can actually support creating more space in the glenohumeral joint (where the arm meets the shoulder socket). You can do this by actively pushing the arms straight, and then try to squeeze your hands toward each other like a bulldog. It is challenging to do oppositional muscle engagements, so this takes a bit of exploring. First work on straightening the elbows and activating the triceps. When you squeeze your arms toward each other you will also get the added benefit of activating the adductor muscles which can also support more space in the shoulder joint.
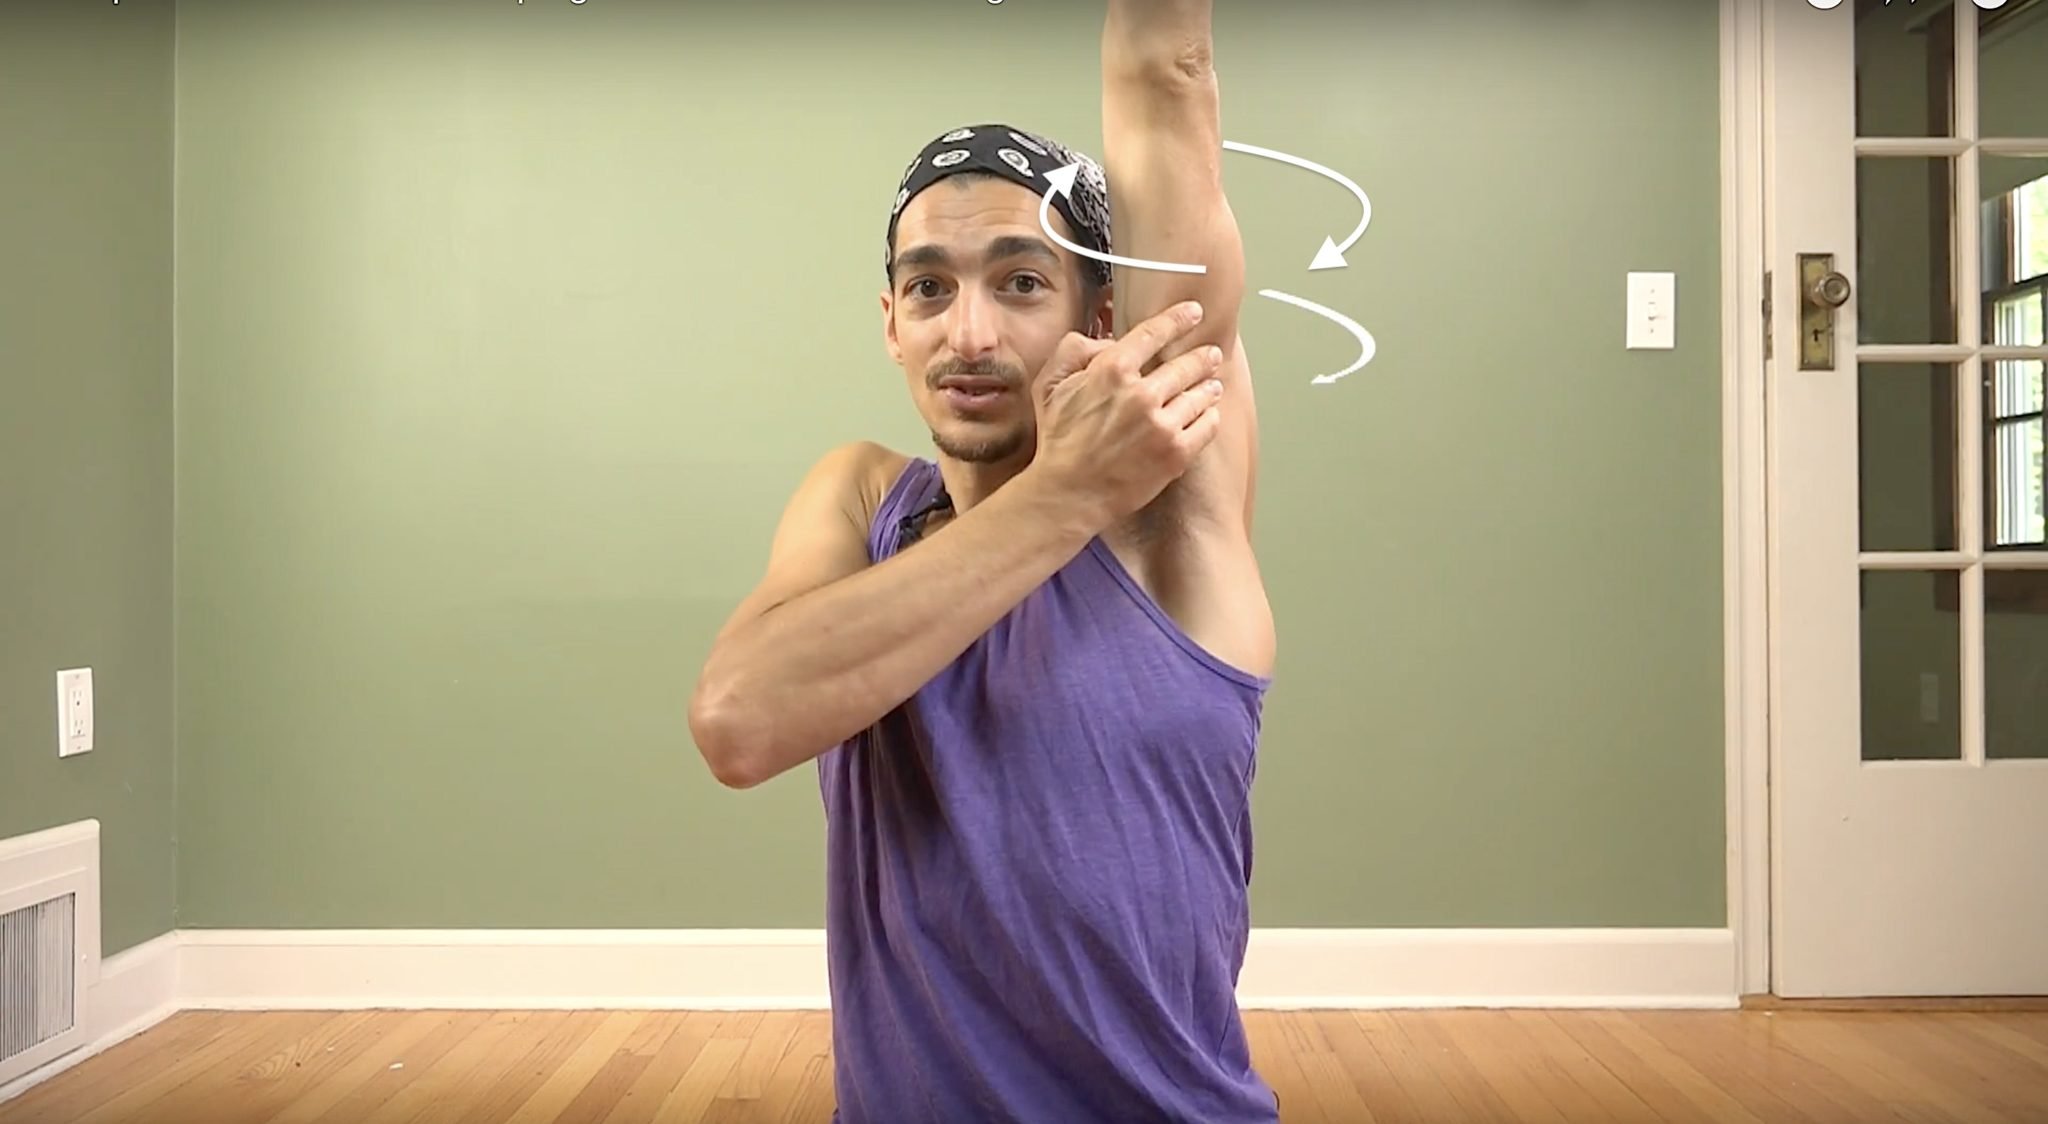
Step 1 - Externally Rotate the Upper Arm Bone
Rotating the humerus externally when the arm goes up overhead can help to avoid the impingement interval in the joint. One of your rotator cuff muscles, the supraspinatus, runs through the glenohumeral joint (under the acromion process and above the head of the humerus). This muscle helps to lift the arms up from tadasana, but because of its location, it is easily pinched if the arms go overhead but the shoulder blades don’t follow the movement. Downward dog is often the culprit- the weight of the body on the shoulders requires that we put effort into the posture to push the ground away however, with cues like “relax your shoulders” and “soften” we often release the appropriate muscular action required to maintain space resulting in shoulder impingement. In plain English – Externally rotate your arms (triceps rotate toward your face) and you will maintain more space in the joint and less potential for impingement.
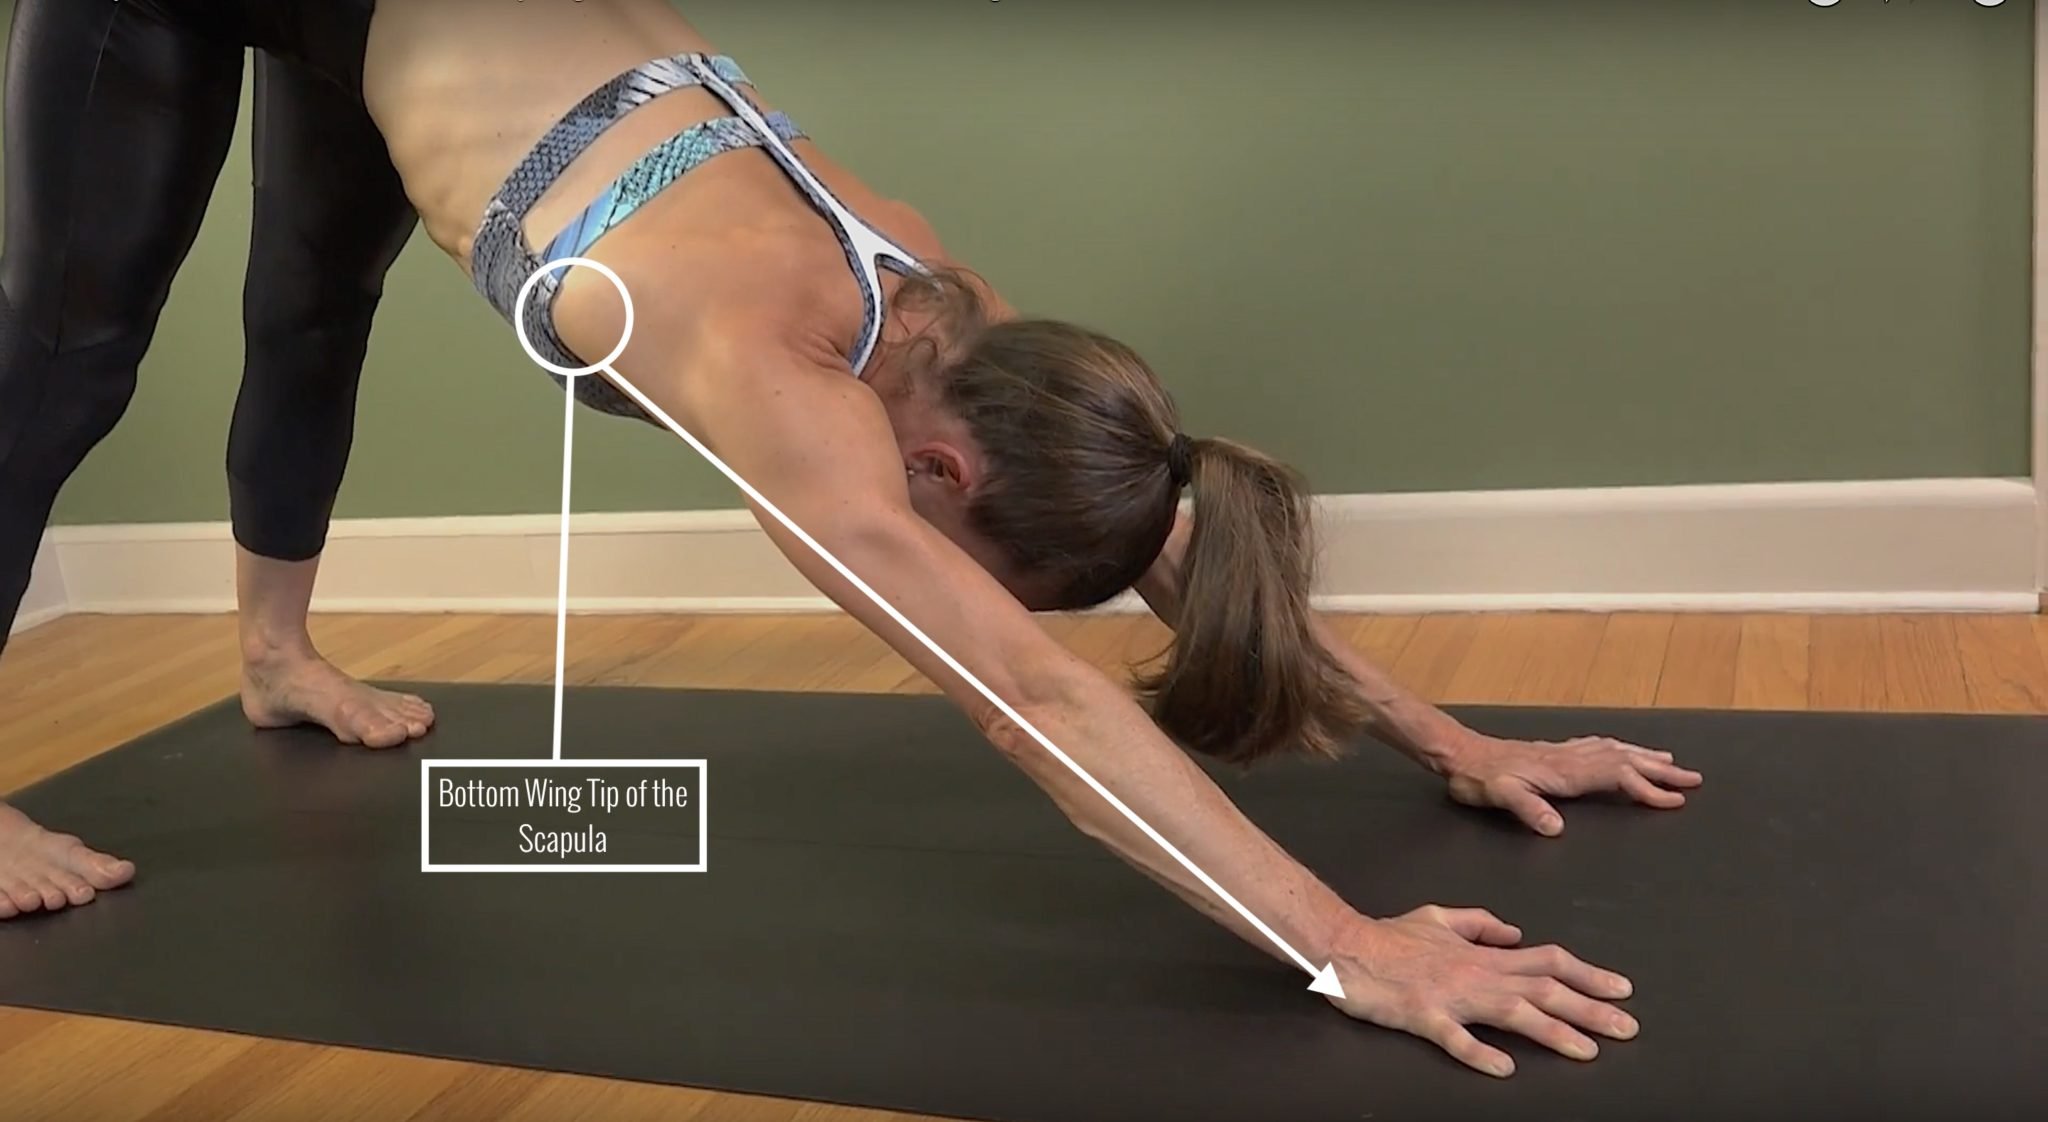
Step 3: Upward Rotation of The Scapula
From the outer line of your shoulder blades, press through your hands into the earth. When you elevate your shoulder blades toward the ears from the outside line of the arm, the bottom wingtip of the scapula begins to rotate out and up – this is known as the upward rotation of the scapula. As a result of upward rotation, your shoulder blade rotates and angles itself to allow the arm bone to be overhead without a collision of bones in the joint, creating less possibility of impingement.
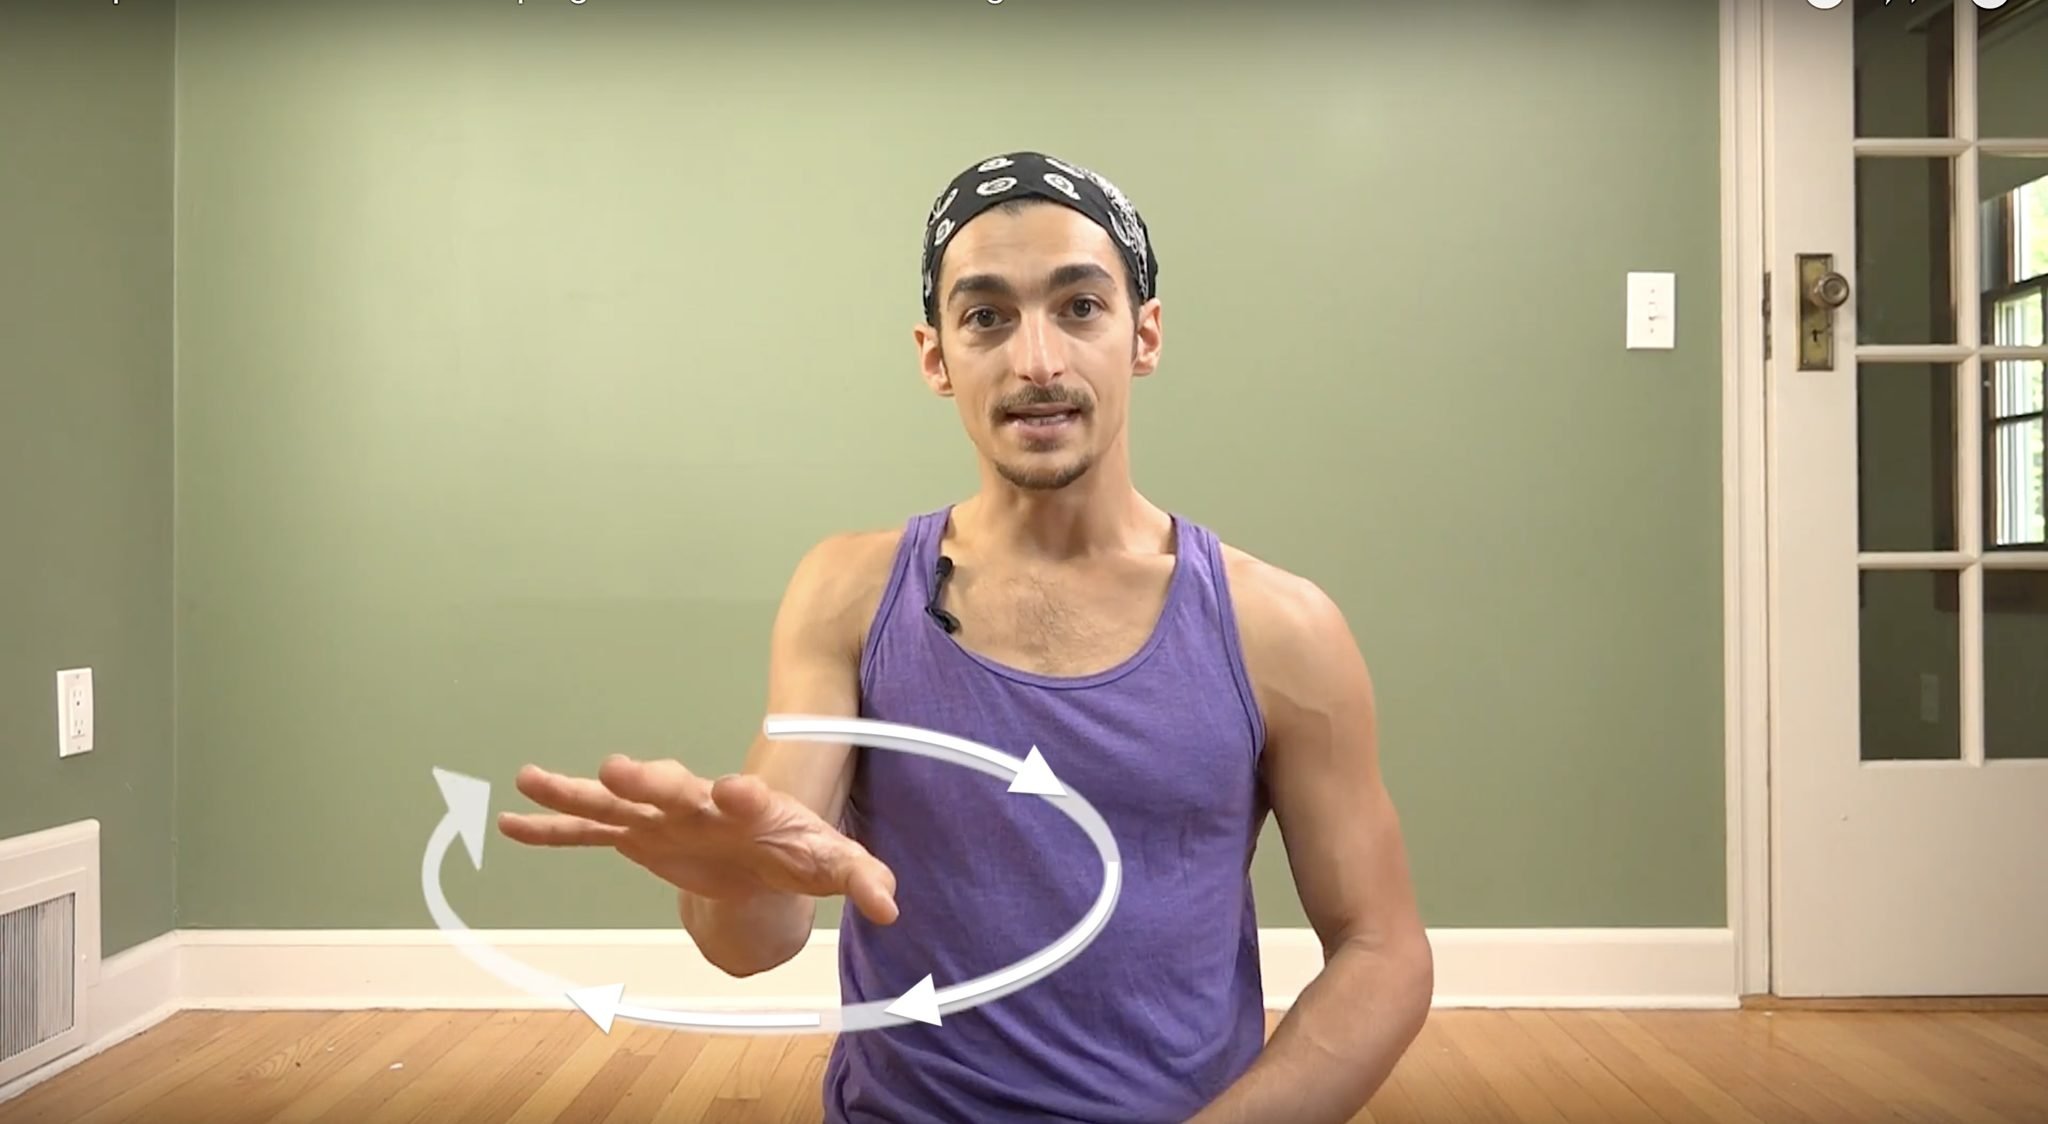
Step 2: Pronate the Forearm
When externally rotating the upper arm bone, you will notice that the lower arm (forearm) will go along for the ride and rotate as well. This results in increased pressure on the outside of the hand and wrist. To evenly distribute the weight to the whole hand, simply pronate your forearm by rotating the inner forearm and hand down toward the ground. Many teachers will stress this by asking you to press your index finger and thumb down. Depending on your range of motion in your radial ulnar joint, you may not be able to press the inside edge of your hand down and maintain external rotation of the shoulder. My suggestion is to turn the hands slightly outward if this is the case. Learning to rotate the forearm in opposition to the upper arm bone can be challenging but through mindful repetition, you will be able to do it and you will feel increased strength and stability from it. To Strengthen your wrists, I highly recommend Handstand Training
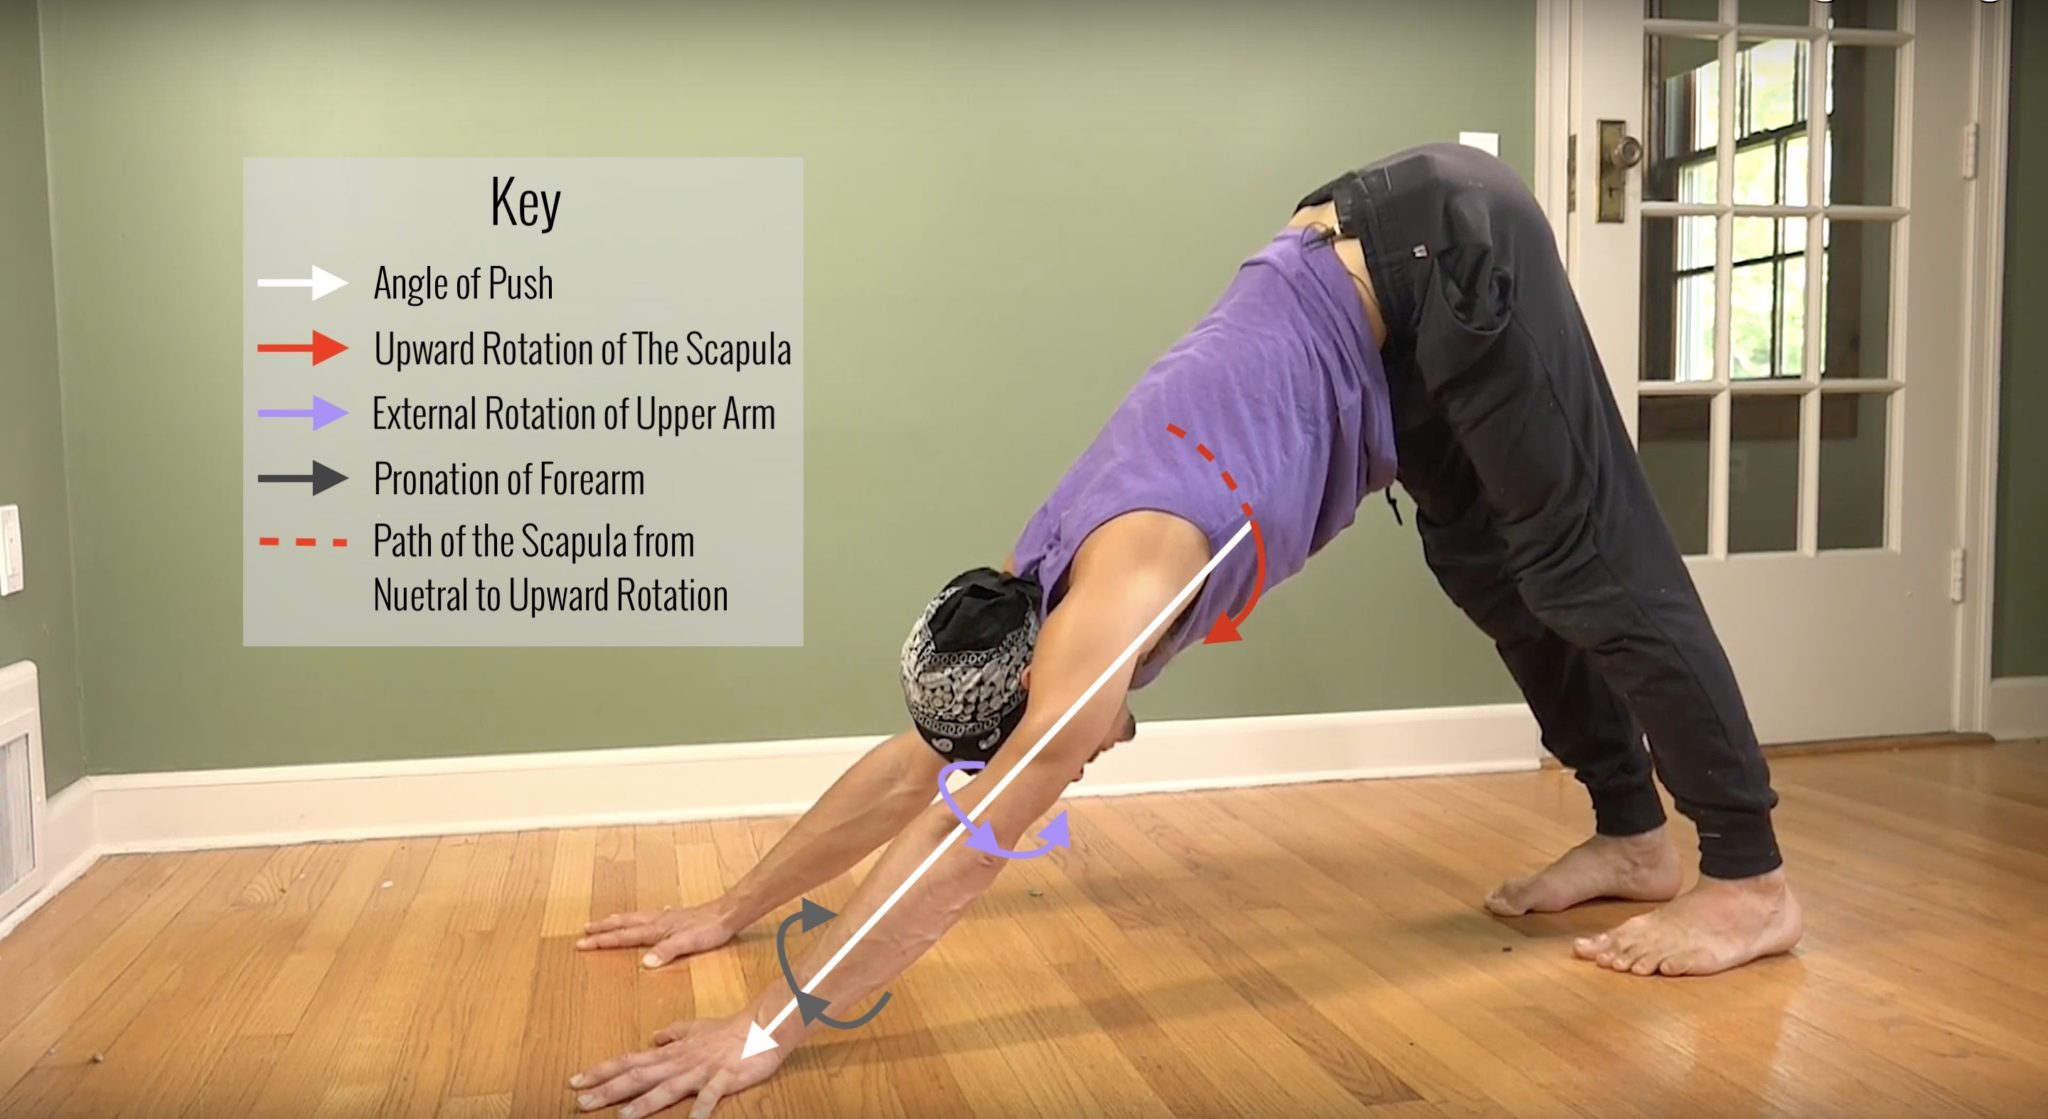
The 3 Actions
While I have broken this down into 3 steps, with time and practice it can be 1 step and the 3 actions can happen all at once. To build muscle coordination it is useful to separate the actions and practice them individually. Though I created a definitive order to follow, know that it is beneficial to mix up the 3 steps and put them out of order. You may find another combination to work better for your body! The dotted red line above indicates the path of the bottom wingtip of the scapula. If you do not push the bottom wing tip, it will wind up closer to the spine. It is helpful to record a video yourself to see where your shoulder blades are on your back.
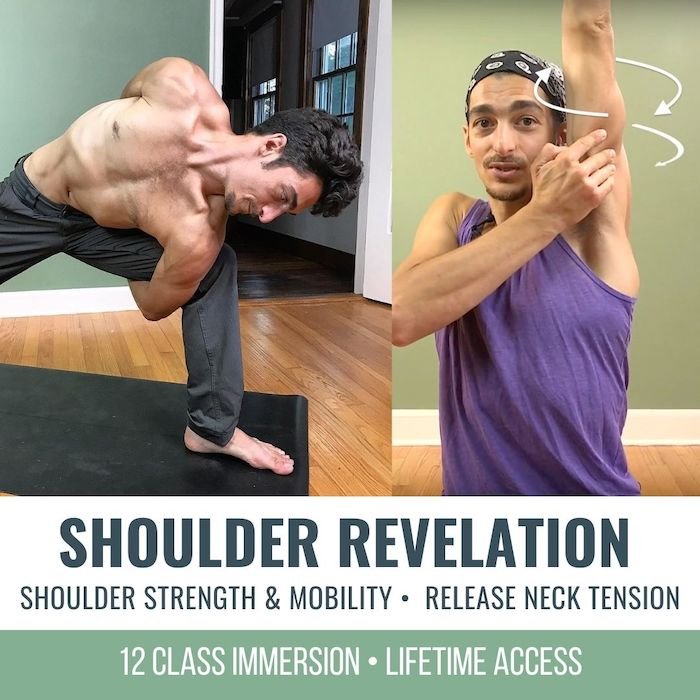
SHOULDER REVELATION
Strength•Mobility•Biomechanics
- Increase strength and flexibility
- Decrease risk of injury
- Release shoulder tension
- Learn anatomy and biomechanics
- Access a wider range of postures
- Stabilize the rotator cuff muscles
- Learn binds, heart openers, and arm balances
- 12 all-levels, 75-minute online classes
- Lifetime unlimited access to all
$198.00 $138.00
Depression of the Scapula
Pulling your shoulders down away from the ears is the opposite of everything I have mentioned in this post, however it is an important action to work on especially for arm balances like side plank because depression creates stability when the arms are at or below shoulder height.
When Can I Relax My Shoulders?
One of the best parts about getting stronger with shoulder elevation (upward rotation) is that the muscles of your upper trapezius will become more supple and be able to relax more easily. Just like after working really hard in a yoga class, when you feel that complete relaxation in your body, each of your muscles experience that after being strengthened. There are plenty of times to relax your shoulders down your back – just not when you reach your arms overhead. So when you are sitting in your chair, you can think shoulders move slightly back and shoulder blades relax downward. When you are in a strong posture like crow pose and your upper arms are not overhead, you can even work on strengthening the muscles of depression of the scapula. My philosophy on the body is that there are no wrong actions or muscle engagements, there are just appropriate and inappropriate times to use them.
A great rule of thumb you can take with you: when in doubt just let your shoulders follow your hands – if the hands go up, let your shoulders go up, if they go down let them go down, if you reach forward let them go forward, etc. Enjoy your exploration, thank you for stopping by!
-Matt
2 Comments
Submit a Comment
You must be logged in to post a comment.
ONLINE TEACHER TRAININGS
GET CERTIFIED AT THE 200 OR 500 HOUR LEVELS
- 200 Hour Training: Get certified to teach yoga
- 300 Hour Training: Take your certification to the 500 hour level
- Recognized globally by Yoga Alliance
- Take your practice to the next level
- All levels, ages, and experience welcomed
TOP RECOMMENDATIONS
Handstand Training
Learn the techniques that make Handstand fun, easy and accessible! This 2 part course consists of the top most effective exercises will increase your strength and technique so you can easefully balance a handstand.
SHOULDER REVELATION
In this 12 class immersion you will practice specific techniques to strengthen and unlock your shoulders. Each class focuses on a specific joint articulation and muscle group so you gain mastery in the shoulders.
HEART OPENERS
Finally, a 12 class immersion designed specifically to help you discover the freedom of heart openers. Learn how to avoid uncomfortable compression, and awaken your true range of motion in a step by step manner.
Continue Learning
Conquering Compass Pose
Conquering Compass PoseSURYA YANTRASANACONQUERING COMPASS POSE Conquering Compass Pose isn’t about forcing your leg behind your shoulder—it’s about understanding and participating in the muscular coordination that makes the posture possible. The real power comes from...
Leg Over Head Pose
Leg Over Head PoseEKA PADA SIRSASANALEG OVER HEAD POSE Leg Over Head Pose is one of those postures that challenges not only our bodies but also our mindset. When faced with a seemingly impossible pose, we tend to respond in one of three ways: dismissing it as...
Spanda In Backbends
Spanda In BackbendsSIDE PLANKSPANDA IN BACKBENDS Spanda in backbends is the key to creating both stability and freedom in spinal extension. Backbends are not just about bending; they require a balance between expansion and controlled engagement to prevent excessive...
Bound Half Moon
Bound Half MoonBADDHA ARDHA CHANDRASANABOUND HALF MOON The elements involved in Bound Half Moon are many. There’s a lot at work and more than meets the eye. Our ears, eyes, muscles, and proprioception help us to balance. When it comes to which element carries more...
Sciatic Nerve Pain
Sciatic Nerve Painhip strengthSCIATIC NERVE PAIN The sciatic nerve runs from the lower back through the glutes and down the leg, making it one of the longest nerves in the body. Because of its length, it can easily become irritated or pinched, leading to pain anywhere...
The SI Joint
The SI JointalignmentTHE SI JOINT What is the SI Joint? To understand what it is, we must discuss all that surrounds it. First, the Sacrum is a triangular-like shaped bone that sits between the two sides of the pelvis (the left Ilium and right Ilium). Now each Ilium...
THE FREE TECHNIQUE PACK
When You Subscribe, You Will Get Instant Access to
- the Technique Pack: 15 yoga pose breakdowns
- exclusive online course discounts
- exclusive blogs and videos




I love your anatomical approach and way to make the conceptual meet the physical! While not always easy to comprehend, your language and graphics make sense. I am so happy that I got to practice with you once in person in Fort Lauderdale–I hope to again do so in the future!
Thank you so much for this information. I am approaching 74 and have been doing Iyengar yoga for 18 years and my teacher constantly shouts at me to straighten my arms when doing down dog. I used to find it very painful and only after using weights to strengthen my rotator cuff and using stretches I found on YouTube channels could I manage to straighten my arms but with a lot of effort.
I have learnt a great deal online – however one has to be selective as there is a lot of rubbish out there.