Practice Peacock Pose

Practice Peacock Pose

Mayurasana

PRACTICE PEACOCK POSE

We go to our yoga practice for many different reasons at any given time. In our asana practice, we are sometimes seeking softness and ease. At other times, we might be striving for vigour and strength. Peacock Pose is for when we are in pursuit of the latter. The full pose requires an ample amount of strength, but it will equally build strength if we are not yet at that point. Taking steps to practice Peacock Pose means we are ready to jump into the fire of what this arm balance posture has to offer.  

With regard to arm balances, Matt teaches us the concept of “lean, resist, push.” This is what guides us to ultimately finding our balance. The same concept exists in Peacock Pose, except that we must approach the “resist” portion differently. The backwards placement of the hands changes our experience. The muscle engagements are different.

chromatic yoga 15 hour immersion

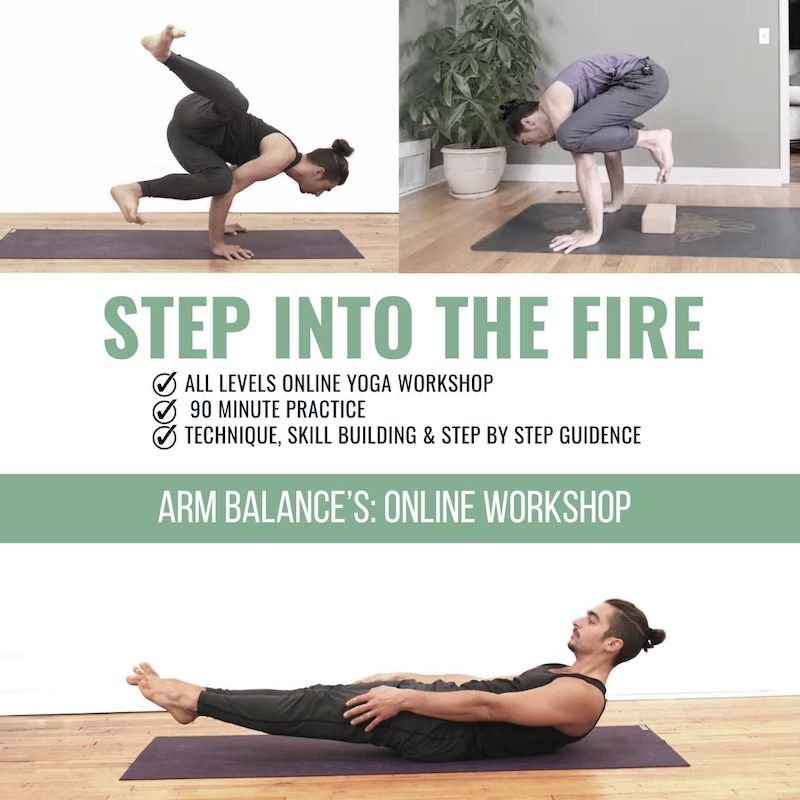
STEP INTO THE FIRE

REGISTRATION NOW OPEN

  • Step-by-step guidance
  • Intelligent and precise warm-up for your body
  • Drills to build and refine your skill sets
  • Essential arm balance techniques
  • All levels appropriate
  • Lifetime access available
  • Live attendance is NOT necessary—you can practice the replays
  • Affordable options available
  • VIP options available

START WITH “SIMPLE” BICEP ACTIVATION

Even though we have many of the traditional principles of an arm balance in Peacock Pose, there’s a lot we can learn from what is different. For example, the placement of the hands is backwards, which makes our hands a pulling force rather than the usual pushing. Our biceps pull us into a position to avoid leaning too much and falling over.

Asana practice, however, does not provide many opportunities for bicep strength. So how do we prepare these muscles, which are integral to the pose? In today’s video, Matt offers two drills that can be incorporated into our practice. 

First, like a bicep curl, you can place one hand on top of the other and resist the push of the top hand by bringing the bottom hand up toward your face or by simply creating an isometric contraction.

Next, on hands and knees, you can pull one hand toward the other, even swiping each hand up to the opposite shoulder.

WATCH THE VIDEO

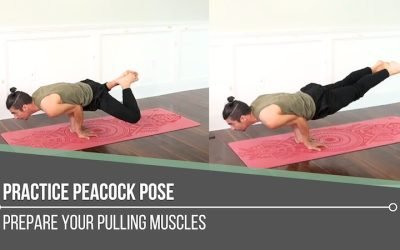
PRACTICE PEACOCK POSE: PREPARE YOUR PULLING MUSCLES

BADDHA KONASANA VARIATION

As always, progression is key. When it’s time to actually explore Peacock Pose, this Baddha Konasana variation is a great step before we attempt the plank-like position. Why? It’s an option that allows us to create less weight in the pose by having our knees bent.  

To start off, placing some soft support out in front is a good plan, just in case we fall.  

In this Baddha Konasana variation of Peacock Pose, we practice the hand placement and arm setup while creating a diamond shape in the legs.  As we lean forward, we must remember that nothing is stopping us! The biceps (our pulling muscles) need to work. It’s all about pressing our hands into the ground and pulling them towards our face, which will help with the counterbalance. The action will move some weight back towards our feet, which will help us from falling forward.

200 Hour Online Teacher Training Certification

200 HOUR ONLINE TEACHER TRAINING

GET CERTIFIED & DEEPEN YOUR YOGA PRACTICE

  • Deepen your yoga practice
  • Build confidence speaking in front of groups in person and online
  • Learn foundational class structures and templates
  • Learn techniques for a wide range of yoga postures
  • Get certified and highly qualified to teach yoga
  • Yoga Alliance Globally Recognized Certification Program

PLANK POSITION FOR PEACOCK POSE

When we arrive in this variation of Peacock Pose, the back muscles are of course involved, but it’s the leaning forward that also takes the legs up.

Additionally, there can be some conversation about the placement of the elbows. With a deeply rounded back, we may get them very low on the belly, even below the belly button, especially during the initial setup phase, but body proportion needs to be taken into consideration. Matt reminds us that when the legs lift up, it can move the belly button area further away from the elbows. It doesn’t mean that they are now in the wrong place.

Essentially, we have the same setup as in the previous variation, but you’ll see in the video that the legs go straight back and we need to be bold with the “lean” element.

300 hour teacher training online

300 HOUR ONLINE TEACHER TRAINING

GET 500 HOUR CERTIFIED AS A MASTER TEACHER

Master your skill set as a teacher through refined techniques, anatomy, biomechanics, sequencing, philosophy, meditation techniques, theming, yoga business, and much more!

  • Get 500 hour certified
  • Learn anatomy, biomechanics, asana techniques
  • Expand your teaching skills
  • Masterful sequencing and verbal delivery
  • Learn meditation and breathwork techniques
  • Transformative tools: theming, dharma talks, satsang

TAKE CARE AND LEAN

Before we even attempt any variation of Peacock Pose, we must not only prepare the pulling muscles (with bicep drills like those offered in today’s video) but also understand how much we need to lean forward to protect our wrists.  If we are at a 90 degree angle or less, this may cause a lot of pressure on the wrists. Leaning forward will increase the angle and potentially minimize the tension. It’s like a cycle: Unless we prepare the pulling muscles, we will not have the capacity to lean to the necessary degree.  

The beauty of the practice is developing this discernment. We develop a sense for what stage fits our development. Taking care to use this discernment indicates longevity in our bodies and in our practice.  

Prepare to receive step-by-step instruction and education in Matt’s upcoming online arm balance workshop, Step into the Fire.

The 200 Hr. Teacher Training: Click Here to See the Next Start Date

The 300 Hr. Advanced Teacher Training: Click Here to See the Next Start Date

Article by Trish Curling

Video Extracted From: Arm Balance Immersion 

lotus pose online yoga classes

ONLINE ANATOMY COURSE

  • Accessible, exciting, and easy to learn
  • Anatomy and biomechanics for yoga
  • Appropriate for both teachers and students
  • Learn joint alignment vs pose alignment
  • Demystify yoga poses and transitions
  • Release aches and pains
  • Learn how to avoid common injuries
  • Caters to all levels with modifications and props
  • 20 hours Continued Education Credits with Yoga Alliance
  • 20 hours toward Chromatic Yoga Certification and 300 Hour
  • Lifetime access

Continue Learning

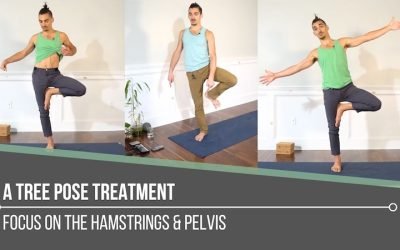
A Tree Pose Treatment

A Tree Pose Treatment

A Tree Pose TreatmentVrksasanaA TREE POSE TREATMENT Tree Pose may appear to be a posture we can just “jump into” because of its “accessibility” from anywhere we might be standing, but it definitely requires more refinement than we might think. A treatment to revive...

read more
Practice Peacock Pose

Practice Peacock Pose

Practice Peacock PoseMayurasanaPRACTICE PEACOCK POSE We go to our yoga practice for many different reasons at any given time. In our asana practice, we are sometimes seeking softness and ease. At other times, we might be striving for vigour and strength. Peacock Pose...

read more
Eka Pada Koundinyasana I

Eka Pada Koundinyasana I

Eka Pada Koundinyasana IArm BalanceEKA PADA KOUNDINYASANA I If Side Crow is already part of our practice, then Eka Pada Koundinyasana I is like adding on another layer to that posture, because they are quite similar. The added layer is that we extend the top leg...

read more
Achieve Flying Balance

Achieve Flying Balance

Achieve Flying BalanceArm BalanceACHIEVE FLYING BALANCE Achieving an arm balance is quite extraordinary when you consider all that’s involved. And when we refer to an arm balance as a “flying balance,” there is even more involved. The “flying” in Eka Pada...

read more
Virasana

Virasana

VirasanaHip ExtensionVIRASANA For some of us, postures like Virasana and Lotus can be uncomfortable or even painful for the knees, so we avoid them altogether. Depending on what we’re dealing with, this may be the best decision. If there is room for safe exploration,...

read more
Get Bendy

Get Bendy

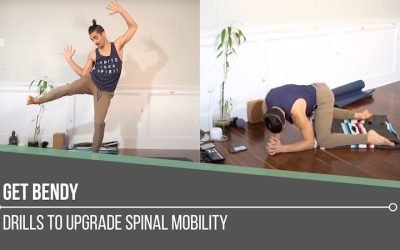
Get BendySpinal MobilityGET BENDY In the yoga context, getting bendy can conjure up images of postures that may seem far-fetched or unattainable. What we should set our sights on instead is not an end result but rather all the things we learn while we're exploring...

read more

THE FREE TECHNIQUE PACK

When You Subscribe, You Will Get Instant Access to

  • the Technique Pack: 15 yoga pose breakdowns
  • exclusive online course discounts
  • exclusive blogs and videos
  • This field is for validation purposes and should be left unchanged.

Eka Pada Koundinyasana I

Eka Pada Koundinyasana I

Arm Balance

EKA PADA KOUNDINYASANA I

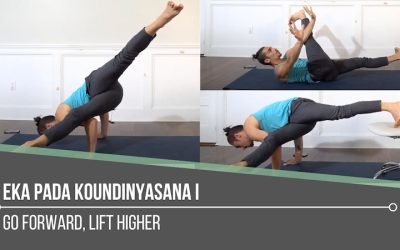
If Side Crow is already part of our practice, then Eka Pada Koundinyasana I is like adding on another layer to that posture, because they are quite similar. The added layer is that we extend the top leg behind us, splitting it from the bottom leg.

As with any arm balance, we can encounter some challenges. A common occurrence when sending that top leg back is losing the “sweet spot” of the counterbalance.  

The good news is that there are actions, articulations, and variations we can engage in to conquer these challenges. In today’s video, Matt demonstrates a variety of ways to approach Eka Pada Koundinyasana I that will meet us where we are in the development of this pose.

chromatic yoga 15 hour immersion

STEP INTO THE FIRE

REGISTRATION NOW OPEN

  • Step-by-step guidance
  • Intelligent and precise warm-up for your body
  • Drills to build and refine your skill sets
  • Essential arm balance techniques
  • All levels appropriate
  • Lifetime access available
  • Live attendance is NOT necessary—you can practice the replays
  • Affordable options available
  • VIP options available

BACK ON THE MAT VARIATION

Unless it is a regular part of our practice, attempting Eka Pada Koundinyasana I may feel discouraging. The pieces may not come together as we want them to, or in the timeline we desire—but this is where the practice happens. It’s our opportunity to take intentional action in the direction of growth, while learning to release the outcomes.

What we also have in our favor is guidance. Matt offers a first variation that lays a foundation. It’s in a supine position, which allows us to focus our well-placed efforts on the nuances and to strengthen in order to prepare for the variations in which balance is required.

One of the key takeaways is this: Just because we are supine doesn’t mean we don’t stay active in our bodies. For example, we use a high degree of abdominal engagement to draw the front leg higher onto the supportive arm.

WATCH THE VIDEO

EKA PADA KOUNDINYASANA I: GO FORWARD, LIFT HIGHER

KICKSTAND SETUP

We may also find it difficult to lift both legs off the ground. Practicing by attempting to lift only one leg may help us gain a sense of what’s required. Using the front foot as a kickstand can allow us to explore what it feels like to lift in the back leg while we contemplate how much we need to go forward with the torso in order to lift the back leg higher. Once we feel secure and strong enough, we can slowly start to play with the idea of bringing the front foot forward and eventually lifting that foot off the ground. This kickstand variation of Eka Pada Koundinyasana I offers us the assurance that until we find full flight, the front foot can remain as a base while we work on muscle engagement and pelvic articulations.

200 Hour Online Teacher Training Certification

200 HOUR ONLINE TEACHER TRAINING

GET CERTIFIED & DEEPEN YOUR YOGA PRACTICE

  • Deepen your yoga practice
  • Build confidence speaking in front of groups in person and online
  • Learn foundational class structures and templates
  • Learn techniques for a wide range of yoga postures
  • Get certified and highly qualified to teach yoga
  • Yoga Alliance Globally Recognized Certification Program

SLIDE WITH SOCKS

Just like in last week’s article about Eka Pada Koundinyasana II, wearing socks as a prop to assist in sliding the front foot forward can make Eka Pada Koundinyasana I more accessible.

Here too, progression and advancement are in the finer details. It’s not uncommon to find it challenging to keep the bottom leg in place on the upper arm. To help with this, Matt teaches us to rotate the pelvis in a way that the “top pelvis” does a hip hike, which will help roll the bottom leg up the arm. Achieving this effectively makes the posture more vertical, which helps us not have to lean forward as much. Matt compares it to how we understand the way a handstand works: When it’s stacked more vertically, we can rely on less counterbalance and become more weightless, therefore maintaining better access to the posture.

300 hour teacher training online

300 HOUR ONLINE TEACHER TRAINING

GET 500 HOUR CERTIFIED AS A MASTER TEACHER

Master your skill set as a teacher through refined techniques, anatomy, biomechanics, sequencing, philosophy, meditation techniques, theming, yoga business, and much more!

  • Get 500 hour certified
  • Learn anatomy, biomechanics, asana techniques
  • Expand your teaching skills
  • Masterful sequencing and verbal delivery
  • Learn meditation and breathwork techniques
  • Transformative tools: theming, dharma talks, satsang

EKA PADA KOUNDINYASANA I CHAIR INVESTIGATION

If we’re not quite ready to take flight, this variation of Eka Pada Koundinyasana I on a chair may be the perfect option. In many ways, it’s similar to the kickstand setup. We start off by keeping the bottom foot on the ground, then placing the top foot on a chair behind us (best to have a chair that doesn’t roll or slide). Once we feel secure, we can start to extend the bottom leg forward. Don’t forget to lean forward to actually be able to extend that leg!  

This exploration with a chair takes some weight off of the posture, creating a pathway towards building enough strength for the ability to take flight in this arm balance.

If you want to unlock more access to arm balances like this one, register for Matt’s next 2-hour online arm balance workshop, Step into the Fire.

The 200 Hr. Teacher Training: Click Here to See the Next Start Date

The 300 Hr. Advanced Teacher Training: Click Here to See the Next Start Date

Article by Trish Curling

Video Extracted From: Flow and Fly Immersion 

lotus pose online yoga classes

ONLINE ANATOMY COURSE

  • Accessible, exciting, and easy to learn
  • Anatomy and biomechanics for yoga
  • Appropriate for both teachers and students
  • Learn joint alignment vs pose alignment
  • Demystify yoga poses and transitions
  • Release aches and pains
  • Learn how to avoid common injuries
  • Caters to all levels with modifications and props
  • 20 hours Continued Education Credits with Yoga Alliance
  • 20 hours toward Chromatic Yoga Certification and 300 Hour
  • Lifetime access

Continue Learning

A Tree Pose Treatment

A Tree Pose Treatment

A Tree Pose TreatmentVrksasanaA TREE POSE TREATMENT Tree Pose may appear to be a posture we can just “jump into” because of its “accessibility” from anywhere we might be standing, but it definitely requires more refinement than we might think. A treatment to revive...

read more
Practice Peacock Pose

Practice Peacock Pose

Practice Peacock PoseMayurasanaPRACTICE PEACOCK POSE We go to our yoga practice for many different reasons at any given time. In our asana practice, we are sometimes seeking softness and ease. At other times, we might be striving for vigour and strength. Peacock Pose...

read more
Eka Pada Koundinyasana I

Eka Pada Koundinyasana I

Eka Pada Koundinyasana IArm BalanceEKA PADA KOUNDINYASANA I If Side Crow is already part of our practice, then Eka Pada Koundinyasana I is like adding on another layer to that posture, because they are quite similar. The added layer is that we extend the top leg...

read more
Achieve Flying Balance

Achieve Flying Balance

Achieve Flying BalanceArm BalanceACHIEVE FLYING BALANCE Achieving an arm balance is quite extraordinary when you consider all that’s involved. And when we refer to an arm balance as a “flying balance,” there is even more involved. The “flying” in Eka Pada...

read more
Virasana

Virasana

VirasanaHip ExtensionVIRASANA For some of us, postures like Virasana and Lotus can be uncomfortable or even painful for the knees, so we avoid them altogether. Depending on what we’re dealing with, this may be the best decision. If there is room for safe exploration,...

read more
Get Bendy

Get Bendy

Get BendySpinal MobilityGET BENDY In the yoga context, getting bendy can conjure up images of postures that may seem far-fetched or unattainable. What we should set our sights on instead is not an end result but rather all the things we learn while we're exploring...

read more

THE FREE TECHNIQUE PACK

When You Subscribe, You Will Get Instant Access to

  • the Technique Pack: 15 yoga pose breakdowns
  • exclusive online course discounts
  • exclusive blogs and videos
  • This field is for validation purposes and should be left unchanged.

Achieve Flying Balance

Achieve Flying Balance

Arm Balance

ACHIEVE FLYING BALANCE

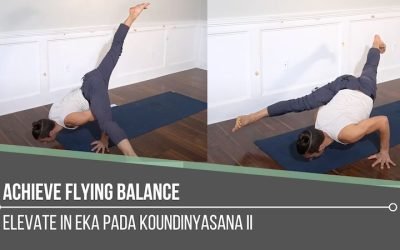
Achieving an arm balance is quite extraordinary when you consider all that’s involved. And when we refer to an arm balance as a “flying balance,” there is even more involved. The “flying” in Eka Pada Koundinyasana II refers to the expansion in the positioning of our bodies, which requires a great deal of adductor flexibility. That is to say that we are not only balancing on our hands, we’re also doing a variation of the splits. The techniques required for arm balances and splits can be quite demanding, so how do we put it all together? We take it step by step. Taking intentional and specific actions will support our journey towards the development of this posture.

In today’s video, Matt shares techniques that properly prepare us for our greatest potential in Eka Pada Koundinyasana II.

chromatic yoga 15 hour immersion

CHROMATIC GLOBAL TRAINING

REGISTRATION NOW OPEN

  • Solve the "Yoga Teacher's Daily Grind"
  • Become the BEST teacher you can be
  • Get personalized feedback and support
  • Learn anatomical sequencing and verbal cues
  • Clear and impactful visual demonstration
  • Strategic workshop design and sell out your events
  • Become a Certified Chromatic Teacher
  • Room for future growth: lead Chromatic Yoga Immersions and Trainings

LOGICAL PREPARATION

The Side Angle variation Matt teaches in the video is an accessible entry point. It removes the balance while still allowing the nervous system to adopt the patterning. As he mentions, this variation “primes the body for the experience.”

What’s unique about this approach is that we set the arms up in the arm balance position so that we can get a feel for the hand placement. Because it mimics the shape of Eka Pada Koundinyasana II, we’re also developing the flexibility of the adductors (the “splits” portion of the pose). We also get an opportunity to iron out all of the alignment misconceptions we may have, especially regarding hand placement. Matt points out a common tendency, which is placing the top elbow too high—it should emulate where we would place our elbows if we were actually balancing the pose.

WATCH THE VIDEO

ACHIEVE FLYING BALANCE: ELEVATE IN EKA PADA KOUNDINYASANA II

VARIOUS ENTRY POINTS

The very first balancing entry point Matt offers, with hands on the yoga mat on a diagonal, is a more controlled way to get into Eka Pada Koundinyasana II. Preparation for the adductors is necessary before we attempt these powerful entries.

From Standing Postures

This option is basically executed by flipping Side Angle Pose on its side. Coming in from the standing position offers more momentum.

Now, the back leg may feel heavy. To offset this feeling, Matt directs us to retract the shoulder blades and lower the torso closer to the ground. This shifts more weight forward. Entering from Trikonasana is also an option.

With Momentum

 Coming from a Downward-Facing Dog variation may make entry easier. The momentum of thrusting forward with more force can assist in achieving this flying balance. 

200 Hour Online Teacher Training Certification

200 HOUR ONLINE TEACHER TRAINING

GET CERTIFIED & DEEPEN YOUR YOGA PRACTICE

  • Deepen your yoga practice
  • Build confidence speaking in front of groups in person and online
  • Learn foundational class structures and templates
  • Learn techniques for a wide range of yoga postures
  • Get certified and highly qualified to teach yoga
  • Yoga Alliance Globally Recognized Certification Program

SOCKS & BLOCKS

Socks

Using socks as a prop for Lizard Pose entry can make it more accessible for the front leg. Matt notes that the keys here are to turn the front leg in and up, then climb up the arm by lowering the torso, creating a shelf. Next, we lift the same-side buttock up while sliding the back leg further back to eventually lift.

Socks & Blocks

In a Downward Dog position but with one foot on a block for greater elevation, we again use momentum and the smoother transition through the socked front foot to ease into the flying balance. Note here that removing the sock from the back foot reduces slipping on the block.

300 hour teacher training online

300 HOUR ONLINE TEACHER TRAINING

GET 500 HOUR CERTIFIED AS A MASTER TEACHER

Master your skill set as a teacher through refined techniques, anatomy, biomechanics, sequencing, philosophy, meditation techniques, theming, yoga business, and much more!

  • Get 500 hour certified
  • Learn anatomy, biomechanics, asana techniques
  • Expand your teaching skills
  • Masterful sequencing and verbal delivery
  • Learn meditation and breathwork techniques
  • Transformative tools: theming, dharma talks, satsang

SLIDE INTO YOUR SLOT

The Chromatic approach lays out a detailed formula for step-by-step preparation for Eka Pada Koundinyasana II. Both leading up to the posture and in the posture itself, we can slide ourselves into the section of preparation that supports our growth and development. If it’s right for us to first develop the flexibility of the adductors, we can practice a facilitated stretch in postures like Side Angle and Trikonasana. If we need to lean into the work of where we stand in terms of the various entry points, then this is where we can default to in our yoga practice. If we can already achieve flying balance in Eka Pada Koundinyasana II, then we can refine details, like leaning more forward or expanding by stretching each leg out more to the sides. There is always a place to step into our own challenge. When we choose consistency in the challenge, we find growth and increased potential.

Last chance to register for Matt’s upcoming Chromatic Global Training, which will support the further development of advanced postures like this one. 

The 200 Hr. Teacher Training: Click Here to See the Next Start Date

The 300 Hr. Advanced Teacher Training: Click Here to See the Next Start Date

Article by Trish Curling

Video Extracted From: Flow and Fly Immersion 

lotus pose online yoga classes

ONLINE ANATOMY COURSE

  • Accessible, exciting, and easy to learn
  • Anatomy and biomechanics for yoga
  • Appropriate for both teachers and students
  • Learn joint alignment vs pose alignment
  • Demystify yoga poses and transitions
  • Release aches and pains
  • Learn how to avoid common injuries
  • Caters to all levels with modifications and props
  • 20 hours Continued Education Credits with Yoga Alliance
  • 20 hours toward Chromatic Yoga Certification and 300 Hour
  • Lifetime access

Continue Learning

A Tree Pose Treatment

A Tree Pose Treatment

A Tree Pose TreatmentVrksasanaA TREE POSE TREATMENT Tree Pose may appear to be a posture we can just “jump into” because of its “accessibility” from anywhere we might be standing, but it definitely requires more refinement than we might think. A treatment to revive...

read more
Practice Peacock Pose

Practice Peacock Pose

Practice Peacock PoseMayurasanaPRACTICE PEACOCK POSE We go to our yoga practice for many different reasons at any given time. In our asana practice, we are sometimes seeking softness and ease. At other times, we might be striving for vigour and strength. Peacock Pose...

read more
Eka Pada Koundinyasana I

Eka Pada Koundinyasana I

Eka Pada Koundinyasana IArm BalanceEKA PADA KOUNDINYASANA I If Side Crow is already part of our practice, then Eka Pada Koundinyasana I is like adding on another layer to that posture, because they are quite similar. The added layer is that we extend the top leg...

read more
Achieve Flying Balance

Achieve Flying Balance

Achieve Flying BalanceArm BalanceACHIEVE FLYING BALANCE Achieving an arm balance is quite extraordinary when you consider all that’s involved. And when we refer to an arm balance as a “flying balance,” there is even more involved. The “flying” in Eka Pada...

read more
Virasana

Virasana

VirasanaHip ExtensionVIRASANA For some of us, postures like Virasana and Lotus can be uncomfortable or even painful for the knees, so we avoid them altogether. Depending on what we’re dealing with, this may be the best decision. If there is room for safe exploration,...

read more
Get Bendy

Get Bendy

Get BendySpinal MobilityGET BENDY In the yoga context, getting bendy can conjure up images of postures that may seem far-fetched or unattainable. What we should set our sights on instead is not an end result but rather all the things we learn while we're exploring...

read more

THE FREE TECHNIQUE PACK

When You Subscribe, You Will Get Instant Access to

  • the Technique Pack: 15 yoga pose breakdowns
  • exclusive online course discounts
  • exclusive blogs and videos
  • This field is for validation purposes and should be left unchanged.

Virasana

Virasana

Hip Extension

VIRASANA

For some of us, postures like Virasana and Lotus can be uncomfortable or even painful for the knees, so we avoid them altogether. Depending on what we’re dealing with, this may be the best decision. If there is room for safe exploration, however, Matt provides intentional education on how to reduce pain in the knee joints and how to strengthen the surrounding tissues. Developing the ability to close the angle of the knee joint can be helpful in this endeavour.

Matt shows us a couple of ways to approach this:

        1.  Get stronger hamstrings to close the knee joint more tightly 

             (puts the least amount of strain on the knees in Lotus)

       2.  Stretch the quadriceps

             (strengthen first to warm them up and then stretch to create increased range of motion)

In today’s video, Matt demonstrates via Virasana variations how these actions can be implemented to move towards Lotus.

chromatic yoga 15 hour immersion

CHROMATIC GLOBAL TRAINING

REGISTRATION NOW OPEN

  • Solve the "Yoga Teacher's Daily Grind"
  • Become the BEST teacher you can be
  • Get personalized feedback and support
  • Learn anatomical sequencing and verbal cues
  • Clear and impactful visual demonstration
  • Strategic workshop design and sell out your events
  • Become a Certified Chromatic Teacher
  • Room for future growth: lead Chromatic Yoga Immersions and Trainings

ACTIVATE YOUR QUADRICEPS

It’s not uncommon to have a love-hate relationship with lunges, and this drill can be added to the list. There’s no denying that they get the job done when it comes to quadricep activation in preparation for Virasana and Lotus. As we’ve learned from practicing with Matt, it’s “strength before stretch,” and in the video, we see the strength portion. 

We start off in a low-lunge position with the top of the back foot pressing into the floor. As we press up into the lunge, we can negotiate the amount of load we want to place on the quadriceps.

If we need less weight on the back leg, we can lean our weight into our hands, which are resting on the front thigh for added support. If we want to load the quads, then keeping the weight more toward the middle of the posture will provide more intensity for the quadriceps.

WATCH THE VIDEO

VIRASANA: PREPARATION THAT LEADS TO LOTUS

SUPPORTED VIRASANA

Finding ways to support the execution of Virasana is imperative when we have concerns about injury or discomfort, particularly in the knees. When exploration is possible, Matt provides options for us to worry less about the knees.

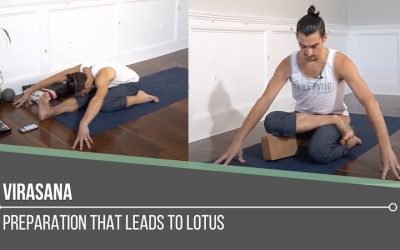
Placing blocks underneath the buttocks in Virasana can be a supportive option, but we can go further. Matt shows us an opportunity to be a more active participant in transforming our experience.

He demonstrates sitting up on blocks in a forward position while actively lifting one heel up towards the buttocks. This movement will activate the hamstrings on that side. Next, we can remove a block and check in with the sensations in the knee joints by gently pulling each knee slightly upward. There may be a shift in sensation—hopefully the reduction of any pulling on the patella tendon. 

200 Hour Online Teacher Training Certification

200 HOUR ONLINE TEACHER TRAINING

GET CERTIFIED & DEEPEN YOUR YOGA PRACTICE

  • Deepen your yoga practice
  • Build confidence speaking in front of groups in person and online
  • Learn foundational class structures and templates
  • Learn techniques for a wide range of yoga postures
  • Get certified and highly qualified to teach yoga
  • Yoga Alliance Globally Recognized Certification Program

EXPLORE THESE VARIATIONS

Ardha Virasana

This may be considered a more accessible option; however, Matt warns that when we bow forward, this is where we might experience more pressure in the knees. Again, applying actions to generate strength can decrease pain. Part of the action described in the video is to press the knee down on the “Virasana side” of the pose, or lifting the heel towards the buttocks as we learned in the “supported Virasana” variation.

Half Virasana / Half Siddhasana

Here is where we move more toward what may become Lotus Pose.  

One of the key actions is to pull the knee out wide on the “Siddhasana side” of the posture. Of course, blocks can continue to support, along with the strengthening actions Matt offers in the video to cultivate integrity around the knee joint.

300 hour teacher training online

300 HOUR ONLINE TEACHER TRAINING

GET 500 HOUR CERTIFIED AS A MASTER TEACHER

Master your skill set as a teacher through refined techniques, anatomy, biomechanics, sequencing, philosophy, meditation techniques, theming, yoga business, and much more!

  • Get 500 hour certified
  • Learn anatomy, biomechanics, asana techniques
  • Expand your teaching skills
  • Masterful sequencing and verbal delivery
  • Learn meditation and breathwork techniques
  • Transformative tools: theming, dharma talks, satsang

SAFE ROUTE TO LOTUS

Working on the shapes we create in Virasana and Lotus are valuable, but we find the richness in the cumulative actions we take to strengthen all areas of the hips in order to eventually stretch more fully into these poses. This means that executing variations like Half Lotus / Half Virasana and finding the articulations within them will ultimately support our ability to find our fullest potential.

One of the articulations that is highlighted in the video is the dorsiflexion of the ankle on the “Lotus” side of the posture. This creates a lock and and more evenly distributes the energy from the knee toward the ankle.

The variations we explore in Virasana are both a roadmap toward postures like Lotus and an investigation of our body’s current and potential capabilities.  

Matt’s upcoming Chromatic Global Training will support your continued studies of safe explorations in your yoga practice.

The 200 Hr. Teacher Training: Click Here to See the Next Start Date

The 300 Hr. Advanced Teacher Training: Click Here to See the Next Start Date

Article by Trish Curling

Video Extracted From: Breath of Fire Immersion 

lotus pose online yoga classes

ONLINE ANATOMY COURSE

  • Accessible, exciting, and easy to learn
  • Anatomy and biomechanics for yoga
  • Appropriate for both teachers and students
  • Learn joint alignment vs pose alignment
  • Demystify yoga poses and transitions
  • Release aches and pains
  • Learn how to avoid common injuries
  • Caters to all levels with modifications and props
  • 20 hours Continued Education Credits with Yoga Alliance
  • 20 hours toward Chromatic Yoga Certification and 300 Hour
  • Lifetime access

Continue Learning

A Tree Pose Treatment

A Tree Pose Treatment

A Tree Pose TreatmentVrksasanaA TREE POSE TREATMENT Tree Pose may appear to be a posture we can just “jump into” because of its “accessibility” from anywhere we might be standing, but it definitely requires more refinement than we might think. A treatment to revive...

read more
Practice Peacock Pose

Practice Peacock Pose

Practice Peacock PoseMayurasanaPRACTICE PEACOCK POSE We go to our yoga practice for many different reasons at any given time. In our asana practice, we are sometimes seeking softness and ease. At other times, we might be striving for vigour and strength. Peacock Pose...

read more
Eka Pada Koundinyasana I

Eka Pada Koundinyasana I

Eka Pada Koundinyasana IArm BalanceEKA PADA KOUNDINYASANA I If Side Crow is already part of our practice, then Eka Pada Koundinyasana I is like adding on another layer to that posture, because they are quite similar. The added layer is that we extend the top leg...

read more
Achieve Flying Balance

Achieve Flying Balance

Achieve Flying BalanceArm BalanceACHIEVE FLYING BALANCE Achieving an arm balance is quite extraordinary when you consider all that’s involved. And when we refer to an arm balance as a “flying balance,” there is even more involved. The “flying” in Eka Pada...

read more
Virasana

Virasana

VirasanaHip ExtensionVIRASANA For some of us, postures like Virasana and Lotus can be uncomfortable or even painful for the knees, so we avoid them altogether. Depending on what we’re dealing with, this may be the best decision. If there is room for safe exploration,...

read more
Get Bendy

Get Bendy

Get BendySpinal MobilityGET BENDY In the yoga context, getting bendy can conjure up images of postures that may seem far-fetched or unattainable. What we should set our sights on instead is not an end result but rather all the things we learn while we're exploring...

read more

THE FREE TECHNIQUE PACK

When You Subscribe, You Will Get Instant Access to

  • the Technique Pack: 15 yoga pose breakdowns
  • exclusive online course discounts
  • exclusive blogs and videos
  • This field is for validation purposes and should be left unchanged.

Wall Drills To Progress In Handstand

Wall Drills to Progress in Handstand

Adho Mukha Vrksasana

WALL DRILLS TO PROGRESS IN HANDSTAND

Wall drills for Handstand are an excellent way to master the mechanics required to go upside down with confidence. Using the wall as a support to refine alignment, rather than as a crutch to neglect technique, is vital to the development of the pose.

In this case, using a wall as a prop may appear to be counterintuitive, but it actually helps us set up a firm foundation for the hands, shoulders, rib cage, and hips. These are the important pieces of the puzzle that will ultimately take us away from the wall and help us to stand tall (on our hands of course).  

It’s true that we learn how to isolate the actions for each body part, but it’s the layering on of each action that locks each piece into place in order for our handstand to become a firm unit.

chromatic yoga 15 hour immersion

CHROMATIC GLOBAL TRAINING

REGISTRATION NOW OPEN

  • Solve the "Yoga Teacher's Daily Grind"
  • Become the BEST teacher you can be
  • Get personalized feedback and support
  • Learn anatomical sequencing and verbal cues
  • Clear and impactful visual demonstration
  • Strategic workshop design and sell out your events
  • Become a Certified Chromatic Teacher
  • Room for future growth: lead Chromatic Yoga Immersions and Trainings

PRIORITIZE THE RIB CAGE

Matt teaches us that the area we need to prioritize when it comes to balancing in Handstand is the rib cage. More than just stacking the hips over the shoulders, getting the rib cage vertical first is actually more important because it provides the control required.

One of the wall drills Matt demonstrates to assist with this technique is the Pike Switch with a chair and a number of yoga blocks.

The first step is to push through the shoulders for increased scapular mobility, which will also allow the rib cage to move more freely during the exploration. 

Setting up the lower leg as high as possible (at approximately a 90-degree angle) will assist in alternating the legs with more ease. It’s also important to tap into the sensation of the placement of the ribs between each “switch” of the legs.

WATCH THE VIDEO

WALL DRILLS TO PROGRESS IN HANDSTAND: IMPLEMENT MASTERFUL INVERSION TECHNIQUES

GO FOR THE FLOAT

Just like we layer on each technique within the body, we also layer on more challenges in the wall drills we explore.

Now that we’ve worked on the alignment of the rib cage to create a straight line from the wrists to the shoulders to the hips, we can progress by aiming to find some “float” time in an L-Handstand. Here we take the top foot closer to the wall, but we still work to avoid the common “banana back.” If this is brand new to your practice, you may not be able to avoid tapping the wall with your top foot in the attempt to stay balanced. However, still aim to keep the rib cage vertical, even though the top leg may be on a slight diagonal towards the wall.

200 Hour Online Teacher Training Certification

200 HOUR ONLINE TEACHER TRAINING

GET CERTIFIED & DEEPEN YOUR YOGA PRACTICE

  • Deepen your yoga practice
  • Build confidence speaking in front of groups in person and online
  • Learn foundational class structures and templates
  • Learn techniques for a wide range of yoga postures
  • Get certified and highly qualified to teach yoga
  • Yoga Alliance Globally Recognized Certification Program

TAKE YOUR FEET TO THE WALL

Matt teaches this drill to help us get a vertical line from the forearms to the rib cage to the knees. The knees are significant here because they are bent, and the feet are actually on the wall. Bending the knees allows us to achieve a vertical line. At this stage, if the legs were straight, we might be more inclined to create more spinal extension.

If we still feel challenged, it may be due to lack of strength in the glutes and core muscles. In the video, Matt lies down in a supine position and then lifts up into a variation of Bridge to help us develop the sensational awareness of glute and core activation simultaneously while taking the arms up overhead. This helps simulate how we would feel in the former wall drill.

300 hour teacher training online

300 HOUR ONLINE TEACHER TRAINING

GET 500 HOUR CERTIFIED AS A MASTER TEACHER

Master your skill set as a teacher through refined techniques, anatomy, biomechanics, sequencing, philosophy, meditation techniques, theming, yoga business, and much more!

  • Get 500 hour certified
  • Learn anatomy, biomechanics, asana techniques
  • Expand your teaching skills
  • Masterful sequencing and verbal delivery
  • Learn meditation and breathwork techniques
  • Transformative tools: theming, dharma talks, satsang

HOP INTO HANDSTAND

Here, we progress into L-Hops by placing one foot on a block that sits directly on the floor. We’re now hopping into balance, with the wall behind us for increased safety. This wall drill can be compared to Kick Switches, the difference being that we keep the same shape and repeat with the same leg for a few rounds, instead of alternating legs. This is a drill to explore once we have found some success with “the float” and of course the stacking of the rib cage. However, there is still room to go further.  

If you’re interested in advancing your practice and/or becoming certified to teach impactful drills like these, then you’ll want to secure your spot in Matt’s upcoming Chromatic Global Training.  

The 200 Hr. Teacher Training: Click Here to See the Next Start Date

The 300 Hr. Advanced Teacher Training: Click Here to See the Next Start Date

Article by Trish Curling

Video Extracted From: The Handstand Program 

lotus pose online yoga classes

ONLINE ANATOMY COURSE

  • Accessible, exciting, and easy to learn
  • Anatomy and biomechanics for yoga
  • Appropriate for both teachers and students
  • Learn joint alignment vs pose alignment
  • Demystify yoga poses and transitions
  • Release aches and pains
  • Learn how to avoid common injuries
  • Caters to all levels with modifications and props
  • 20 hours Continued Education Credits with Yoga Alliance
  • 20 hours toward Chromatic Yoga Certification and 300 Hour
  • Lifetime access

Continue Learning

A Tree Pose Treatment

A Tree Pose Treatment

A Tree Pose TreatmentVrksasanaA TREE POSE TREATMENT Tree Pose may appear to be a posture we can just “jump into” because of its “accessibility” from anywhere we might be standing, but it definitely requires more refinement than we might think. A treatment to revive...

read more
Practice Peacock Pose

Practice Peacock Pose

Practice Peacock PoseMayurasanaPRACTICE PEACOCK POSE We go to our yoga practice for many different reasons at any given time. In our asana practice, we are sometimes seeking softness and ease. At other times, we might be striving for vigour and strength. Peacock Pose...

read more
Eka Pada Koundinyasana I

Eka Pada Koundinyasana I

Eka Pada Koundinyasana IArm BalanceEKA PADA KOUNDINYASANA I If Side Crow is already part of our practice, then Eka Pada Koundinyasana I is like adding on another layer to that posture, because they are quite similar. The added layer is that we extend the top leg...

read more
Achieve Flying Balance

Achieve Flying Balance

Achieve Flying BalanceArm BalanceACHIEVE FLYING BALANCE Achieving an arm balance is quite extraordinary when you consider all that’s involved. And when we refer to an arm balance as a “flying balance,” there is even more involved. The “flying” in Eka Pada...

read more
Virasana

Virasana

VirasanaHip ExtensionVIRASANA For some of us, postures like Virasana and Lotus can be uncomfortable or even painful for the knees, so we avoid them altogether. Depending on what we’re dealing with, this may be the best decision. If there is room for safe exploration,...

read more
Get Bendy

Get Bendy

Get BendySpinal MobilityGET BENDY In the yoga context, getting bendy can conjure up images of postures that may seem far-fetched or unattainable. What we should set our sights on instead is not an end result but rather all the things we learn while we're exploring...

read more

THE FREE TECHNIQUE PACK

When You Subscribe, You Will Get Instant Access to

  • the Technique Pack: 15 yoga pose breakdowns
  • exclusive online course discounts
  • exclusive blogs and videos
  • This field is for validation purposes and should be left unchanged.

BLACK FRIDAY: 30% OFF ALL ONLINE IMMERSIONS & WORKSHOPS !
0
days
0
hours
0
minutes
0
seconds
BLACK FRIDAY: 30% OFF ALL ONLINE IMMERSIONS & WORKSHOPS!
0
days
0
hours
0
minutes
0
seconds
BLACK FRIDAY SALE! Congratulations, your 30% discount code has been applied and will be reflected at the very bottom of the checkout page. All Immersions & Immersion Bundles are included in this sale. To get more info on each immersion click on the photo. On Demand and Lifetime Access To all
Overlay Image
BLACK FRIDAY SALE! Congratulations, your 30% discount code has been applied and will be reflected at the very bottom of the checkout page. All Immersions & Immersion Bundles are included in this sale. To get more info on each immersion click on the photo. On Demand and Lifetime Access To all

Pin It on Pinterest