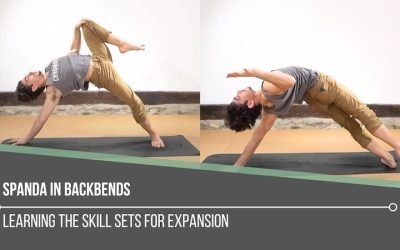
Spanda In BackbendsSIDE PLANKSPANDA IN BACKBENDS Spanda in backbends is the key to creating both stability and freedom in spinal extension. Backbends are not just about bending; they require a balance between expansion and controlled engagement to prevent excessive...
Titibhasana Techniques
Titibhasana Techniques
firefly pose
TITIBHASANA TECHNIQUES
There are some general rules to follow when executing arm balance postures. To find optimal balance, most require us not to shy away from leaning forward. They also demand a considerable degree of upper body strength to create the rounded position of the torso that’s typically essential in an arm balance. On the other hand, Matt teaches us that if we have the substantial hip flexibility that’s vital for Titibhasana, it is probably one of the easier arm balances. The positioning of the legs in Titibhasana almost automatically places our torso in the rounded position and protracts the scapulae. The pose may sound “simple” when we look at it in these terms, but there are of course techniques we must adopt and master in order to fly in Titibhasana.

THE POSE FACTORY
WAITLIST NOW OPEN
- Dogmatic alignment versus functional alignment
- Learn popular postural pitfalls
- Myths versus truth
- Formulaic approach for comprehensive learning
- Excellent guide for yoga enthusiasts
- Must-have for yoga teachers
- Joint-health awareness
- Muscle integrity, range of motion
- Props for accessibity
- Alignment alterations in the case of injuries
STRADDLE VARIATIONS
What’s wonderful about Matt’s Chromatic approach to yoga is that he breaks down postures that appear to be insurmountable into smaller, digestible pieces. This allows us to more deeply comprehend what’s required in terms of technique and of what’s required in a posture as a whole. We receive opportunities to practice the techniques in more accessible ways.
In the first part of today’s video, he demonstrates Titibhasana straddle variations.
Straddle A
Seated on a mat, we’re first introduced to the importance of squeezing the legs in while internally rotating them, that is, activating the tensor fasciae latae and adductor muscles. We also get a sense of the rounded position of the torso.
Straddle B
The difference here is the addition of blocks if we find that our elbows are unable to reach the mat (which again adds more accessibility). We can practice the same techniques with additional support.
WATCH THE VIDEO
TITIBHASANA TECHNIQUES: 6 WAYS TO ACCESS THIS ARM BALANCE
MIMIC THE SHAPE
In Matt’s demonstrations that follow, we observe the development of going deeper into the shape required for Titibhasana.
Turtle Pose
In this variation, we’re taking our chest as close to the floor/mat as possible. We’re still reminded of the squeeze in and internal rotation of the legs, but we’re adding the sensation of getting the legs a little higher on the arms. This is a key factor in finding more success in Titibhasana.
Standing Variations
Option 1
This time, in a standing position, the focus is a bit more on entering Titibhasana and straightening the legs.
Option 2
A bind is introduced here, which encourages increased shoulder mobility. If we know that protracting the shoulder blades is a challenge, this variation can enhance our ability to find the rounding we need.

200 HOUR ONLINE TEACHER TRAINING
GET CERTIFIED & DEEPEN YOUR YOGA PRACTICE
- Deepen your yoga practice
- Build confidence speaking in front of groups in person and online
- Learn foundational class structures and templates
- Learn techniques for a wide range of yoga postures
- Get certified and highly qualified to teach yoga
- Yoga Alliance Globally Recognized Certification Program
GO FOR BALANCE
Again, Matt patiently takes us through the process by first offering a variation that does not require a significant amount of balance before we attempt full balance in Titibhasana.
Half Titibhasana
Although we are not balancing completely in Half Titibhasana, Matt advises us to place a blanket behind ourselves in case we fall backwards.
In this variation, we get an opportunity to “play,” as Matt says, and really put the techniques we’ve learned to the test. Instead of taking flight with both legs, we practice by alternating legs and executing the hip rotation.
Titibhasana
Finally, we attempt to lift both legs up. When we check out Matt’s entry into Titibhasana, we can see the culmination of all of the explored variations.

300 HOUR ONLINE TEACHER TRAINING
GET 500 HOUR CERTIFIED AS A MASTER TEACHER
Master your skill set as a teacher through refined techniques, anatomy, biomechanics, sequencing, philosophy, meditation techniques, theming, yoga business, and much more!
- Get 500 hour certified
- Learn anatomy, biomechanics, asana techniques
- Expand your teaching skills
- Masterful sequencing and verbal delivery
- Learn meditation and breathwork techniques
- Transformative tools: theming, dharma talks, satsang
A TEACHER’S PERSPECTIVE
As a student, the breaking down of these tips and techniques is invaluable. The different variations of Titibhasana offer entry points along our journey towards this arm balance.
This perspective does not change for yoga teachers. The ability to offer insights and actionable steps for our students is equally priceless. We can’t deny that the Chromatic step-by-step approach is extremely beneficial to our students’ understanding of what’s required for their own bodies.
Matt’s next online course, The Pose Factory, is suited for both students and teachers. It cracks the code of alignment and techniques to help us refine a variety of yoga postures.
Sign up for the waiting list here to deepen your practice.
The 200 Hr. Teacher Training: Click Here to See the Next Start Date
The 300 Hr. Advanced Teacher Training: Click Here to See the Next Start Date
Article by Trish Curling
Videos Extracted From: Flow & Fly Immersion

ONLINE ANATOMY COURSE
- Accessible, exciting, and easy to learn
- Anatomy and biomechanics for yoga
- Appropriate for both teachers and students
- Learn joint alignment vs pose alignment
- Demystify yoga poses and transitions
- Release aches and pains
- Learn how to avoid common injuries
- Caters to all levels with modifications and props
- 20 hours Continued Education Credits with Yoga Alliance
- 20 hours toward Chromatic Yoga Certification and 300 Hour
- Lifetime access
Continue Learning
Spanda In Backbends
read more
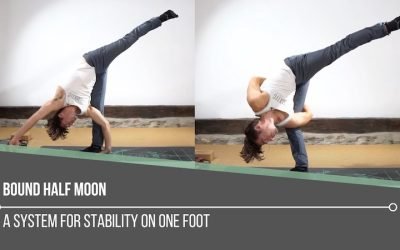
Bound Half Moon
Bound Half MoonBADDHA ARDHA CHANDRASANABOUND HALF MOON The elements involved in Bound Half Moon are many. There’s a lot at work and more than meets the eye. Our ears, eyes, muscles, and proprioception help us to balance. When it comes to which element carries more...
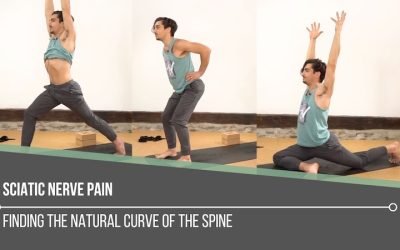
Sciatic Nerve Pain
Sciatic Nerve Painhip strengthSCIATIC NERVE PAIN The sciatic nerve runs from the lower back through the glutes and down the leg, making it one of the longest nerves in the body. Because of its length, it can easily become irritated or pinched, leading to pain anywhere...

The SI Joint
The SI JointalignmentTHE SI JOINT What is the SI Joint? To understand what it is, we must discuss all that surrounds it. First, the Sacrum is a triangular-like shaped bone that sits between the two sides of the pelvis (the left Ilium and right Ilium). Now each Ilium...
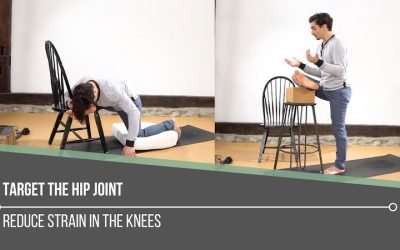
Target The Hip Joint
Target The Hip JointalignmentTARGET THE HIP JOINT Unlike the hip joint, the movement available at the knee is primarily meant for flexion and extension. When we engage in hip opening postures in our yoga practice, there can be a great impact on both the hip and the...
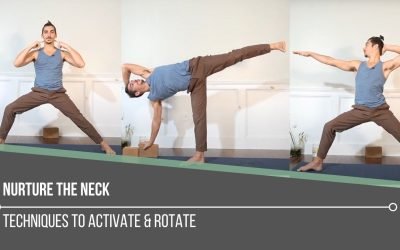
Nurture The Neck
Nurture The NeckalignmentNURTURE THE NECK The neck is not often the shining star of our yoga practice, yet it is an integral part. Too often, we may only offer more attention if we’re feeling pain in a particular posture. It’s important however, for us to be...
THE FREE TECHNIQUE PACK
When You Subscribe, You Will Get Instant Access to
- the Technique Pack: 15 yoga pose breakdowns
- exclusive online course discounts
- exclusive blogs and videos