3 Best Yoga Practices for the 5 Layered Self, Asana, Breathwork, & Meditation

3 BEST YOGA PRACTICES FOR THE 5 LAYERED SELF

ASANA “YOGA”, PRANAYAMA “BREATHWORK”, MEDITATION

3 BEST YOGA PRACTICES

5 LAYERED SELF AND THE 3 BEST YOGA PRACTICES

What are the 3 best yoga practices and why? You are likely already familiar with Asana, as it is the physical practice of yoga that has been widely popularized across the world. The other two practices are gaining popularity but not necessarily amongst yoga practitioners.

Imagine if someone came along and said here are the 3 magic herbs you need to take daily in order to heal your mind, body, and balance your energy. Yet instead of taking all 3 herbs, much of the world just got really excited about 1 of them. The recipe would be incomplete, and so would the benefits. This is what has happened with yoga, and we are missing out on massive benefits as a result.

Asana is for the body

If you have been reading my blogs, and following my work, you know that I love sharing tips about the physical practice. The human body is something I am particularly passionate about. I am not here to tell you that the physical practice isn’t important; it definitely is. I simply want to support your transition to the next phase so that you not only feel better physically, but you learn to cleanse the mind and balance and optimize your energy, which is what the yogis call prana.

What is Prana?

Prana is the word for the relatively unexplainable life force within each of us that causes our hearts to beat and our lungs to inflate and deflate. In its simplest explanation, prana is our energy system. The aspect of prana most asana practitioners are interested in is the energy channels- specifically Ida and Pingala, known in modern science as Parasympathetic and Sympathetic Nervous System. This is your “rest and digest” relaxing energy and your “Go Go” focused, alert energy. Learning to manage, balance, optimize, and utilize energy/prana is one of the major goals of the yoga practitioner. With the right practices, you can become masterful at sleep, wakefulness, alertness, rest, calm, focus, exercise, etc.


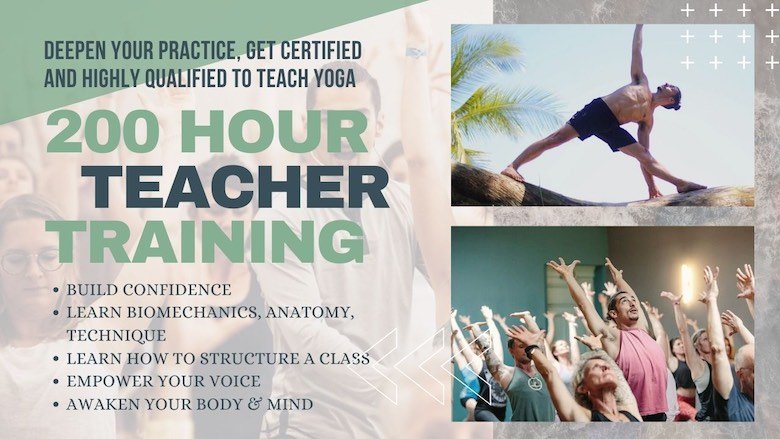
200 hour online teacher training certification

200 Hour Online Teacher Training

“The 200 Hour Online Teacher Training certification with Matt Giordano is hands down the most detailed, comprehensive, in-depth and effective trainings to learn how to teach yoga and deepen your yoga practice”

VIDEO PODCAST: THE 5(6) LAYERED SELF

+ 3 BEST YOGA PRACTICES


What is the Mind or Heart-Mind?

In a moment, we are going to get into the layers of our Self and the 3 practices for total well-being. But first let’s discuss something that is often ignored- the mind. What is the mind? This is no easy question to answer. Even the mental health industry struggles to define it. How can you establish the health of something you can’t even define?

It’s one of those interesting points of discussion. We know we have a mind, but the only tangible, physical representation of it is the brain and nervous system. No one has yet to dissect a mind or know for sure what thoughts are and how exactly they are formed. Fortunately, yogis have been contemplating and studying the mind for centuries, so we can turn to them for answers.

The mind is our way of experiencing the world by using thoughts and emotions to process time, space, physical sensations, and events. The mind is perhaps the most important system to take care of because it governs our entire perception of our existence. This is why yoga is most often defined as the study or science of the mind when we look at sacred texts. You will never see it defined as the study of the body, though that, too, is a part of studying the mind.

So, as magnificent as the physical practice of yoga is, it is limited- only targeting one layer of our being, called deha, or body. Yes, feeling better physically helps us energetically, mentally, and emotionally but it’s a temporary Bandaid. To get to the root of the challenges our mind present, we need a yoga practice that focuses on all the layers of our being, which include:

The 5 Layered Self, According to Tantra Yoga 

  1. Deha: The Body
  2. Citta: Heart-Mind, thoughts & emotions
  3. Prana: Energy, life force, autonomic nervous system
  4. Shunya: The Void, calming, peaceful, clear, stillness
  5. Cit: Blissful Awareness


the best yoga teacher training for alignment

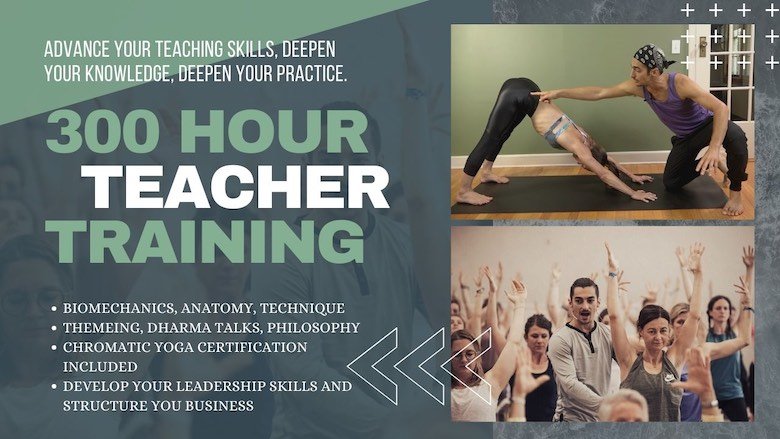
300 HOUR ONLINE TEACHER TRAINING

GET 500 HOUR CERTIFIED AS A MASTER TEACHER

Master your skillset as a teacher through refined techniques, anatomy, biomechanics, sequencing, philosophy, meditation techniques. theming, yoga business, and much more!

“THE TRIFECTA” THE 3 BEST YOGA PRACTICES

Under the umbrella of yoga, there are many amazing approaches to working with the 6 Layers of our Self, but if I am to recommend the top 3 best yoga practices, it would be as follows, not in any particular order:

  1. Asana: (commonly referred to as yoga) Cleanses deha, the body.
  2. Meditation: cleanses the heart-mind first. With practice, allows us to root deeper into Shunya and Cit, pronounced “Chit”. Meditation cultivates our ability to experience Blissful Awareness, even in our day-to-day tasks.
  3. Pranayama: Balances out our energy levels.

For each of these layers, there are specific yogic practices. Most familiar and most popular is Asana- movement of the body which helps develop awareness, strength, and flexibility. We can think of this as a cleanse for the physical form.

Then there is Citta, Heart-Mind. It’s unfortunate that many of us are not provided with the proper tools to keep the mind clean. We brush our teeth because plaque builds up daily on the teeth. Similarly, the mind builds up and collects unwanted toxicity but rarely do we learn how to take care of that. To cleanse the mind, we use the practice of meditation, specifically mantra– a repetitive phrase to cultivate the mind’s attention and strengthen our ability to focus.

For prana (Energy) there are incredible breathwork practices available to us in the yoga lineage, called pranayama. Breathwork helps balance the autonomic nervous system,  so that we can harness the “go go” energy when we need it and cultivate “rest and digest” energy when our bodies and minds are stressed and overworked. Finding balance between the two allows us to live our lives with more intention rather than being driven by emotion.


    the best yoga teacher training for alignment

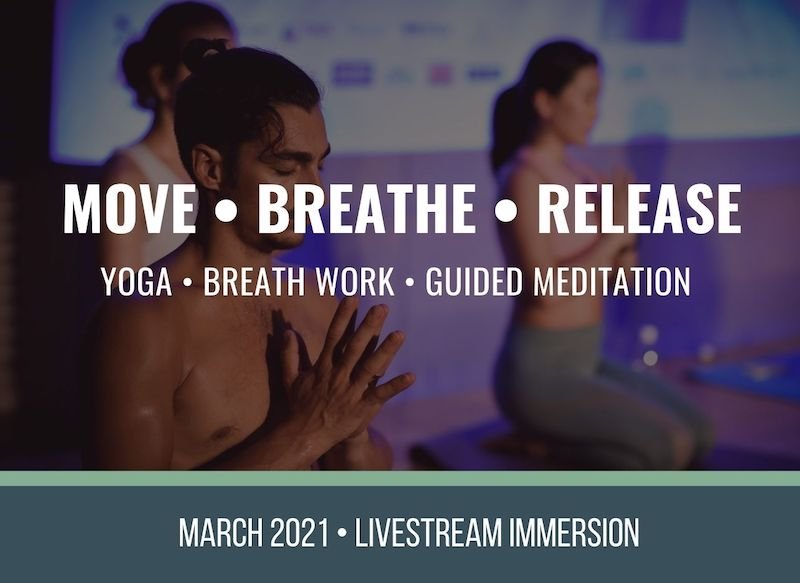
    MOVE•BREATHE•RELEASE

    Yoga, Breathwork, Meditation!

    Expand your yoga practice with asana for the body, breathwork to balance your energy, and meditation for greater peace of mind, focus, and clarity. This is the best way to establish a meditation practice while enjoying the benefits of a routine physical yoga practice.

    THE PROBLEM

    Now that we know these 3 practices help us to feel better physically, mentally, emotionally, AND energetically, why don’t we practice them routinely?

    Well, the answer is simple. We created a habit, or pattern, of brushing our teeth, but haven’t yet created one for meditation and pranayama. Maybe you haven’t created one for yoga yet either?

    THE SOLUTION

    To create a habit, repetition is the only thing needed. However, repetition requires effort and prioritizing your time. Most adults struggle with this. I once read a quote that said something along the lines of “If you have the time, meditate for 20 minutes each morning. If you don’t have time, meditate for an hour each morning.” It’s funny but it’s also the unfortunate truth.The more you fill your day, the more time you need to process and digest everything coming in.

    Let’s acknowledge that routinely showing up for yourself and practicing asana, pranayama and meditation might seem like a lot at first. This is why I have created an online program to make this easy for you. It’s called MOVE•BREATHE•RELEASE, consisting of 3 practices per week, each with all three elements, so you do not need to find time to do them separately. Each class is fully guided so all you have to do is commit. I will take care of the rest. 

    TOP RELEVANT RECOMMENDATIONS

    1. MOVE•BREATHE•RELEASE: 12 CLASS PACKAGE
    2. Journey To Bliss: 12 Class Immersion with 4 Guided Meditations

    TEACHER TRAINING COURSES

    1. 200 Hour training: Get Certified
    2. 300 Hour Online Training: Get 500hr Certified
    THE DANCE: YOGA ALIGNMENT AND FLOW

    MOVE • BREATHE • RELEASE

    Yoga, Breath Work & Guided Meditation 

    1. 12 ALL LEVELS LIVESTREAM CLASSES
    2. WATCH ANYTIME WITH LIFETIME ACCESS
    3. DEVELOP YOUR YOGA PRACTICE, RELEASE TENSION IN THE BODY AND MIND

    $128.00

    Continue Learning

    Virasana

    Virasana

    VirasanaHip ExtensionVIRASANA For some of us, postures like Virasana and Lotus can be uncomfortable or even painful for the knees, so we avoid them altogether. Depending on what we’re dealing with, this may be the best decision. If there is room for safe exploration,...

    read more
    Get Bendy

    Get Bendy

    Get BendySpinal MobilityGET BENDY In the yoga context, getting bendy can conjure up images of postures that may seem far-fetched or unattainable. What we should set our sights on instead is not an end result but rather all the things we learn while we're exploring...

    read more
    Wall Drills To Progress In Handstand

    Wall Drills To Progress In Handstand

    Wall Drills to Progress in HandstandAdho Mukha VrksasanaWALL DRILLS TO PROGRESS IN HANDSTAND Wall drills for Handstand are an excellent way to master the mechanics required to go upside down with confidence. Using the wall as a support to refine alignment, rather than...

    read more
    Mountain Pose Mechanics

    Mountain Pose Mechanics

    Mountain Pose MechanicstadasanaMOUNTAIN POSE MECHANICS How often do we go back to refine the “basics”?  Revisiting a posture like Mountain Pose (Tadasana) is like pruning a tree. We may have already developed a foundation, but it’s important to continue to clip away...

    read more
    Plough Pose vs. Shoulder Stand

    Plough Pose vs. Shoulder Stand

    Plough Pose vs. Shoulder StandhalasanaPLOUGH POSE VS. SHOULDER STAND After we have engaged in postures that strengthen the posterior chain, Plough and Shoulder Stand offer a good stretch for these areas of the body. Plough in particular provides a more extensive...

    read more
    Arm Balance Transitions

    Arm Balance Transitions

    Arm Balance TransitionskakasanaARM BALANCE TRANSITIONS Arm balance postures can be challenging enough without attempting to layer on a smooth transition in and out of them. However, fluid transitions are a natural progression in our yoga practice; they also provide...

    read more

    THE FREE TECHNIQUE PACK

    When You Subscribe, You Will Get Instant Access to

    • the Technique Pack: 15 yoga pose breakdowns
    • exclusive online course discounts
    • exclusive blogs and videos
    • This field is for validation purposes and should be left unchanged.

    CONTACT MATT

    • This field is for validation purposes and should be left unchanged.

    yoga pose alignment full wheel

    YOGA ALIGNMENT: FULL WHEEL POSE

    THE 3 MYTHS DEBUNKED

    FULL WHEEL

    YOGA ALIGNMENT: FULL WHEEL POSE

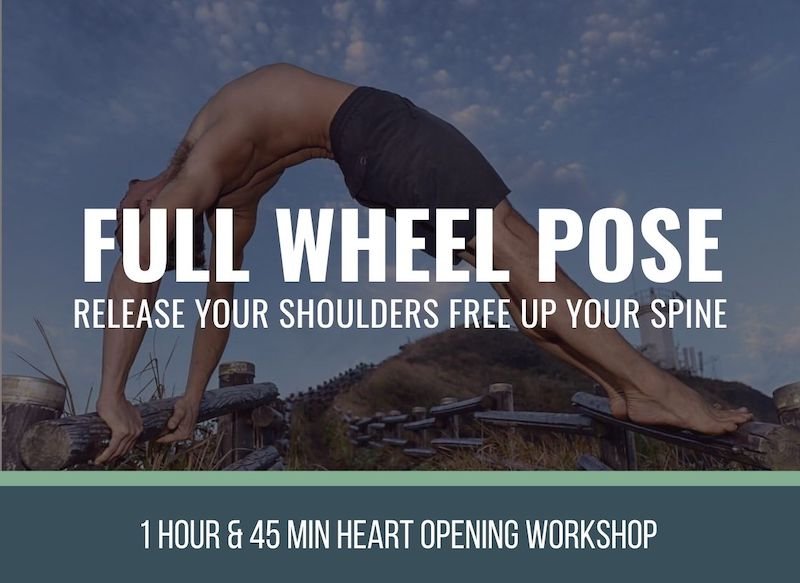
    Yoga alignment for Full Wheel Pose is anything but simple, but achieving an easeful expression of the posture in your body is most definitely attainable. We just have to break through some of the alignment myths that many teachers have been taught are “correct”.

    Let’s quickly discuss the name of this posture because it has many. Wheel Pose is usually translated as “Chakrasana” because it opens ALL the energy centers. The posture is also known as Urdhva Dhanurasana which translates to Upward Facing Bow Pose. Many backbends in the yoga posture are either named Bow or after a type of Bow. Moving forward, I will use any of these names when discussing my suggestions regarding the alignment for full wheel pose.

    Debunking the 3 Myths

    What you may have been taught is the correct Yoga Alignment for Full Wheel Pose:

    Hug your elbows in. Do not activate the glutes. Tuck your tailbone.

    These are cues used often to move a student into wheel pose, but are they helpful? I don’t think so.

     Wheel pose, Chakrasana is a very active and advanced pose. It requires extreme flexibility AND strength of the hips, shoulders, and wrists. Flexibility is required along the front body, and strength is required along the back body. The good news is, with disciplined practice and a healthy dose of body awareness, this powerful heart-opening extension pose can be accessible to many.

    We need to clear some things up so you can start practicing the best alignment for your full wheel pose. Meaning, you may have some things to UNLEARN before you can dive deeply into your practice. Yoga teachers, please take a breath. You are not a bad teacher if you have said any of the following to your students – we are all in the process of learning and developing our skills as practitioners and teachers. Instead, celebrate that you are here, curious and ready to learn.

    200 hour online teacher training certification

    200 Hour Online Teacher Training

    “The 200 Hour Online Teacher Training certification with Matt Giordano is hands down the most detailed, comprehensive, in-depth and effective training to learn how to teach yoga and deepen your yoga practice”

    WATCH FULL WHEEL UNLOCKED

    Myth #1: Tuck, hug or “squeeze” your elbows in.

    Most of us are told to tuck our elbows in before rising into wheel. At this stage of the pose, this cue doesn’t really work.

    I’ll show you why. Try this:

    Follow along with the video at minute marker 7:50. 

    From a seated position, bend your elbows to a 90 degree angle in front of your chest, wrists bent so that palms face up. Now you’re simulating  “tucking” or “squeezing” your elbows in. Move your elbows up and see how high your arms lift.

    Now come back to position and widen your elbows. Press your arms up again.

    Feel the difference? It’s pretty noticeable. Just like weightlifters would never tuck in their elbows to lift massive weight over their heads, you don’t want to limit your shoulder range of motion by keeping your elbows tucked. So elbows wide as you lift into your wheel.

    WHAT IS THE CORRECT YOGA ALIGNMENT FOR FULL WHEEL?

    Once IN the pose, you can certainly wrap your elbows in but this may not serve you if you find it challenging to straighten your arms. The reason why is that hugging your elbows in is actually an action at the shoulders, not at the elbow. This action is called external rotation of the upper arm bone. External rotation can be really great to help stabilize the shoulders, but remember that stability means less mobility. When you externally rotate the upper arms, your shoulder blades will follow the arms and will protract (move away from each other). Protraction creates stability and less mobility.

    There is no correct alignment here; you have to assess what your needs are. Do you need more mobility or stability? If you are struggling to straighten your arms and your upper back feels stiff then DON’T wrap your elbows in, and DON’T protract your shoulder blades. IF, on the other hand, you are very mobile, coming up to wheel is easy, and your upper back easily extends, then of course you will want to balance out your mobility with stability. In that case, wrap your elbows in and broaden your shoulder blades.

    Myth #2: Relax your glutes as you lift.

    I don’t care if you’re Gumby or the Hulk, you cannot lift your hips off the ground against the weight of gravity without activating your glutes. The muscles that lift your hips from the ground ARE THE GLUTES, Gluteus Maximus in particular.

    Imagine yourself walking for a moment. Better yet, walk around. Note how every time your upper thigh goes back behind you and your toes prepare to push off, your back buttock (and upper hamstrings) contracts. It’s activated. That’s what your glute muscles do when your hips are in extension.

    Wheel is a powerful hip extending pose, so to lift yourself off the ground, you cannot relax your caboose. Once you are in full expression of your pose, there is no need to hyper squeeze your glutes or anus for that matter – this is an over activation of deeper muscles, and all it will do is leave you constipated (likely true).

    the best yoga teacher training for alignment

    300 HOUR ONLINE TEACHER TRAINING

    GET 500 HOUR CERTIFIED AS A MASTER TEACHER

    Master your skillset as a teacher through refined techniques, anatomy, biomechanics, sequencing, philosophy, meditation techniques, theming, yoga business, and much more!

    THE BUTTOCK SOLUTION

    Instead of hyper squeezing or clenching your deep buttock muscles, try to press into the inner edges of your heels. This will engage the T.F.L. (tensor fascia lattae) and internally rotate the thigh bones. Because T.F.L. is an internal rotator of the thigh, it balances out the Gluteus Maximus, which is an external rotator of the thigh.

    BONUS: Activating T.F.L. creates a facilitated stretch, which is an activation of a muscle while it is in a lengthened position. Facilitated stretching is a way of increasing flexibility without losing muscle and joint integrity. Check out the Best Stretch for Your Hamstrings.

    Myth #3: Tuck your tailbone.

    I imagine the intent behind this cue is to get the student to activate their buttocks and probably core muscles. But anytime you scoop your tailbone, you’re taking your lumbar spine into flexion (rounding). You might ask, Isn’t that safer? In short, no. Trying to round your low back while simultaneously moving into full wheel is a collision course waiting to happen. BE SURE TO WATCH AT 12:35 Seconds FOR CLARITY

      the best yoga teacher training for alignment

      FULL WHEEL WORKSHOP

      PAY WHAT YOU CAN!

      Full-length workshop teaching you yoga alignment for full wheel pose. Develop the necessary flexibility and strength through applied techniques. This workshop is available in pay-what-you-can format or you can purchase Full Body Bliss, the 12 class immersion that includes this workshop.

      Yes, it is true that an active core can help you stabilize your spine, but a lot of people concentrate on superficial muscles like rectus abdominus or obliques. Contracting these muscles while in wheel shortens your abdomen, which in turn shortens the front of your spine. Wheel pose itself shortens the back of your spine – the two together amounts to immobility at best, and pain or injury at worst.

      Instead, consider strengthening your transverse abdominus ahead of time. This is a deep muscle that will strengthen a myriad of postures and stabilize your spine while leaving room for mobility. Build a strong DEEP core ahead of time and your practice will flourish in ways you never imagined, especially in back bending and twisting postures.

      To learn more about the proper setup for wheel pose, check out Backbends and The Glutes with a short follow-along video.

      TOP RELEVANT RECOMMENDATIONS

      1. Full Wheel Workshop (pay what you can)

      2. “Full Body Bliss” (includes Full Wheel Workshop + 11 more master classes)

      3. THE SPINAL RESET: 12 Class Immersion 

      MORE WAYS TO DEVELOP YOUR PRACTICE

      1. Live Immersions: 3 Classes Per Week
      2. 200 hour training: Get Certified
      3. 300 Hour Online Training: Get 500hr Certified
      12 ONLINE VINYASA YOGA CLASSES

      UPCOMING IMMERSION

      Each month, you have the opportunity to enroll in 3 weekly classes! You get lifetime and unlimited access to each of the classes. Once you enroll, you also have the opportunity to view all classes live as they stream. Each month has a physical focus to help you gain targeted techniques and advance your body awareness.

      Be a part of the community! After enrolling, you can connect with members through our exclusive Facebook group, where you can get tips directly from me, Matt Giordano. You are encouraged to share photos and videos of your practice for personalized  support.

      I look forward to sharing this practice with you and helping you develop in a big way!

      ~Matt


      WHAT STUDENTS SAY ABOUT THE LIVE IMMERISONS

      Matt‘s classes are phenomenal. If you ever have the ability to practice with him, make use of it!! He has a very unique talent of combining anatomy, yoga philosophy, and his own perspective into a super intense package of knowledge which is fun AND easy to understand. I enjoyed the April immersion a lot as it was a great way of deepening my own practice and broadening my horizon, especially as the lifetime access allows you to take classes as often as you want. Trust me, you will want to take them again! I can’t wait for next month’s classes and highly recommend everyone to take the next pass and join in on the journey.

      ~Nadja Kyra King - @nadja_kyra

      Matt’s April pass was a journey. It was more than just the physical exploration of my practice but also helped me explore my spiritual practice. It was very nice to have a consistent practice during this time of uncertainty. If you are looking for a practice to ground yourself, I would highly recommend exploring the Live Immersion of the Month.

      ~Amanda Barnes Salowsky

      Covid-19 brought Matt into my home and my yoga practice. This last month I have learned so much. It has deepened my practice and my understanding of anatomy & biomechanics and how we use both in every asana we practice. He has also helped in my teaching, i.e. asking my students to think about the foot as a tripod “big toe, pinkie toe, heel.” I never imagined I would learn so much from the immersion.

      ~Debbie, @the_joyofyoga

      THE DANCE: YOGA ALIGNMENT AND FLOW

      MOVE • BREATHE • RELEASE

      Yoga, Breath Work & Guided Meditation 

      1. 12 ALL LEVELS LIVESTREAM CLASSES
      2. WATCH ANYTIME WITH LIFETIME ACCESS
      3. DEVELOP YOUR YOGA PRACTICE, RELEASE TENSION IN THE BODY AND MIND

      $128.00

      Continue Learning

      Virasana

      Virasana

      VirasanaHip ExtensionVIRASANA For some of us, postures like Virasana and Lotus can be uncomfortable or even painful for the knees, so we avoid them altogether. Depending on what we’re dealing with, this may be the best decision. If there is room for safe exploration,...

      read more
      Get Bendy

      Get Bendy

      Get BendySpinal MobilityGET BENDY In the yoga context, getting bendy can conjure up images of postures that may seem far-fetched or unattainable. What we should set our sights on instead is not an end result but rather all the things we learn while we're exploring...

      read more
      Wall Drills To Progress In Handstand

      Wall Drills To Progress In Handstand

      Wall Drills to Progress in HandstandAdho Mukha VrksasanaWALL DRILLS TO PROGRESS IN HANDSTAND Wall drills for Handstand are an excellent way to master the mechanics required to go upside down with confidence. Using the wall as a support to refine alignment, rather than...

      read more
      Mountain Pose Mechanics

      Mountain Pose Mechanics

      Mountain Pose MechanicstadasanaMOUNTAIN POSE MECHANICS How often do we go back to refine the “basics”?  Revisiting a posture like Mountain Pose (Tadasana) is like pruning a tree. We may have already developed a foundation, but it’s important to continue to clip away...

      read more
      Plough Pose vs. Shoulder Stand

      Plough Pose vs. Shoulder Stand

      Plough Pose vs. Shoulder StandhalasanaPLOUGH POSE VS. SHOULDER STAND After we have engaged in postures that strengthen the posterior chain, Plough and Shoulder Stand offer a good stretch for these areas of the body. Plough in particular provides a more extensive...

      read more
      Arm Balance Transitions

      Arm Balance Transitions

      Arm Balance TransitionskakasanaARM BALANCE TRANSITIONS Arm balance postures can be challenging enough without attempting to layer on a smooth transition in and out of them. However, fluid transitions are a natural progression in our yoga practice; they also provide...

      read more

      THE FREE TECHNIQUE PACK

      When You Subscribe, You Will Get Instant Access to

      • the Technique Pack: 15 yoga pose breakdowns
      • exclusive online course discounts
      • exclusive blogs and videos
      • This field is for validation purposes and should be left unchanged.

      CONTACT

      • This field is for validation purposes and should be left unchanged.

      Chaturanga yoga pose alignment and anatomy

      Chaturanga Yoga Pose Alignment and Anatomy

      The Mystery FINALLY Revealed and Clarified

      CHATURANGA

      WHAT IS CHATURANGA AND WHY IS IT SO CONFUSING?

      What is the best alignment for Chaturanga? First, let’s start with what this pose is. Chaturanga is both a yoga pose and a transition, otherwise known as a movement. A pose implies no movement, while a transition implies movement between two static postures. Because Chaturanga is used as both a static posture and a transition, it’s hard to have a universal conversation about it. We have to first agree on what it is in order to analyze. Globally, there is discussion about chaturanga and yet everyone has a different idea of what it is. Thus, there exists much controversy around correct alignment.

      How could there be correct alignment when the posture is usually taught as movement from one pose to another? In modern vinyasa, this pose is used to go from plank to upward dog. In order for a movement to occur, it is a law of biomechanics that joint alignment has to change. If it doesn’t, then no movement can occur. SO, while there are many reasons to practice chaturanga as an isolated pose, that is not how most people are practicing it these days. It would be more useful to discuss how to move our bones and which muscles we can engage if we want a smooth flowing posture that minimizes risk to our joints. 

      CONFUSED BY GRAVITY 

      While movement is not complex, it can be confusing mostly because of our relationship to gravity. There are only there major joints that change: the elbows go from straight to bent, the arm bones go from being in front to by our side (flexion to neutral), and the shoulder blades go from protraction to retraction (more or less), explained in the video below. If you stand with your arms in front of you and simulate the same actions, there is nothing mysterious or complex, but add the weight of your body and gravity, and now it gets interesting. 

      While the joint actions are simply moving from plank toward the ground, the muscle engagements that slow the body down in this transition are actually the OPPOSITE of the joints.  For example, the elbows bend, BUT the muscles that engage in order to resist the movement are actually your triceps. Triceps are the muscles that help to straighten your arm. So as you bend into your elbows, your triceps fight back, keeping you from landing on your face.  We do this all the time in transitions. We activate the opposing muscles of what is happening anatomically in our joints. We even do it in most static postures. How many poses have you done where you feel your quads burn, and yet your knees are bent? The muscles that straighten the knees are the quads, and yet they are fully engaged in bent knee postures so that you don’t land on the ground.

      200 hour online teacher training certification

      200 Hour Online Teacher Training

      “The 200 Hour Online Teacher Training certification with Matt Giordano is hands down the most detailed, comprehensive, in-depth and effective training to learn how to teach yoga and deepen your own yoga practice”

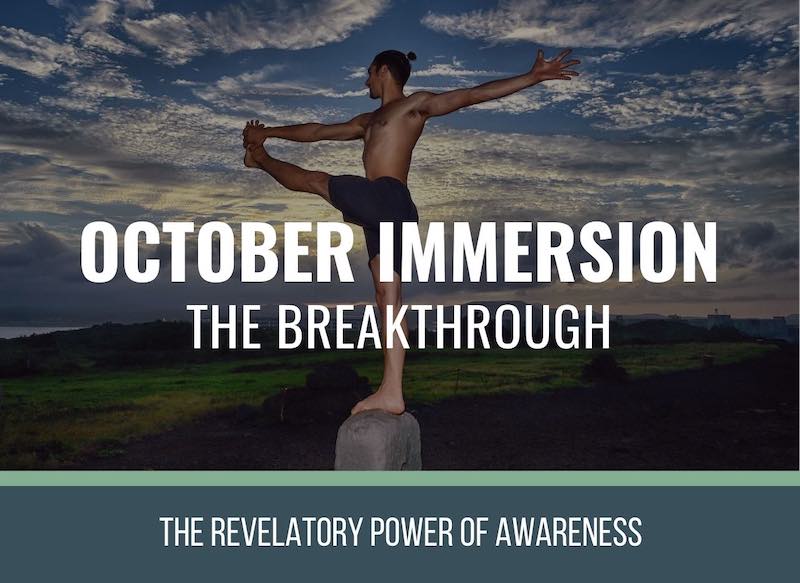
      October Livestream Yoga Classes

      THE BREAKTHROUGH

      FOCUS: ARM BALANCES & HIP OPENERS

      • Build Upper Body Strength
      • Release Hip Tension
      • Learn Techniques to make hip opening and arm balances more accessible!
      • Experience the revelatory "aha" moments in the postures you struggle with
      • Uncover your range of motion and flexibility
      • Release low back tension through hip opening
      • 12 All Levels Live Asana Classes
      • Lifetime Unlimited Access to All


      CLARITY: WHAT IS THE CORRECT ALIGNMENT OR WAY TO DO CHATURANGA?

      In my video below, you will hear more about “correct” and “incorrect” and why there really isn’t a way we could define that, but we can talk about efficiency, joint safety, greatest stability, or range of motion, etc. The way I suggest to practice chaturanga is as follows: .

      Allow your joints to:

      1. Elbow: Bend (flexion)
      2. Shoulders: Arm Bones go from flexion (out in front as in plank) to neutral
      3. Shoulder Blades: Protraction to Retraction while moving from plank to chaturanga

      What Muscles To Engage and HOW to Engage them

      1. Triceps: Try to straighten your elbow while allowing it to bend. This action is an activation of your triceps. You activate your triceps only enough to slow down the bending of the elbow but not enough that your triceps win over the weight of your body and gravity. If you did that, you’d wind up back in plank pose.
      2. Deltoids: Same here. The front deltoids are the muscles that would normally bring your arms from neutral to out in front (flexion). Activate these muscles enough that it slows down the decent but does’t stop it.
      3. Serratus Anterior:  this is the muscle that moves your shoulder blades apart and should be very active in plank; it remains active while lowering. This muscle slows the movement of the scapula from protraction to retraction. Note: this is not the same as punching your shoulder blade forward into what is called upward tilt, which I go over thoroughly in the blogs below.
      4. CHATURANA ALIGNMENT: 3 KEY ACTIONS
      5. CHATURANGA ALIGNMENT PT 2: INTEGRATE THE ACTIONS

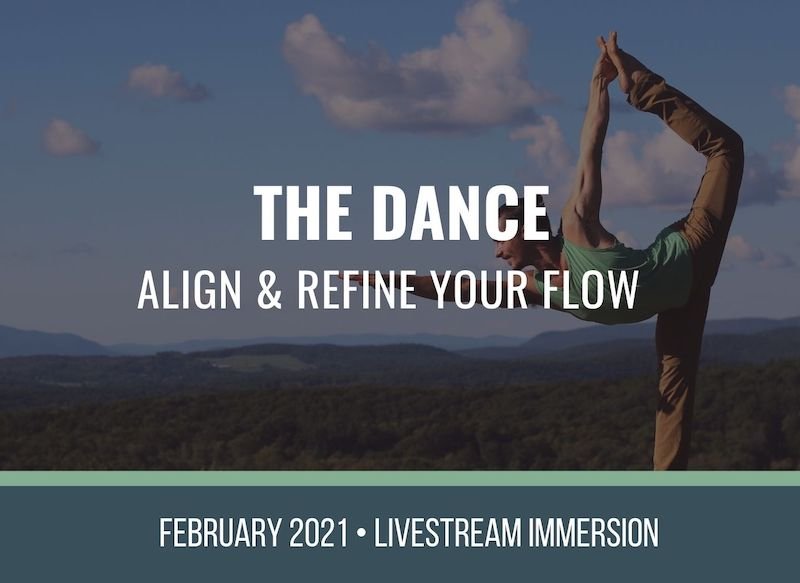
      The February 2020 Immersion, titled “The Dance”, is a unique immersion focused entirely on transitions from one pose to another, learning the biomechanics and anatomy of each transition. If you are looking to re-pattern the way you move on your mat and learn which muscles to engage for efficiency and control, this is the livestream immersion for you! See All Livestream Immersions

      MORE WAYS TO DEVELOP YOUR PRACTICE

      1. Live Immersions are all designed to support you with both the development of your knowledge and your embodiment. With every immersion there is a focus, and I guide you through sensation-based practices to help you rediscover your body!
      2. 200 hour training  Dive into your practice in a deeper way, developing body awareness, understanding of anatomy, and how to share it with others.
      3. 300 Hour Online Training Advance your teaching skills. Get 500 hour certified and create a greater impact with your offering as a teacher of yoga.

      the best yoga teacher training for alignment

      300 HOUR ONLINE TEACHER TRAINING

      GET 500 HOUR CERTIFIED AS A MASTER TEACHER

      ATTENTION YOGA TEACHERS! Master your skillset as a teacher through refined techniques, anatomy, biomechanics, sequencing, philosophy, meditation techniques, theming, yoga business, and much more!

      THE DANCE: YOGA ALIGNMENT AND FLOW

      THE DANCE

      ALIGN, REFINE AND MASTER YOUR FLOW

      12 Class Pack for Alignment and Flow! Develop your balance, increase your strength, and learn to transition gracefully between postures. This livestream immersion focuses heavily on providing step by step instruction for popular transitions like plank to chaturanga, hop forwards, warrior 2 to half moon. 

      Do to the challenging transitions and postures this immersion is recommended for intermediate level students. 

      LEARN MORE

      $28.00

      Continue Learning

      Virasana

      Virasana

      VirasanaHip ExtensionVIRASANA For some of us, postures like Virasana and Lotus can be uncomfortable or even painful for the knees, so we avoid them altogether. Depending on what we’re dealing with, this may be the best decision. If there is room for safe exploration,...

      read more
      Get Bendy

      Get Bendy

      Get BendySpinal MobilityGET BENDY In the yoga context, getting bendy can conjure up images of postures that may seem far-fetched or unattainable. What we should set our sights on instead is not an end result but rather all the things we learn while we're exploring...

      read more
      Wall Drills To Progress In Handstand

      Wall Drills To Progress In Handstand

      Wall Drills to Progress in HandstandAdho Mukha VrksasanaWALL DRILLS TO PROGRESS IN HANDSTAND Wall drills for Handstand are an excellent way to master the mechanics required to go upside down with confidence. Using the wall as a support to refine alignment, rather than...

      read more
      Mountain Pose Mechanics

      Mountain Pose Mechanics

      Mountain Pose MechanicstadasanaMOUNTAIN POSE MECHANICS How often do we go back to refine the “basics”?  Revisiting a posture like Mountain Pose (Tadasana) is like pruning a tree. We may have already developed a foundation, but it’s important to continue to clip away...

      read more
      Plough Pose vs. Shoulder Stand

      Plough Pose vs. Shoulder Stand

      Plough Pose vs. Shoulder StandhalasanaPLOUGH POSE VS. SHOULDER STAND After we have engaged in postures that strengthen the posterior chain, Plough and Shoulder Stand offer a good stretch for these areas of the body. Plough in particular provides a more extensive...

      read more
      Arm Balance Transitions

      Arm Balance Transitions

      Arm Balance TransitionskakasanaARM BALANCE TRANSITIONS Arm balance postures can be challenging enough without attempting to layer on a smooth transition in and out of them. However, fluid transitions are a natural progression in our yoga practice; they also provide...

      read more

      THE FREE TECHNIQUE PACK

      When You Subscribe, You Will Get Instant Access to

      • the Technique Pack: 15 yoga pose breakdowns
      • exclusive online course discounts
      • exclusive blogs and videos
      • This field is for validation purposes and should be left unchanged.

      What is Yoga Alignment and is it important

      What is Yoga Alignment?

      Is there only one right way to do a pose?

      YOGA ALIGNMENT

      YOGA ALIGNMENT: WHAT’S THE RIGHT WAY TO DO THE POSE?

      Yoga alignment has long been regarded as a way of keeping our bodies safe, but what is it and is it actually effective and important? Let’s first discuss what alignment is in the physical sense. Alignment is how we choose to hold our bones in relationship to one another in any given shape. The key word there is “choose.” The problem that we have fallen into as a yoga community is that many believe and have preached that their way is the right way to do a posture, claiming it will keep you safe, or simply saying “this is the right way.”

      Truth is, there are very few wrong ways to do a posture and hundreds of correct ways. What is correct and incorrect based on? More often than not, it has been based on a shape, an aesthetic that may or may not be appropriate for any one individual. In my opinion, it would be better to focus on developing awareness of what our bodies need in order to find greater balance in the muscular system. I like to look at everything as more of a spectrum rather than an incorrect or correct. This way, if something falls far over on the scale as potentially harmful, I can simply make the decision to avoid it. Take the risk of shoulder impingement when dropping the shoulders in down dog. While it may not be wrong, it’s simply not worth the potential harm to the shoulders. For more clarity, please check out the two blogs below:

      1. Stop Relaxing Your Shoulders Away from Your Ears
      2. 3 Steps to Avoid Shoulder Impingement in Downward Dog
      IS ALIGNMENT IMPORTANT?

      Alignment may not be very important if your only concern is the external shape of the pose, or if you want some fancy Instagram photo. HOWEVER, If you use alignment as a way to reflect upon your muscular patterns- i.e. strengths, weaknesses, areas of tension etc.-  then alignment can be a powerful tool in the transformation of your body. Trying a posture with multiple alignments will provide a platform for your self-inquiry, and this is what a yoga practice is all about.

      THE TWO STEPS

      There are only two things you need to do if you want to bring health to your muscular system and advance your yoga practice!

      1. Learn your personal muscular patterns. This requires that you seek out your weak, tight, and overstretched muscles, and develop an understanding of how your joints are interacting with these muscular patterns. Sounds complicated, I know. This is why yoga has never been a self-taught practice and we have teachers to guide us. This is why I offer the Livestream Immersions each month – to help you develop your physical awareness, advance your practice, and ultimately transform your body.
      2. Once you establish an understanding of your movement patterns, learn which ones are supportive and which are not. Non-supportive patterns will require that you do exact opposite movements. Repeated over time, these new movements will bring balance back to your body. Balance in our muscular system allows our joints to ALIGN more optimally, giving us a greater range of motion in our joints without  the collision of compression and friction that happens when our muscular system is out of balance with itself.

      The February 2020 Immersion titled “The Dance” is a unique immersion focused on helping you seek out movement patterns that may be holding you back from flowing gracefully in your yoga practice. If you want to re-pattern the way you move on your mat, this is the live stream immersion for you! See All Livestream Immersions

      200 hour online teacher training certification

      200 Hour Online Teacher Training

      “The 200 Hour Online Teacher Training certification with Matt Giordano is hands down the most detailed, comprehensive, in-depth and effective training to learn how to teach yoga and deepen your own personal yoga practice.”

      WHERE DO I BEGIN?

      Hopefully the video tutorial provided you with clarity. Now it’s time to begin the process of uncovering your patterns and working toward balancing your muscular system! The Live Immersions are all designed to support you with this exact process. Every immersion is focused and I guide you through sensation-based practices to help you rediscover your body! Yoga teachers who want to further their study should check out my 300 Hour Online Training.

      If you are ready to dive into your own practice in a deeper way and learn how to share it with others, then the 200 hour training is your next step!

      Thank you for reading and watching. I look forward to sharing more with you in an upcoming training or monthly immersion!

      300 HOUR ONLINE TEACHER TRAINING

      GET 500 HOUR CERTIFIED AS A MASTER TEACHER

      Master your skillset as a teacher through refined techniques, anatomy, biomechanics, sequencing, philosophy, meditation techniques, theming, yoga business, and much more!

      12 ONLINE VINYASA YOGA CLASSES

      UPCOMING IMMERSION

      Each month, you have the opportunity to enroll in 3 weekly classes! You get lifetime and unlimited access to each of the classes. Once you enroll, you also have the opportunity to view all classes live as they stream. Each month has a physical focus to help you gain targeted techniques and advance your body awareness.

      Be a part of the community! After enrolling, you can connect with members through our exclusive Facebook group, where you can get tips directly from me, Matt Giordano. You are encouraged to share photos and videos of your practice for personalized  support.

      I look forward to sharing this practice with you and helping you develop in a big way!

      ~Matt


      WHAT STUDENTS SAY ABOUT THE LIVE IMMERISONS

      Matt‘s classes are phenomenal- if you ever have the ability to practice with him, make use of it!! He has a very unique talent of combining anatomy, yoga philosophy, and his own perspective into a super intense package of knowledge which is fun AND easy to understand. I enjoyed the April immersion a lot as it was a great way of deepening my own practice and broadening my horizon, especially as the lifetime access allows you to take classes as often as you want- trust me, you will want to take them again! I can’t wait for next month’s classes and highly recommend everyone to take the May pass and joining in on the journey.

      ~Nadja Kyra King - @nadja_kyra

      Matt’s April pass was a journey. It was more than just the physical exploration of my practice but also helped me explore my spiritual practice. It was very nice to have a consistent practice during this time of uncertainty. If you are looking for a practice to ground yourself I would highly recommend exploring the Live Immersion of the Month.
      ~Amanda Barnes Salowsky

      Covid-19 bought Matt into my home and my yoga practice. This last month I have learned so much. It has deepened my practice and my understanding of anatomy & biomechanics and how we use both in every asana we practice. He has also helped in my teaching, ie asking my students to think about the foot as a tripod “big toe, pinkie toe, heel.” I never imagined I would learn so much from the immersion.

      ~Debbie, @the_joyofyoga

      THE DANCE: YOGA ALIGNMENT AND FLOW

      THE DANCE

      ALIGN, REFINE AND MASTER YOUR FLOW

      1. 12 ALL LEVELS LIVESTREAM CLASSES
      2. WATCH ANYTIME WITH LIFETIME ACCESS
      3. SHARPEN YOUR SKILLSET & ADVANCE YOUR PRACTICE

      $28.00

      Continue Learning

      Virasana

      Virasana

      VirasanaHip ExtensionVIRASANA For some of us, postures like Virasana and Lotus can be uncomfortable or even painful for the knees, so we avoid them altogether. Depending on what we’re dealing with, this may be the best decision. If there is room for safe exploration,...

      read more
      Get Bendy

      Get Bendy

      Get BendySpinal MobilityGET BENDY In the yoga context, getting bendy can conjure up images of postures that may seem far-fetched or unattainable. What we should set our sights on instead is not an end result but rather all the things we learn while we're exploring...

      read more
      Wall Drills To Progress In Handstand

      Wall Drills To Progress In Handstand

      Wall Drills to Progress in HandstandAdho Mukha VrksasanaWALL DRILLS TO PROGRESS IN HANDSTAND Wall drills for Handstand are an excellent way to master the mechanics required to go upside down with confidence. Using the wall as a support to refine alignment, rather than...

      read more
      Mountain Pose Mechanics

      Mountain Pose Mechanics

      Mountain Pose MechanicstadasanaMOUNTAIN POSE MECHANICS How often do we go back to refine the “basics”?  Revisiting a posture like Mountain Pose (Tadasana) is like pruning a tree. We may have already developed a foundation, but it’s important to continue to clip away...

      read more
      Plough Pose vs. Shoulder Stand

      Plough Pose vs. Shoulder Stand

      Plough Pose vs. Shoulder StandhalasanaPLOUGH POSE VS. SHOULDER STAND After we have engaged in postures that strengthen the posterior chain, Plough and Shoulder Stand offer a good stretch for these areas of the body. Plough in particular provides a more extensive...

      read more
      Arm Balance Transitions

      Arm Balance Transitions

      Arm Balance TransitionskakasanaARM BALANCE TRANSITIONS Arm balance postures can be challenging enough without attempting to layer on a smooth transition in and out of them. However, fluid transitions are a natural progression in our yoga practice; they also provide...

      read more

      THE FREE TECHNIQUE PACK

      When You Subscribe, You Will Get Instant Access to

      • the Technique Pack: 15 yoga pose breakdowns
      • exclusive online course discounts
      • exclusive blogs and videos
      • This field is for validation purposes and should be left unchanged.

      CONTACT

      • This field is for validation purposes and should be left unchanged.

      5 Step Pigeon Pose Best Hip Stretch

      5 STEPS TO MAKE PIGEON POSE THE BEST HIP STRETCH

      IS YOUR PIGEON LAZY?

      PIGEON

      DOES PIGEON POSE INCREASE FLEXIBILITY?

      Is Pigeon pose the best hip stretch? The quick answer: it depends on how you do it. Somebody told me recently on Instagram that I was blessed with open hips. Ha! If only they’d seen me when I first started practicing. My hips were so tight I needed not just one block, but block towers under my legs to come into almost any seated pose. So yes, twenty years later I am blessed with open hips, but only after doing the work to get them.

      That said, each of us has unique anatomy so the way my hips open may not be the way yours open. What I hear a lot is something like, “I’ve been practicing for years and I still haven’t increased my flexibility. Likely this is due to the lack of technique – muscle engagements, and joint articulations that result in increased flexibility or range of motion.

      WHY ALIGNMENT ACTUALLY MATTERS

      In today’s video, I’ll show you a way of making Half Pigeon Pose the best hip stretch by using a block. Not only will this approach help to make this pose more accessible, but it will highlight your muscular patterns.

      This is important; the reason alignment and technique matter is not because there is a right or wrong way to do a pose – that’s a completely fictitious concept because it requires that we define a context for what right and wrong means when it comes to making shapes. There is no agreed-upon idea of right and wrong and so there can be no right alignment. However, alignment matters within the context of increasing body awareness and efficacy when striving to increase flexibility.

      HIPS • HEART • HANDSTAND

      12 ONLINE YOGA CLASSES

      • HIP OPENERS
      • HEART OPENERS
      • HANDSTAND TECHNIQUES
      • BUILD COURAGE & STRENGTH
      • 12 ALL LEVELS CLASSES 

      $148.00

      IF YOU DO PIGEON POSE WITHOUT ALTERING YOUR ALIGNMENT OR ENGAGING YOUR MUSCLES, YOUR POSE WILL BE COUNTER PRODUCTIVE. IN ORDER TO MAKE PIGEON POSE THE BEST HIP STRETCH, YOU CAN FOLLOW THE 5 STEPS BELOW

      This is because your body will always avoid stretching what is tight and it will always tend to stretch what is already flexible. The same is true for strength – when you do an action your body will use the strongest muscles by default, even if there are better muscles for the job. The body will always tend toward efficiency and the path of least resistance unless you use the power of your will to strengthen what is weak and lengthen what is tight.

      The following video is a short clip of one approach to make pigeon pose the best hip stretch that it can be! This approach is sure to take you out of your normal patterns. Practicing pigeon in this way may require more muscle activation and be less “lazy” however, it will produce the desired results of increasing flexibility.

      5 Steps to Make Pigeon Pose The Best Hip Stretch

      UPCOMING IMMERSION

      Each month, you have the opportunity to enroll in 3 weekly classes! You get lifetime and unlimited access to each of the classes. Once you enroll, you also have the opportunity to view all classes live as they stream. Each month has a physical focus to help you gain targeted techniques and advance your body awareness.

      Be a part of the community! After enrolling, you can connect with members through our exclusive Facebook group, where you can get tips directly from me, Matt Giordano. You are encouraged to share photos and videos of your practice for personalized  support.

      I look forward to sharing this practice with you and helping you develop in a big way!

      ~Matt


      12 ONLINE VINYASA YOGA CLASSES

      5 STEPS TO INCREASE FLEXIBILITY WITH PIGEON POSE

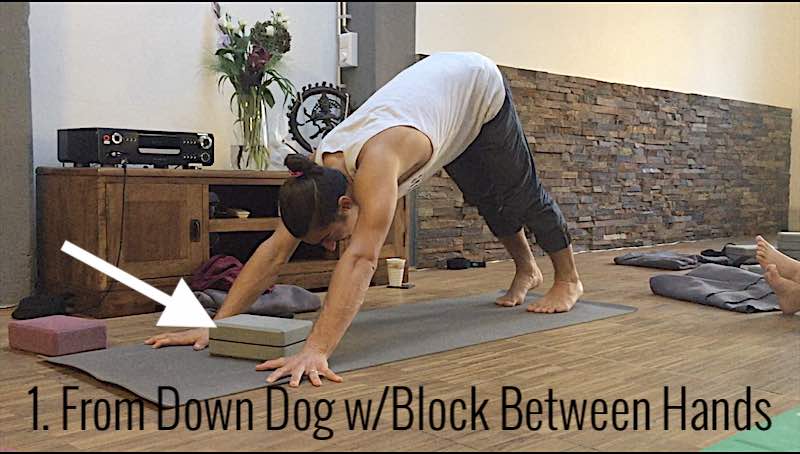
      Step 1 Pigeon Pose Best Hip Stretch

      Step 1 - Start in Downward Facing Dog

       Place a block between your hands, at a slight diagonal, left side angled down. Lift your right leg to the sky and sweep your leg forward, externally rotating your inner thigh and resting your bent leg on the block.

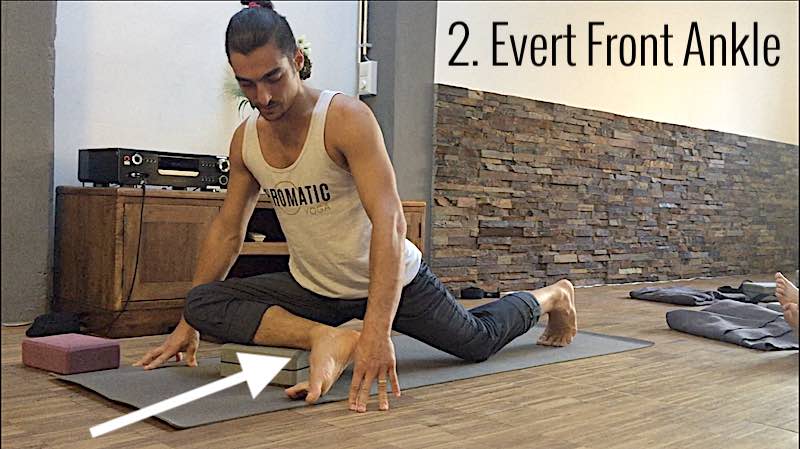
      step 2 Pigeon pose best hip stretch

      Step 2: EVERT FRONT ANKLE

      Flex and evert your front foot, grounding the pinkie toe into the mat and reaching forward with your big toe.

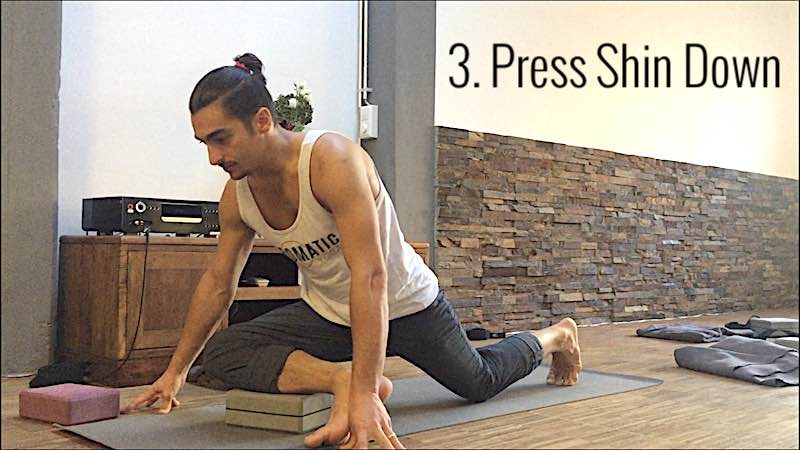
      step 3 Pigeon pose best hip stretch

      Step 3: Activate your legs.

      Press your front shin and knee into the block to activate the buttocks. Pull your back knee forward to activate hip flexors – your hips will rise.

      step 4 Pigeon pose best hip stretch

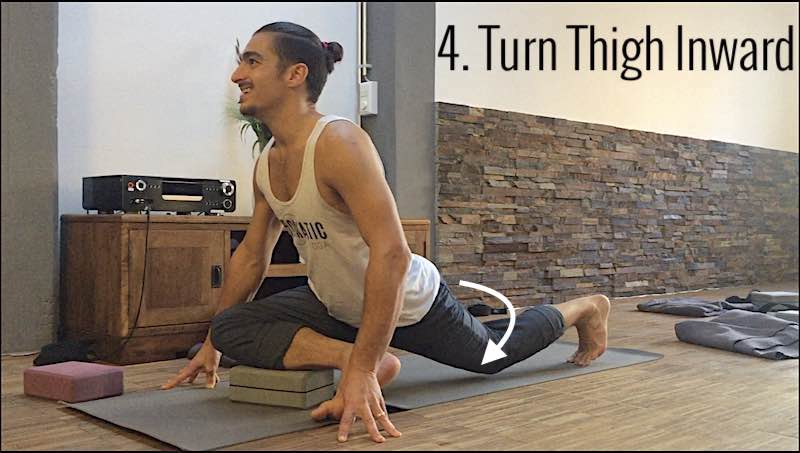
      Step 4: Rotate thigh and pelvis inward

      Tuck your back toes, lift your knee, spin your back thigh IN so your pelvis rotates in. Set your back knee down and use your toes to walk your back leg further back. 

      step 5 Pigeon pose best hip stretch

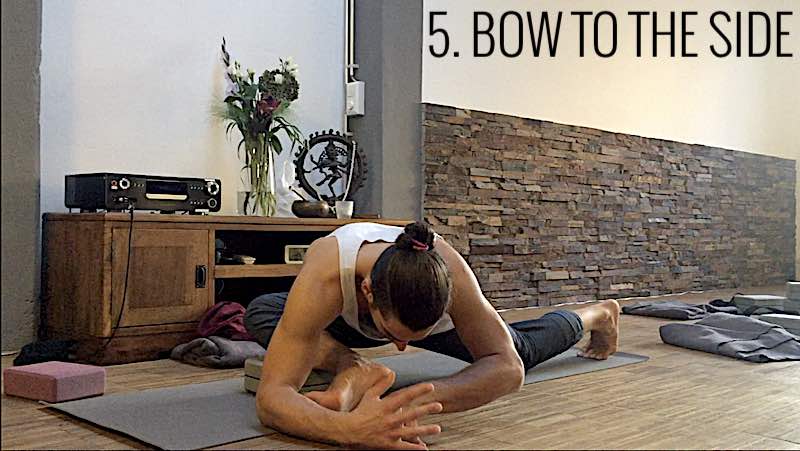
      Step 5: bow your torso toward your foot

       Without moving your hips, walk your hands and torso off to the left and fold, resting on blocks or your forearms. Stay here for five breaths and repeat other side.

      THE PROBLEM WITH LAZY PIGEON

      If you are doing lazy pigeon to rest and not necessarily to increase range of motion in the hips then there is no problem; you will get exactly what you came for. However, if you are trying to make pigeon pose the best hip stretch it can possibly be, then you need to go against your patterns otherwise, you will be forever stretching what already is flexible, eventually leading to injury (most likely).

      This version of pigeon is one of many that I use to shake up my patterns. For another variation I recommend my blog Pigeon Without Knee Pain.

      Thanks for tuning in. If you are interested in Hip Openers I suggest the following class packages

      12 CLASS PACKAGE’S WITH HEAVY FOCUS ON HIP OPENING

      1. The Breakthrough: October 2020 Immersion
      2. Journey to Bliss: August 2020 Immersion
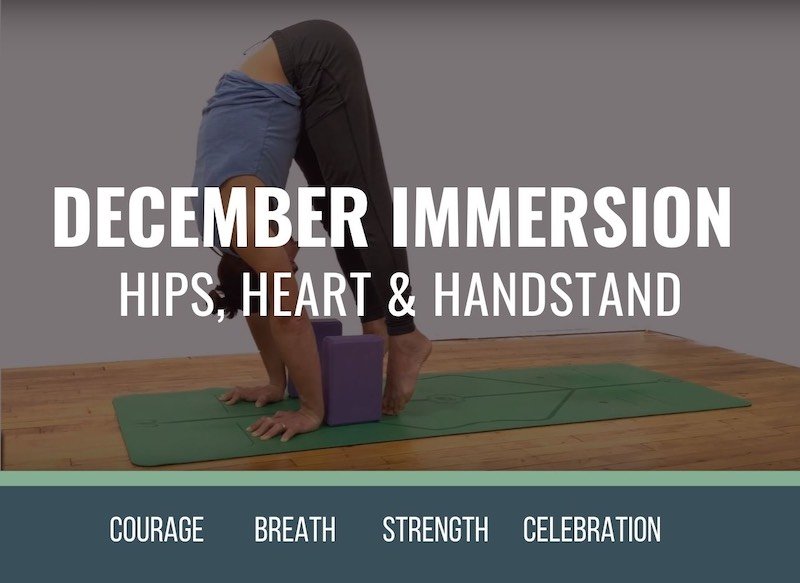
      3. Hips • Heart • Handstand: December 2020 Immersion 

      Livestream Class Packages

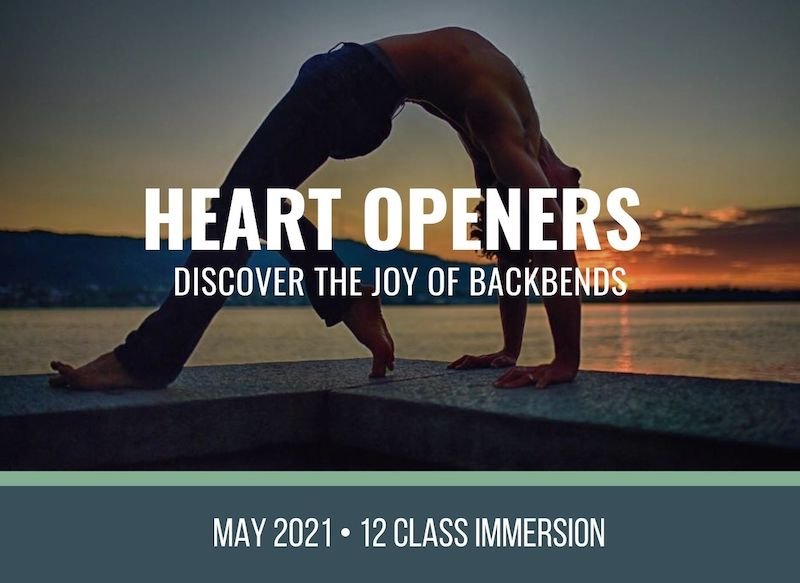
      yoga backbend techniques: 12 classes

      HEART OPENING

      DISCOVER THE JOY OF BACKBENDS

      • Learn Over 12 Back Bends
      • Step by Step Instructionals in Every Practice
      • Techniques, Bio-mechanics and Alignment
      • Bow Pose, Camel, Dancer Full Wheel
      • King Cobra, King Dancer, King Pigeon
      • 12 All Levels 75min Online Classes
      • Lifetime Unlimited Access to All
      $148.00
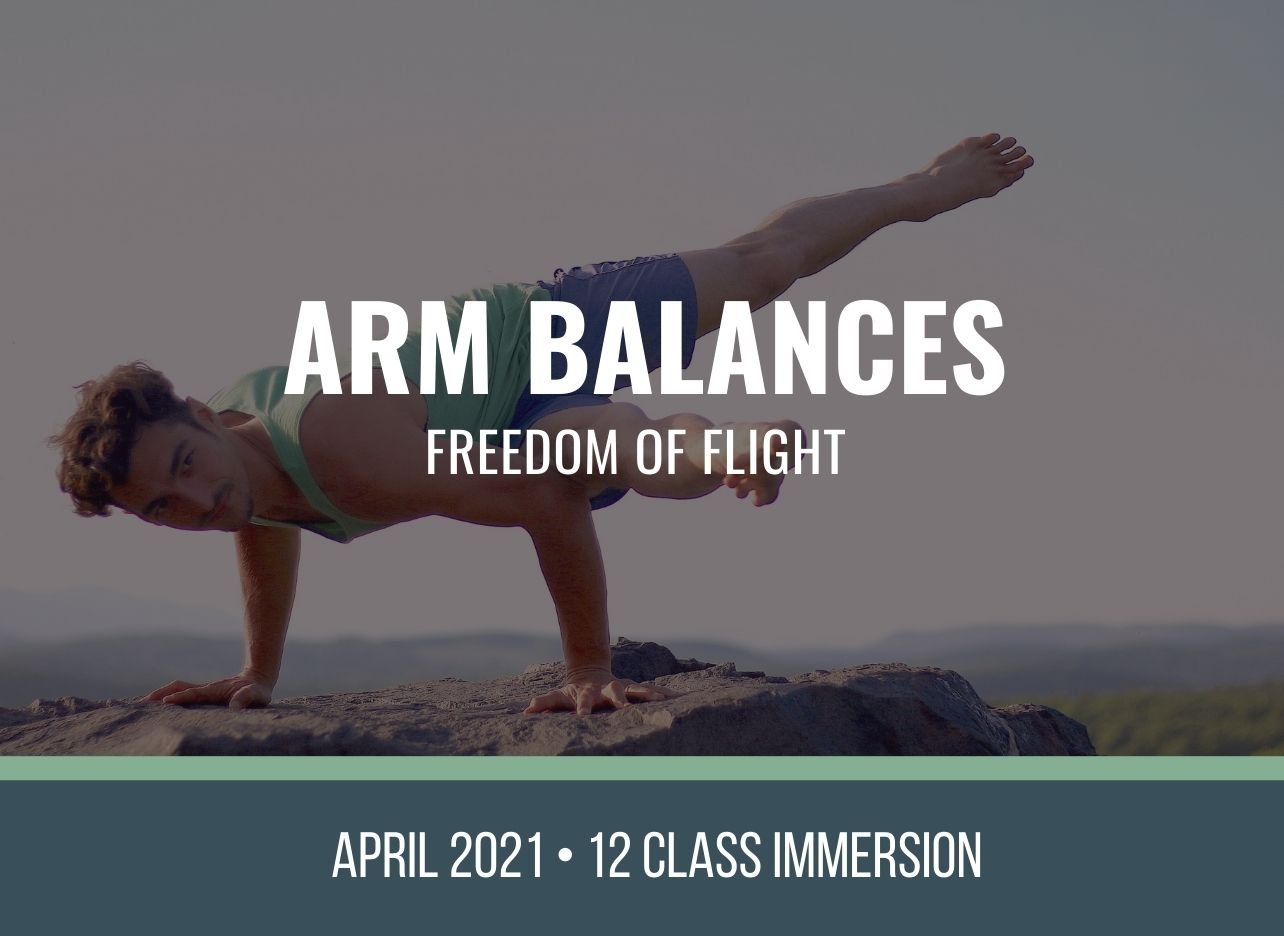
      Arm Balances Online Yoga Classes

      ARM BALANCES

      FREEDOM OF FLIGHT

      • Learn Over 12 Arm Balances
      • Step by Step Instructionals in Every Practice
      • Techniques, Bio-mechanics and Alignment
      • Crow, Side Crow, Titibasna, Ashtavakrasana
      • Forearm Stand, Koundenyasana 1 & 2, Handstand
      • 12 All Levels 75min Online Classes
      • Lifetime Unlimited Access to All
      $198.00 $128.00
      Yoga Alignment and Flow

      MOVE • BREATHE • RELEASE

      YOGA • BREATHWORK • MEDITATION

      • YOGA: TRANSFORM YOUR BODY
      • BREATHWORK: REJUVENATE
      • MEDITATION: AWAKEN YOUR MIND
      • THE TRIFECTA OF YOGA
      • 12 ALL LEVELS CLASSES 

      Yoga Alignment and Flow

      THE DANCE

      ALIGN • REFINE • FLOW

      • MOVEMENT TRANSFORMATION
      • ALIGNED TRANSITIONS
      • TARGETED STRENGTH
      • DEEP HIP OPENERS
      • 12 CLASSES: INTERMEDIATE
      $148.00
      back health online yoga classes

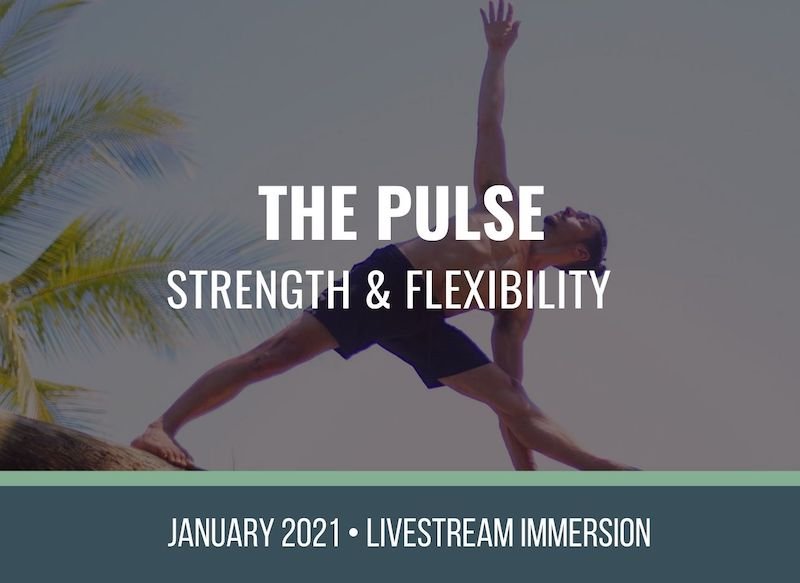
      THE PULSE

      BALANCE • STRENGTH • FLEXIBILITY

      • SHOULDER STRENGTH
      • HEART OPENERS
      • HAMSTRINGS & BUTTOCKS
      • INNER THIGHS
      • 12 ALL LEVELS CLASSES 

      $128.00

      2020 IMMERSIONS

      back health online yoga classes

      HIPS • HEART • HANDSTAND

      • HIP OPENERS
      • HEART OPENERS
      • HANDSTAND TECHNIQUES
      • BUILD COURAGE & STRENGTH
      • 12 ALL LEVELS CLASSES 

      $148.00

      boundless freedom

      • SHOULDER & NEXT RELEASE
      • SHOULDER BIOMECHANICS
      • BALANCED STRENGTH
      • INCREASE RANGE OF MOTION
      • 12 ALL LEVELS CLASSES

      $298.00 $128.00

      BIRDS OF PARADISE

      • FLEXIBILITY OF INNER THIGHS
      • 4 GUIDED MEDITATIONS
      • LIVETIME ACCCESS TO ALL
      • LEADS TO BIRDS OF PARADISE 
      • COMPARTMENTS OF THE MIND 

      $298.00 $128.00 

      BEST STARTER PACKAGE

      • 6 YOGA CLASSES
      • 2 GUIDED MEDITATIONS
      • LIVETIME ACCCESS TO ALL
      • 6 PEAK POSTURES
      • 6 YOGA SUTRA THEMES

      $148.00 $78.00

      back health online yoga classes

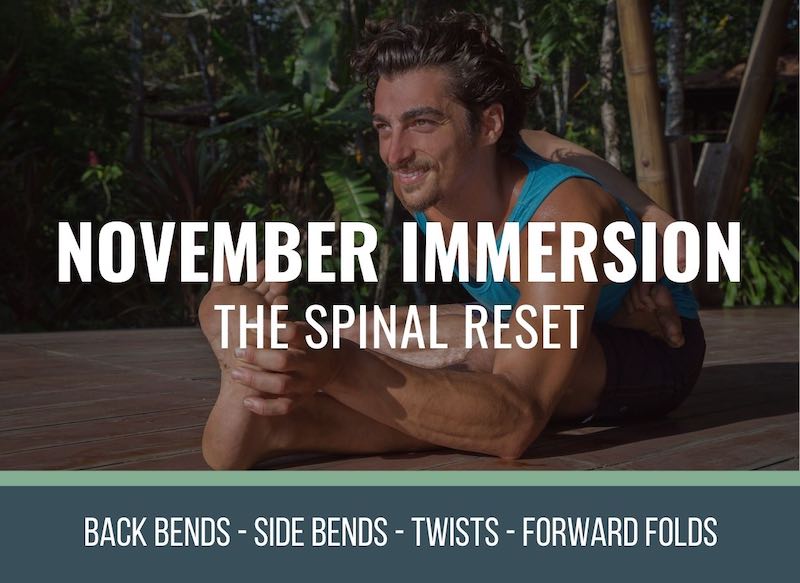
      THE SPINAL RESET

      • BACK & SIDE BENDS
      • TWISTS AND FORWARD FOLDS
      • SPINAL BIOMECHANICS
      • 4 POST CLASS MEDITATIONS
      • 12 ALL LEVELS CLASSES

      $128.00

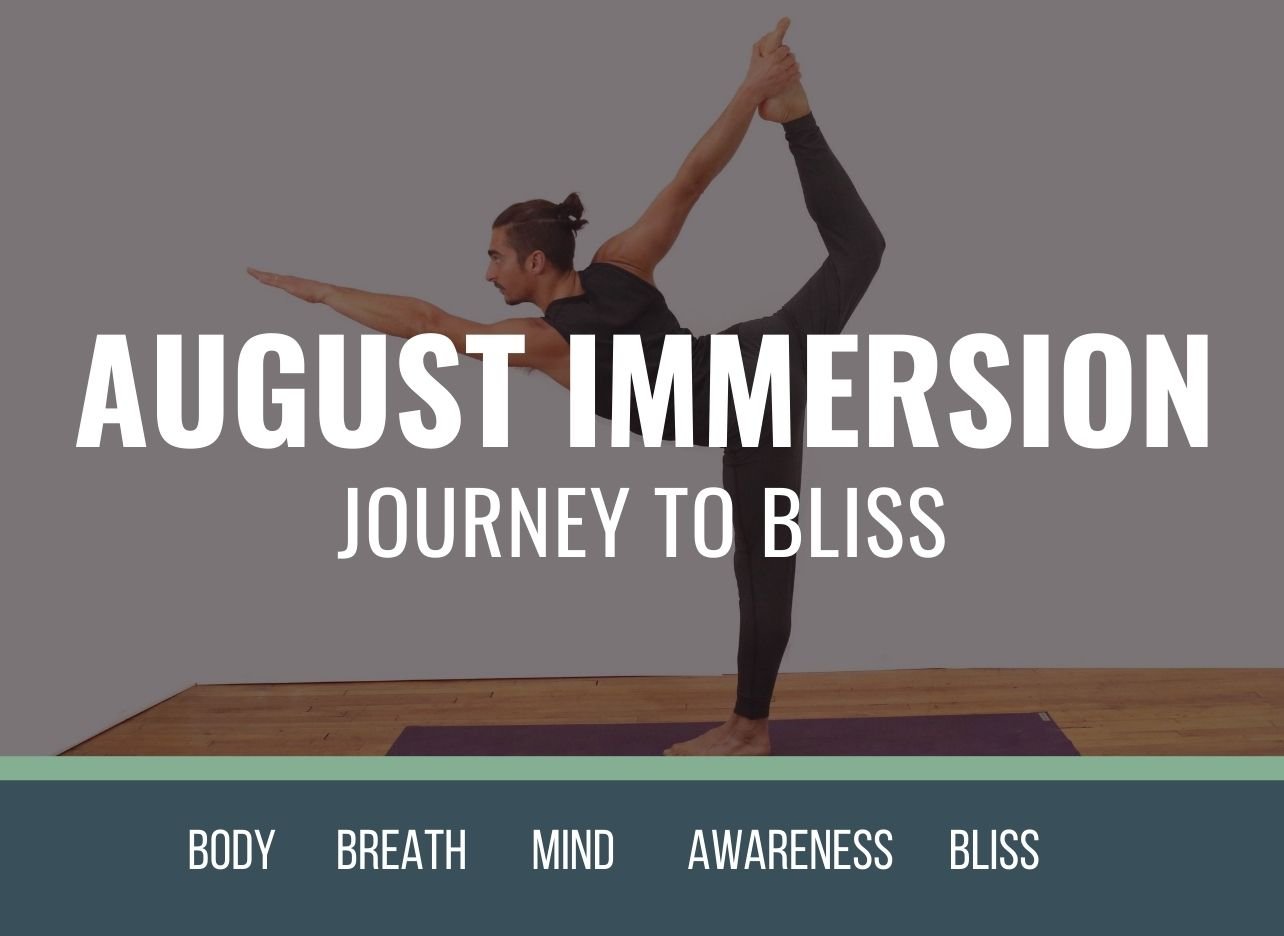
      JOURNEY TO BLISS

      • PHYSICAL MEETS SPIRITUAL
      • EXPLORE THE KOSHAS
      • MIND BODY TENSION RELEASE
      • 4 GUIDED MEDITATIONS
      • 12 ALL LEVELS YOGA CLASSES

      $148.00 $118.00

      BACK, NECK & SHOULDERS

      • 12 YOGA CLASSES
      • 4 GUIDED MEDITATIONS
      • LIVETIME ACCCESS TO ALL
      • 12 PEAK POSTURES
      • 12 YOGA SUTRA THEMES

      $178.00 $128.00

      October Livestream Yoga Classes

      THE BREAKTHROUGH

      • HIP OPENERS
      • HIP BIOMECHANICS
      • EMPHASIS ON ARM BALANCES
      • 4 POST CLASS MEDITATIONS
      • 12 ALL LEVELS CLASSES 

      $128.00

      JOURNEY TO THE HEART

      • FULL BODY RESET
      • INCREASE BALANCE
      • ARM BALANCES
      • 4 GUIDED MEDITATIONS
      • ELEMENTALLY THEMED

      $148.00 $118.00

      KING PIGEON & HANUMAN

      • FLEXIBILITY OF HIPS
      • SHOULDER & SPINE MOBILITY
      • 4 GUIDED MEDITATIONS
      • 12 INTERMEDIATE CLASSES
      • HAMSTRINGS RANGE OF MOTION

      $128.00 

      Continue Learning

      Virasana

      Virasana

      VirasanaHip ExtensionVIRASANA For some of us, postures like Virasana and Lotus can be uncomfortable or even painful for the knees, so we avoid them altogether. Depending on what we’re dealing with, this may be the best decision. If there is room for safe exploration,...

      read more
      Get Bendy

      Get Bendy

      Get BendySpinal MobilityGET BENDY In the yoga context, getting bendy can conjure up images of postures that may seem far-fetched or unattainable. What we should set our sights on instead is not an end result but rather all the things we learn while we're exploring...

      read more
      Wall Drills To Progress In Handstand

      Wall Drills To Progress In Handstand

      Wall Drills to Progress in HandstandAdho Mukha VrksasanaWALL DRILLS TO PROGRESS IN HANDSTAND Wall drills for Handstand are an excellent way to master the mechanics required to go upside down with confidence. Using the wall as a support to refine alignment, rather than...

      read more
      Mountain Pose Mechanics

      Mountain Pose Mechanics

      Mountain Pose MechanicstadasanaMOUNTAIN POSE MECHANICS How often do we go back to refine the “basics”?  Revisiting a posture like Mountain Pose (Tadasana) is like pruning a tree. We may have already developed a foundation, but it’s important to continue to clip away...

      read more
      Plough Pose vs. Shoulder Stand

      Plough Pose vs. Shoulder Stand

      Plough Pose vs. Shoulder StandhalasanaPLOUGH POSE VS. SHOULDER STAND After we have engaged in postures that strengthen the posterior chain, Plough and Shoulder Stand offer a good stretch for these areas of the body. Plough in particular provides a more extensive...

      read more
      Arm Balance Transitions

      Arm Balance Transitions

      Arm Balance TransitionskakasanaARM BALANCE TRANSITIONS Arm balance postures can be challenging enough without attempting to layer on a smooth transition in and out of them. However, fluid transitions are a natural progression in our yoga practice; they also provide...

      read more

      THE FREE TECHNIQUE PACK

      When You Subscribe, You Will Get Instant Access to

      • the Technique Pack: 15 yoga pose breakdowns
      • exclusive online course discounts
      • exclusive blogs and videos
      • This field is for validation purposes and should be left unchanged.

      Neck And Shoulder Pain Relief 3 Step Release

      NECK & SHOULDER PAIN RELEIF

      THE 3 STEP RELEASE

      NECK & SHOULDERS

      CAN SHOULDER TENSION CAUSE NECK PAIN?

      When someone comes to me complaining of neck and shoulder pain, they are usually rubbing their upper shoulder/neck area- their trapezius muscle. On the surface, this muscle seems to be the number one cause for neck and shoulder pain, but I believe trapezius gets a bad rap and it’s often tight chest muscles that are to blame.

      There are two postures I share that almost always provide immediate and long-lasting release. One posture is Wild Thing, and the other is a Neck and Shoulders Release that I consider Wild Thing at the wall.

      Why do these postures relieve neck pain?

      Most people don’t realize how connected the neck and shoulders really are. At this point, I’m sure you’ve heard about fascia and how it weaves over, around, and into all the muscles in our bodies, creating a unified, one-muscle body.

      Have you ever opened an orange and seen all the pith fibers around and between each segment? This is like fruit fascia, and our muscles are the same way. Our necks are connected to our shoulders and our shoulders to our chest. Let’s just take a quick peek at the anatomy, shall we?

      Shoulder Anatomy: What You Need To Know

      There are 3 bones that make up the shoulders 

      1. Collar bone “Clavicle” 
      2. Arm Bone “Humerus”
      3. Shoulder Blade “Scapula”

      There are multiple muscles that attach to one or more of these bones that also connect to your neck and/or head. One muscle is called the Sternocleidomastoid, running from the top of your chest to the back of your neck and skull. When tight, this muscle will pull the head forward and down toward your chest. 

      The Pectorals Major and Minor muscles attach to the chest, arm bone, shoulder blade, and collar bone. Along with the Trapezius muscle, these will be our focus for today. The Trapezius not only attaches to the neck, spine, skull, and shoulder blade, it also attaches to the collar bone. 

      THE BIG SECRET

      The truth is there are multiple causes for neck and shoulder pain, but the common every day “rub your upper shoulders and neck” kind of pain is typically the result of tight, shortened pectoral muscles. When collar bones are pulled downward and shoulder blades are forced to rise up and forward, the Trapezius is often blamed. But Trapezius is trying to do its job and pull your shoulder blades back down, creating a tug of war.

      So what do you do? You start rubbing your Trapezius, asking it to relax, when really what needs to chill are your chest muscles. Release the Pectorals and more often than not, your neck and shoulder pain will go away. 

      SO CAN SHOULDER TENSION CAUSE NECK PAIN? Absolutely! When we look at all the different muscles that attach to both the neck and shoulders, it’s obvious.

      In the September Immersion we worked through three primary shoulder actions in a 75-minute class and then we learned to apply them directly to Wild Thing. Each immersion practice focuses on a different yoga pose in order to develop a greater understanding of our body. Join the next livestream immersion and get lifetime access to all videos when you sign up today!

      SOLUTION TO NECK AND SHOULDER PAIN

      If you have neck and shoulder pain on a regular basis, or if you simply want to prevent chronic discomfort, then I suggest including at least one pectoral stretch in your daily yoga practice. What if you can’t get on your mat each day? No problem! Stretch your Pectoralis muscles anywhere you find a wall.

      As you read this, your arms are likely in front of you. They are for much of our day, which causes shoulders to pull forward. The simple solution is to pull shoulders back. In the video below, I share with you the 3 Steps to Releasing your Neck and Shoulder Pain! 

      BOUNDLESS FREEDOM

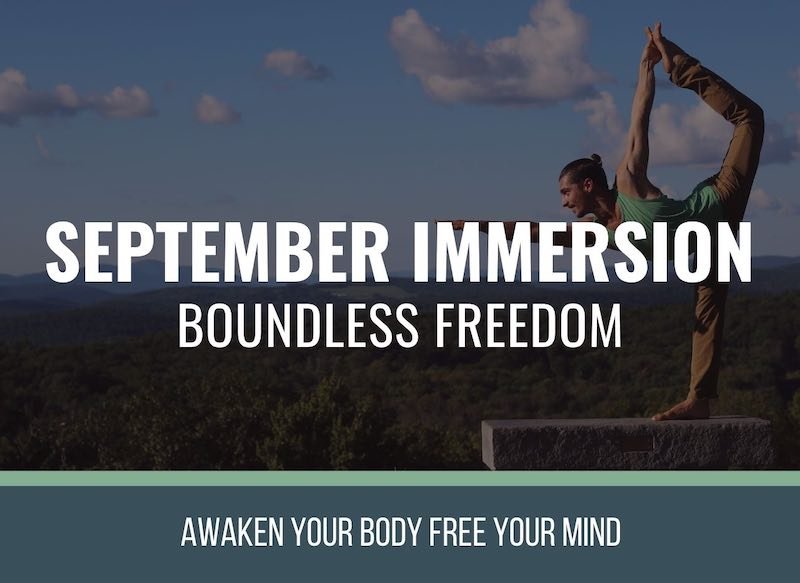
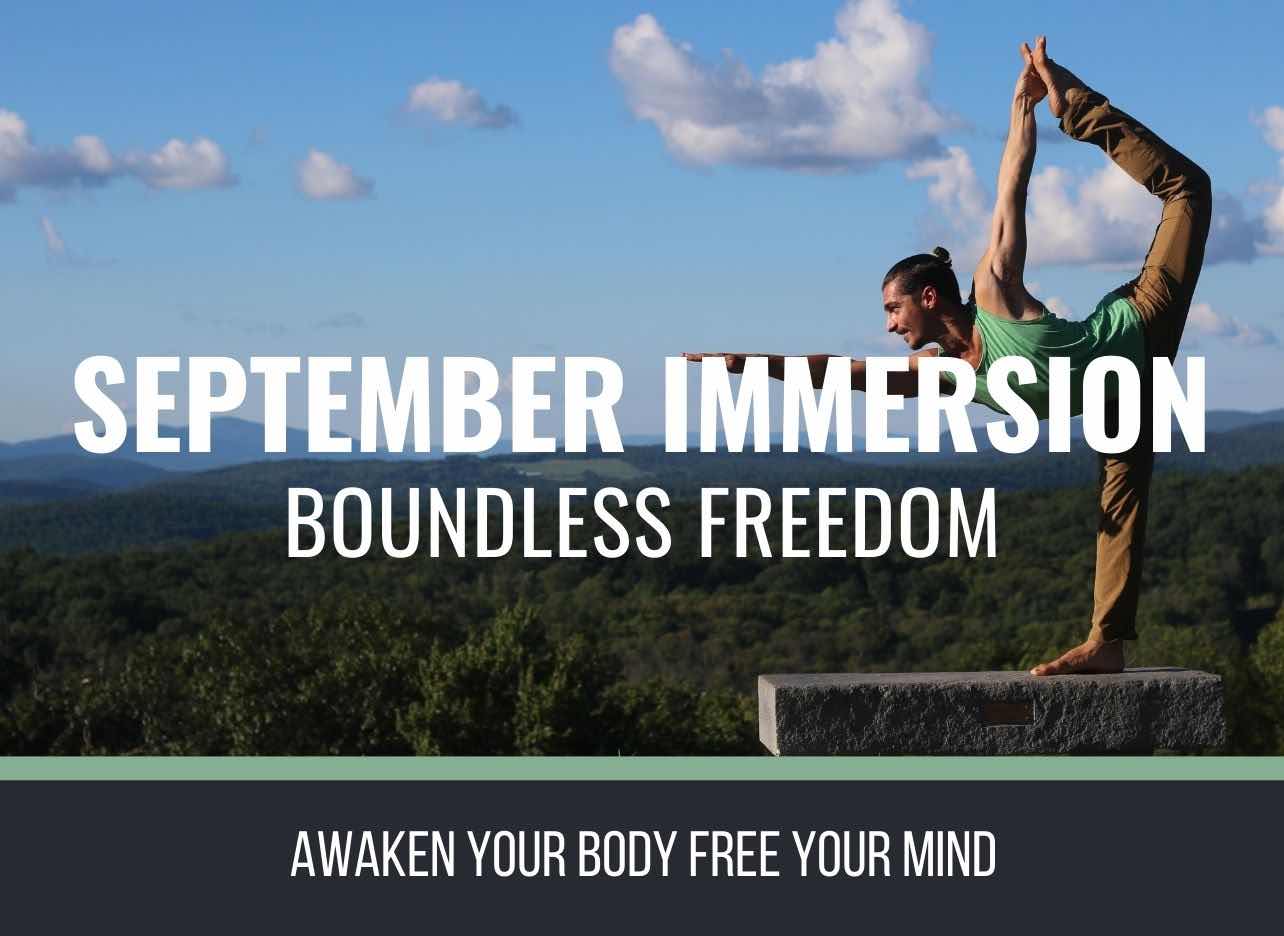
      The September Immersion includes the full length class to Wild Thing Pose as well as other peak poses with a heavy emphasis on Shoulder Bio-Mechanics! In this package you get twelve 75-minute yoga classes, 4 of which include guided meditations!

      Want to feel better in your shoulders? This is THE immersion to practice! 

       THE 3-STEP RELEASE

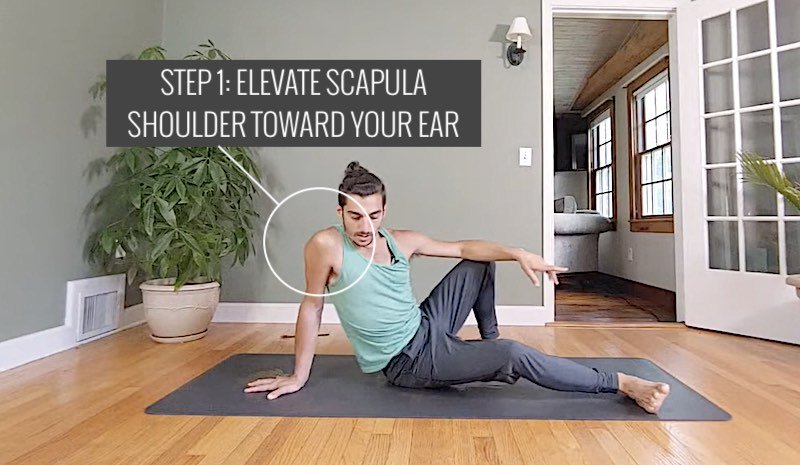
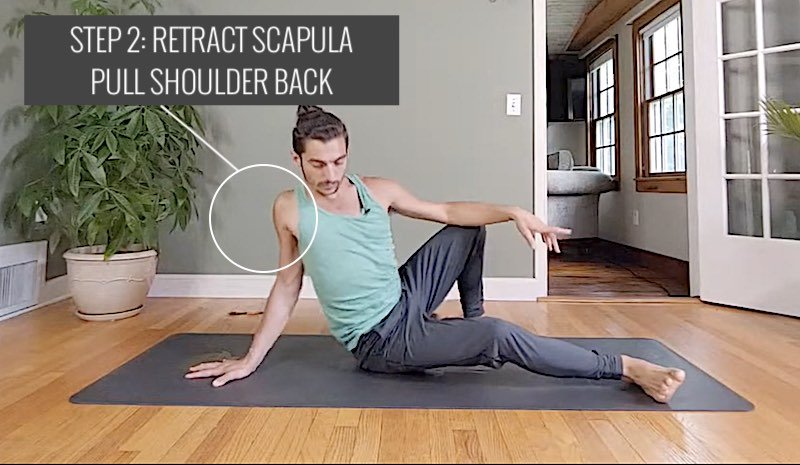
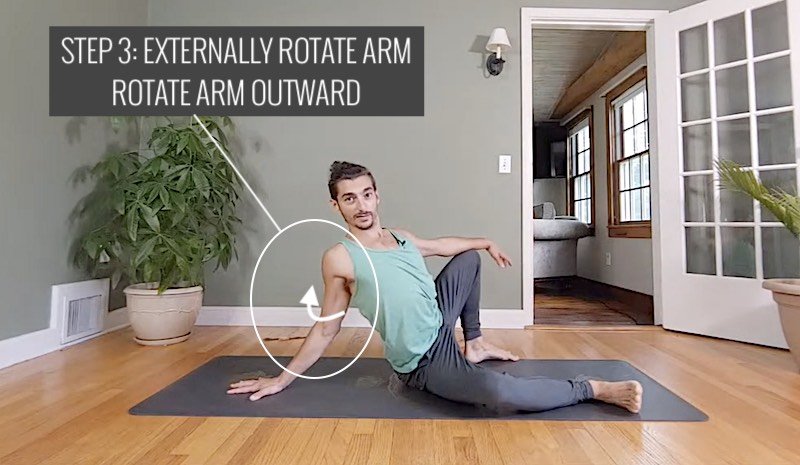
      The pictures below are from my teaching on Wild Thing. The actions are exactly the same at the wall but each posture provides slightly different benefits. At the wall, you do not need a yoga mat or to get down on the ground. That makes it easy to access the pose at work or wherever you are. The benefit to Wild Thing on the ground is that it adds a layer of required strength to the back body. This will further support a release of the neck since the back body muscles tend to be weak for most of us.

      Step 1 - Elevate the shoulder

      Step 1 is to lift your shoulder up toward the ear. This is vital in range of motion and helping your pectoralis muscles to lengthen and to initiate strength from your trapezius.

      Step 2: retract shoulder blade

       Next, move your shoulder back (retract the shoulder blade toward the spine). This will recruit your back muscles and stretch the Pectoralis major muscle, in particular.

      Step 3: Rotate Shoulder Outward

      Externally rotate the arm bone. This will pull the top of the shoulder back, stretching Pectoralis Minor. It will also help release a muscle called subscapularis, which tends to cause neck pain.

      WHAT NEXT?

      Short-term fixes are great to help you get through the day, but ultimately you need to create positive and supportive muscle patterns that hold your body in a way that helps to keep you pain-free and injury-free, even when your mind is stressed out from the daily grind. The best part of self care is that it FEELS GOOD! So if you are ready to take care of your body and jump into your yoga practice three days a week, check out my upcoming Live Immersion Here

      If you read this far, you are likely a yoga teacher already, or you are ready to be. For yoga teachers looking to advance your anatomy, biomechanics, and teaching skills, I invite you to check out my 300 Hour Online Training.

      If you are not a teacher yet, but a yogi ready to dive deeply into your yoga practice and get certified to share this practice with others, then the 200 hour training is your next step!

      Thank you for reading and watching, I look forward to sharing more with you in an upcoming training or monthly immersion!

      200 hour online yoga teacher training

      BOUNDLESS FREEDOM

      INLCUDES THE WILD THING CLASS

      The September Immersion includes the full-length class to Wild Thing Pose as well as other peak poses with a heavy emphasis on Shoulder Bio-Mechanics! In this package, you will get twelve  75 minute Yoga Classes, 4 of which include guided meditations! So, If you want to get to know your shoulders then this is THE immersion to practice!

      WHAT STUDENTS SAY ABOUT THE LIVE IMMERISONS

      Matt‘s classes are phenomenal- if you ever have the ability to practice with him, make use of it!! He has a very unique talent of combining anatomy, yoga philosophy and his own perspective into a super intense package of knowledge which is fun AND easy to understand. I enjoyed the April immersion a lot as it was a great way of deepening my own practice and broadening my horizon, especially as the lifetime access allows you to take classes
      as often as you want- trust me, you will want to take them again! I cant wait for next month’s classes and highly recommend everyone to take the May pass and joining in on the journey.

      ~Nadja Kyra King - @nadja_kyra

      Matt’s April pass was a journey. It was more than just the physical exploration of my practice but also helped me explore my spiritual practice. It was very nice to have a consistent practice during this time of uncertainty. If you are looking for a practice to ground yourself I would highly recommend exploring the Live Immersion of the Month.
      ~Amanda Barnes Salowsky

      Covid_19 bought Matt into my home and my yoga practice. This last month I have learn’t so much it has deepened my practice and my understanding of the anatomy & biomechanics and how we use both in every asana we practice. He has also helped in my teaching, ie asking my students to think about the foot as a tripod “big toe, pinkie toe, heel ” I never imagined I would learn so much from the immersion.

      ~Debbie, @the_joyofyoga

      THE BREAKTHROUGH


      Are you ready to reconnect to your body, expand your practice, access new yoga poses, and feel better on a daily basis?

      $128.00

      Continue Learning

      Virasana

      Virasana

      VirasanaHip ExtensionVIRASANA For some of us, postures like Virasana and Lotus can be uncomfortable or even painful for the knees, so we avoid them altogether. Depending on what we’re dealing with, this may be the best decision. If there is room for safe exploration,...

      read more
      Get Bendy

      Get Bendy

      Get BendySpinal MobilityGET BENDY In the yoga context, getting bendy can conjure up images of postures that may seem far-fetched or unattainable. What we should set our sights on instead is not an end result but rather all the things we learn while we're exploring...

      read more
      Wall Drills To Progress In Handstand

      Wall Drills To Progress In Handstand

      Wall Drills to Progress in HandstandAdho Mukha VrksasanaWALL DRILLS TO PROGRESS IN HANDSTAND Wall drills for Handstand are an excellent way to master the mechanics required to go upside down with confidence. Using the wall as a support to refine alignment, rather than...

      read more
      Mountain Pose Mechanics

      Mountain Pose Mechanics

      Mountain Pose MechanicstadasanaMOUNTAIN POSE MECHANICS How often do we go back to refine the “basics”?  Revisiting a posture like Mountain Pose (Tadasana) is like pruning a tree. We may have already developed a foundation, but it’s important to continue to clip away...

      read more
      Plough Pose vs. Shoulder Stand

      Plough Pose vs. Shoulder Stand

      Plough Pose vs. Shoulder StandhalasanaPLOUGH POSE VS. SHOULDER STAND After we have engaged in postures that strengthen the posterior chain, Plough and Shoulder Stand offer a good stretch for these areas of the body. Plough in particular provides a more extensive...

      read more
      Arm Balance Transitions

      Arm Balance Transitions

      Arm Balance TransitionskakasanaARM BALANCE TRANSITIONS Arm balance postures can be challenging enough without attempting to layer on a smooth transition in and out of them. However, fluid transitions are a natural progression in our yoga practice; they also provide...

      read more

      THE FREE TECHNIQUE PACK

      When You Subscribe, You Will Get Instant Access to

      • the Technique Pack: 15 yoga pose breakdowns
      • exclusive online course discounts
      • exclusive blogs and videos
      • This field is for validation purposes and should be left unchanged.

      CONTACT

      • This field is for validation purposes and should be left unchanged.

      Pin It on Pinterest