theyogimatt on deep rooted bliss podcast

DEEP ROOTED BLISS PODCAST INTERVIEW

FINDING FULFILLMENT AS A YOGA TEACHER & ENTREPENEUR

COURAGE

DEEP ROOTED BLISS INTERVIEW

OVERCOMING BURNOUT AND FINDING FULFILLMENT AS A YOGA TEACHER

In 2014 Rebecca Doring, founder and host of the Deep Rooted Bliss Podcast, came to me seeking support. At that time, I had just launched what became my first online offer, called “The Mentorship Mastery Program.” My time mentoring Rebecca was as important to my growth as it was to hers. We were both on the path toward making huge shifts in our career, but of course we didn’t know that at the time. Rebecca went from full-time massage therapist to full-time yoga instructor to where she is today: meditation coach, podcast host, and online entrepreneur.

As for me, in this time I went from teaching full-time in Manhattan to leading workshops and trainings around the US, Europe, and Asia to where I am now, leading online yoga immersions and 200-hour and 300-hour teacher trainings.

Following your passion, your dreams and authentic expression is not as glorious as it seems.

Today, business coaches, entrepreneurs, and yoga teachers alike will glorify self-employment, making it seem like the grass is always greener when you can work for yourself. And indeed I can’t disagree, but if you are thinking of making the leap, or if you already have done so, there are some things you should definitely consider. In this podcast, Rebecca and I discuss some of the struggles of being a yoga instructor and/or entrepreneur, and what you can do to to achieve success without burnout.

I highly recommend subscribing to Rebecca’s podcast, Deep Rooted Bliss, on your favorite place to listen to podcasts. I personally listen in weekly to get inspired to live my life on purpose. She provides incredible insight for meditation, personal growth, and living a life filled with bliss.

LISTEN TO THE PODCAST WITH REBECCA DORING AND MATT GIORDANO

UPCOMING ONLINE EVENTS & TEACHER TRAININGS

Online Yoga for Hip Openers and Flexibility

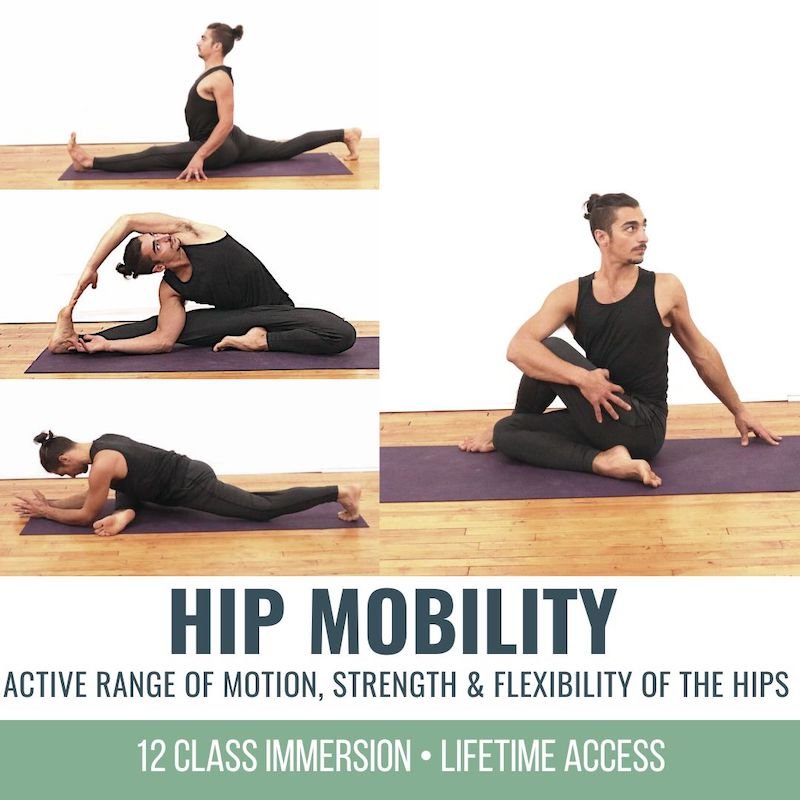
HIP MOBILITY

October 2022 Immersion

  • Strengthen and lengthen your hips
  • Increase active and passive range of motion
  • Learn anatomical techniques to improve functionality
  • Access a wider range of seated postures and hip openers
  • 12 Classes: All levels appropriate
  • Lifetime unlimited access to all
  • Attend the livestream OR practice the replays any time that’s convenient for you

$148.00

MORE INFORMATION

NEXT TRAINING BEGINS FEBRUARY 2024 ENROLLMENT NOW OPEN!

FREE VIDEO & BLOG TUTORIALS 

Janu Sirsasana To Half Lotus

Janu Sirsasana To Half Lotus

Janu Sirsasana To Half LotusKurmasanaJANU SIRSASANA TO HALF LOTUS There’s never one single route to a posture we’re exploring.  There are individual specifics we always need to consider.   When it comes to hip opening postures like Janu Sirsasana and Half Lotus we...

read more
Turtle Pose To Titibhasana

Turtle Pose To Titibhasana

Turtle Pose To TitibhasanaKurmasanaTURTLE POSE TO TITIBHASANA Turtle Pose is not tiny by any means.  There is a great deal that goes into its preparation.  At the same time, it’s also an excellent preparatory posture for Titibhasana.  The journey between these two...

read more
Full Wheel

Full Wheel

Full WheelUrdhva DhanurasanaFULL WHEEL Teaching an intentional class becomes inevitable when following the Chromatic system that Matt created .  In Chromatic, we’re following a system that sets up the body for maximum execution within our fullest potential.  When it...

read more
Mastering Bakasana

Mastering Bakasana

Mastering BakasanaCrow PoseMASTERING BAKASANA We may never truly master a posture, but as we go on a journey of exploration towards our greatest potential within our asana practice, we most definitely become masters of our own awareness—cultivating the ability to...

read more
Tuck Jumps

Tuck Jumps

Tuck JumpsHandstandTUCK JUMPS Tuck jumps can be a confidence booster when it comes to preparing for handstands. They're not the first step in the course of preparation, but they're definitely a way of identifying where strength and proprioception require attention.  ...

read more
Counter Rotations

Counter Rotations

Counter RotationsStabilityCOUNTER ROTATIONS The isolation of specific articulations in a yoga posture can be tricky to implement when we’re still learning how our bodies move. When we begin to explore counter rotations, this layer might feel confusing or even...

read more

THE FREE TECHNIQUE PACK

When You Subscribe, You Will Get Instant Access to

  • the Technique Pack: 15 yoga pose breakdowns
  • exclusive online course discounts
  • exclusive blogs and videos
  • This field is for validation purposes and should be left unchanged.

Bow Pose: Where to Breathe in a Backbend

BOW POSEWHERE TO BREATHE 

YOGA ANATOMY • BIOMECHANICS • TECHNIQUE

BOW POSE

The Challenge of breathing in backbends

Ever feel short of breath in a backbend? You aren’t the only one. Where to breathe in a backbend is a popular question, and rightfully so. If you look at the anatomy of it, the front-body (anterior) muscles are all stretched out, and the back-body (posterior) muscles are completely contracted. Without getting too technically specific, whenever we inhale, the muscles that surround the abdomen and chest stretch and expand. In a backbend, or heart opener, these muscles are already stretched to their maximum, so there is little to no room to breathe, especially in the belly/abdominal area. Over time, you can certainly increase the flexibility of your abdominals; however, you will likely also begin to deepen your backbends, which will put you right back in the same predicament of fully stretched belly muscles and no additional room for breath. On the flip side, the back muscles are completely contracted and shortened. All of the vertebrae of your spine are in extension, making it very hard to breathe in the back body with so much contraction.

    back bending online yoga and anatomy

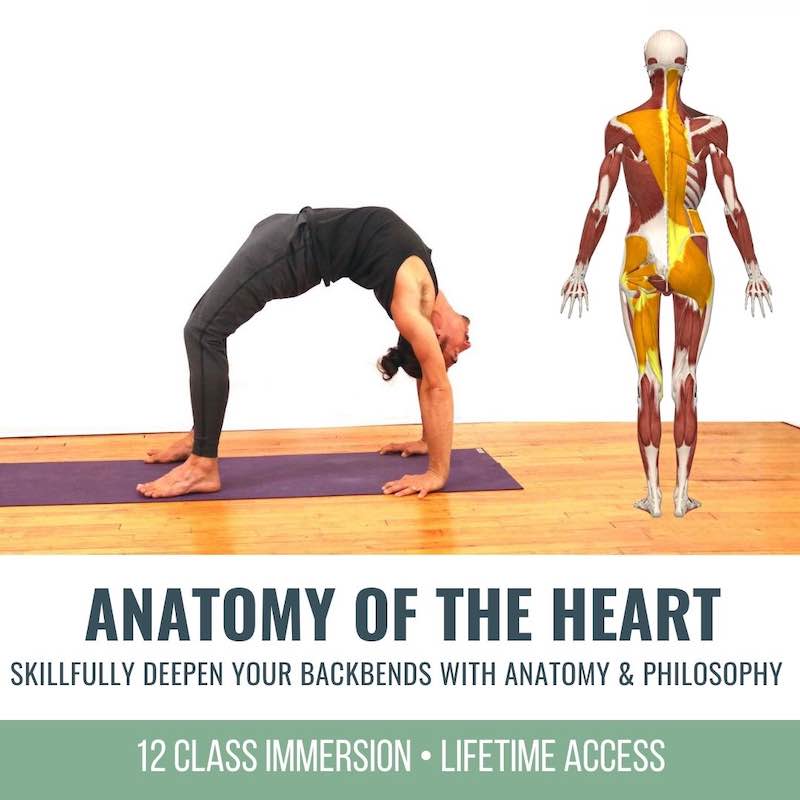
    ANATOMY OF THE HEART

    JUNE 2022 Immersion

    • Technique to expand and deepen your backbends
    • Foundations and preparatory postures to set you up for success
    • Anatomy education to prime the nervous system
    • Themes to cultivate the appropriate mindset for heart opening
    • 12 Classes: 6 focused on anatomy, 6 themed for the heart
    • Unlock a wide range of postures including: Bow Pose, Camel, Full Wheel, King Dancer, King Cobra, King Pigeon, and more
    • Lifetime unlimited access to all
    • Attend livestream OR practice the replays any time that’s convenient for you

    $168.00 $148.00

    MORE INFORMATION


    WHERE TO BREATHE IN BACKBENDS (ALSO KNOWN AS HEART OPENERS)

    Through much experience, I have found that the best approach to breathing in heart openers is to focus on expanding the sides of the ribs outward, lifting the heart upward, and allowing the shoulders to rise and fall. In all of my heart-opening immersions, I teach the specifics and guide you step by step on how to shift your breathing from the belly to the thoracic. Belly breathing, often known as diaphragmatic breathing, is excellent, highly efficient, and calming; in heart openers, however, it tends to cause a great deal of discomfort in the low back, and more often than not, it significantly restricts mobility. I do suggest belly breathing between sets of backbends to bring the heart rate back down and to get grounded.

    The easiest way to learn how to breathe into the sides of the ribs and chest is to cinch your belly in and up, which is often referred to as Uddiyana Bandha. Anatomically speaking, I am referring to two main muscle actions.

    1. transversus abdominis: Activate this, known as the corset muscle, by pulling your wasteline inward on all sides of the body.
    2. erector spinae: Lift your ribs and chest upward; don’t try to”knit the ribs,” but allow them to lift.

    Maintaining these two actions, place your hands on your outer ribs. On your inhale, try to push outwards into your hands with your ribs while keeping the belly inward (a little movement will occur—that’s ok) and your middle and upper chest lifting. Doing this will force the intercostal muscles between the ribs to lengthen. That said, you’ll want to be careful and avoid massive inhales when learning this so that you do not overstretch any of these muscles. In the immersion titled Anatomy of the Heart, we go over all of these actions, and I also show these muscles to you so you can visualize how it all works.

    BOW POSE ON A BOLSTER

    Doing Bow Pose on a bolster can be very helpful because it relieves much effort in the back muscles, allowing you to focus on the various aspects of the posture without being overwhelmed. The key points are the following:

    • Pull your belly inward and lengthen it before placing your low ribs/upper belly on the bolster. This will keep you from getting stuck on the mat when you start to lift.
    • Adjust your shoulders by lifting them up first, then retracting them (pulling your shoulder blades toward each other).
    • Follow the movement of your breath. On inhales, kick your feet back and up to rise; on exhales, soften and relax some of your effort.
    • IMPORTANT: Try to keep the middle of your spine moving forward — press your middle back toward the bolster, especially when you kick your feet back. Otherwise you will feel spinal compression or discomfort.
    back bending online yoga and anatomy

    ANATOMY OF THE HEART

    JUNE 2022 Immersion

    • Technique to expand and deepen your backbends
    • Foundations and preparatory postures to set you up for success
    • Anatomy education to prime the nervous system
    • Themes to cultivate the appropriate mindset for heart opening
    • 12 Classes: 6 focused on anatomy, 6 themed for the heart
    • Unlock a wide range of postures including: Bow Pose, Camel, Full Wheel, King Dancer, King Cobra, King Pigeon, and more
    • Lifetime unlimited access to all
    • Attend livestream OR practice the replays any time that’s convenient for you

    $168.00 $148.00

    MORE INFORMATION


    BREATHING IN OTHER BACKBENDS

    While Bow Pose might be more challenging due to the fact that the belly is on the ground, it can be a great posture to work with because you dont have to worry about balance or the host of other challenges presented by something like Full Wheel. That said, I recommend this same type of breathing in all heart openers. There is both a learning curve involved in this type of breathing and repetition that is required until your muscles (transversus abdominis, intercostals, erector spinae) develop the necessary strength, endurance, and flexibility for this approach to yield the best results.

    In the Anatomy of the Heart immersion, you will learn breathing exercises and postural drills that will strengthen these muscles and help you become proficient in this breathing technique. Additionally, we will be working on the HEART of heart openers—the emotional correlation and mindset that helps release unnecessary tension and provides you with the freedom and ease that is possible in these postures. Lastly, you will learn energy management in order to upregulate or downregulate your nervous system. This means you will be able to relax or calm your system down if you become too lifted, light-headed, nervous, or anxious, or you can ramp your energy up if you are feeling lethargic, unmotivated, or not attentive enough for heart openers.

    See you on the mat!

    The 200 Hr. Teacher Training: Click Here to See The Next Start Date

    The 300 Hr. Advanced Teacher Training: Click Here to See The Next Start Date

    Article by Matt Giordano

    Video Extracted From: Anatomy in Motion

    Continue Learning

    Janu Sirsasana To Half Lotus

    Janu Sirsasana To Half Lotus

    Janu Sirsasana To Half LotusKurmasanaJANU SIRSASANA TO HALF LOTUS There’s never one single route to a posture we’re exploring.  There are individual specifics we always need to consider.   When it comes to hip opening postures like Janu Sirsasana and Half Lotus we...

    read more
    Turtle Pose To Titibhasana

    Turtle Pose To Titibhasana

    Turtle Pose To TitibhasanaKurmasanaTURTLE POSE TO TITIBHASANA Turtle Pose is not tiny by any means.  There is a great deal that goes into its preparation.  At the same time, it’s also an excellent preparatory posture for Titibhasana.  The journey between these two...

    read more
    Full Wheel

    Full Wheel

    Full WheelUrdhva DhanurasanaFULL WHEEL Teaching an intentional class becomes inevitable when following the Chromatic system that Matt created .  In Chromatic, we’re following a system that sets up the body for maximum execution within our fullest potential.  When it...

    read more
    Mastering Bakasana

    Mastering Bakasana

    Mastering BakasanaCrow PoseMASTERING BAKASANA We may never truly master a posture, but as we go on a journey of exploration towards our greatest potential within our asana practice, we most definitely become masters of our own awareness—cultivating the ability to...

    read more
    Tuck Jumps

    Tuck Jumps

    Tuck JumpsHandstandTUCK JUMPS Tuck jumps can be a confidence booster when it comes to preparing for handstands. They're not the first step in the course of preparation, but they're definitely a way of identifying where strength and proprioception require attention.  ...

    read more
    Counter Rotations

    Counter Rotations

    Counter RotationsStabilityCOUNTER ROTATIONS The isolation of specific articulations in a yoga posture can be tricky to implement when we’re still learning how our bodies move. When we begin to explore counter rotations, this layer might feel confusing or even...

    read more

    THE FREE TECHNIQUE PACK

    When You Subscribe, You Will Get Instant Access to

    • the Technique Pack: 15 yoga pose breakdowns
    • exclusive online course discounts
    • exclusive blogs and videos
    • This field is for validation purposes and should be left unchanged.

    side plank variations

    Side Plank Variations

    VASHISTASANA • MODIFICATIONS • TUTORIAL

    SIDE PLANK

    Extended Side plank variations

     [Click Below to listen to the Audio Version of “Extended Side Plank”]

    There are definitely more ways than one to access a yoga posture. Not only that, but Matt is explicit about technique in order to unlock access. In an all-encompassing pose like Extended Side Plank—Vashistasana—there is a lot going on all at once. There are so many things that need to be digested when breaking it down. Even though this posture may be a physically challenging one, Matt breaks down how you can approach it both physically and intellectually. He shows you specifically what muscles to activate and what parts of the body to articulate. Extended Side Angle is one of those postures that recruits and demands so much of your effort and attention.   

    When exploring the various entry points and different ways to execute the posture, it’s important to pay attention to the specifics of each variation. Matt outlines 2 variations in today’s tutorial. You’ll explore Extended Side Plank by utilizing a wall and another variation with a strap.

    Within these explorations, you’ll see just how much body awareness is involved and how connected you need to be to your anatomy. Much more than just knowing your muscles and bones, it’s about understanding how to move and articulate each part of your body.

      12 Online Yoga classes to Learn Anatomy

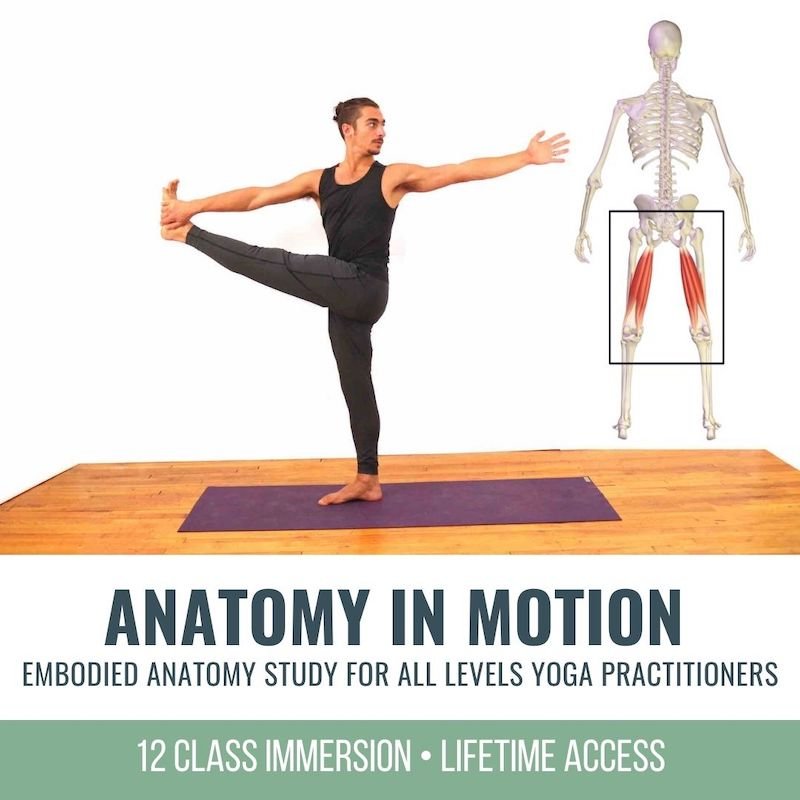
      ANATOMY IN MOTION

      APRIL 2022 Immersion

      • Embody anatomy
      • Learn key muscles, bones, and joints
      • Visualize your movements internally
      • Improve proprioception
      • Sensation-based practices
      • Unlock and strengthen major muscle groups
      • Active, passive, and isometric stretching
      • Improve mobility and stability
      • Get VERY geeky

      $168.00


      The Actions for Extended Side Plank, Variation at the Wall

      As always, it’s imperative to start your awareness from the ground up.

      Step 1 – Matt explains that the gripping of your hand into the mat activates the flexors of your wrist. This is important because now you are utilizing technique to activate strength and set a solid base for the posture.

      Step 2 – Next, we have spinal extension as a result of the shoulder blade moving into the spine. Matt emphasizes how necessary these actions are so that the rest of the posture can actually be expressed.

      Step 3 – This step is really connected to Step 2, as it’s important to take the steps of lifting your shoulder up, back, and around. We also see this in Matt’s Shoulder Alignment Tutorial for Wild Thing.

      Step 4 – Move your pelvis and weight in towards the wall.

      Step 5 – You can then bend your knee and bring your foot onto the wall.

      Step 6 – This step can take you to another level.
      Grab your knee and pull it in as tightly towards the chest as possible. If this is the final step in the journey at this time for you, Matt explains that the only thing missing is the extension of the leg, removing the quadricep engagement.

      How does this differ from the next variation?

      The Actions for Extended Side Plank, Variation with a Strap

      This one might actually be a bit more challenging, as the actions for entry are slightly different. You’ll see how Matt turns his body open before actually going into the backbend.

      Step 1 – Strap goes around your foot. 

      Step 2 – Come into Side Plank with kickstand.

      Step 3 – Lift your hips up and pull your knee into your chest as you turn 

      *Here he highlights the difference between the experience of this variation and of choosing to kick your leg out first and then kicking it upwards, which may make the hips feel too heavy.

      Step 4 – Once you have completed Step 3, the turn is done with a bent knee, with an option to now extend your leg fully.

      This order of entry may be far more accessible.

      Matt describes Extended Side Plank as the “full spectrum of body awareness.” This is evident from the actions that are taken in these variations.  

      Anatomy and actions involved:

      • strengthening of the wrists
      • rotator cuff muscles engaged due to the external rotation of the upper arm bone
      • depression and retraction of the scapula to mobilize the spine (bowing of the spine)
      • eversion of the ankle 
      • gluteus muscles engaged to press the feet down and get the hips lifted
      • extension of the knee joint to activate quadriceps

      There is the evidence of just how much focus, attention, and awareness is involved.

      Learn how to MASTER actions and awareness like this, not to mention the sharpening of your knowledge with anatomy, in Matt’s current immersion:

      Anatomy In Motion

      See you on the mat!

      Online yoga to improve mobility

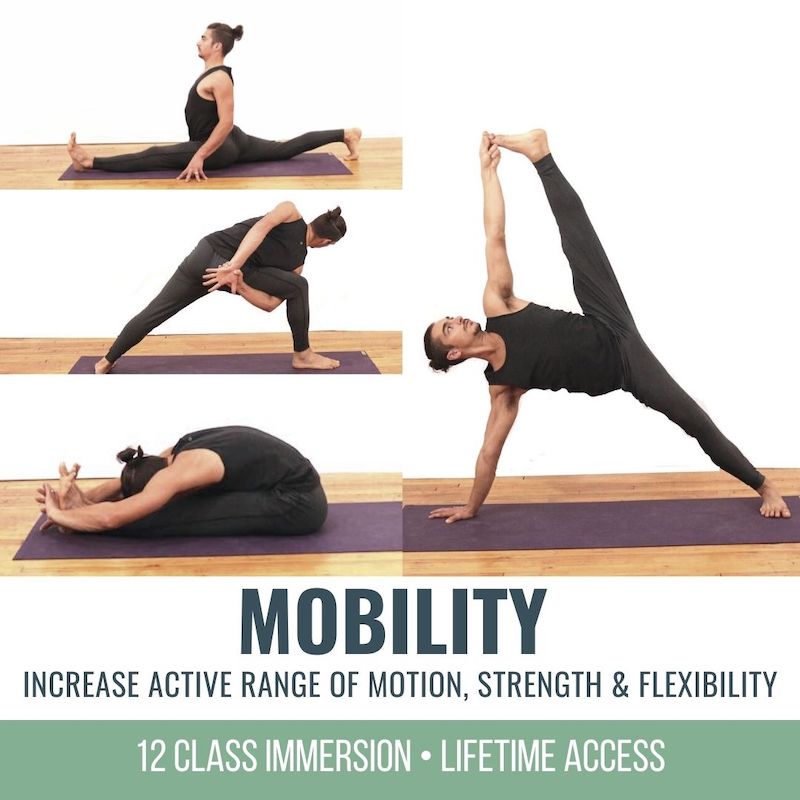
      MOBILITY

      ONLINE YOGA IMMERSION

      • Key techniques to increase flexibility
      • Strength development for mobility and range of motion
      • Learn postures: Hanumanasana (Splits), Extended Side Plank
      • Active and passive mobility for shoulders, hips, and spine
      • Improve spinal twists, heart openers, shoulder openers, and hip openers
      • Find greater ease in seated postures
      • Improve mobility and posture off the mat
      • When and how to do active, passive, and isometric stretching

      $148.00

      MORE INFORMATION

      12 Online Yoga classes to Learn Anatomy

      ANATOMY IN MOTION

      APRIL 2022 Immersion

      • Embody anatomy
      • Learn key muscles, bones, and joints
      • Visualize your movements internally
      • Improve proprioception
      • Sensation-based practices
      • Unlock and strengthen major muscle groups
      • Active, passive, and isometric stretching
      • Improve mobility and stability
      • Get VERY geeky

      $168.00


      Continue Learning

      Janu Sirsasana To Half Lotus

      Janu Sirsasana To Half Lotus

      Janu Sirsasana To Half LotusKurmasanaJANU SIRSASANA TO HALF LOTUS There’s never one single route to a posture we’re exploring.  There are individual specifics we always need to consider.   When it comes to hip opening postures like Janu Sirsasana and Half Lotus we...

      read more
      Turtle Pose To Titibhasana

      Turtle Pose To Titibhasana

      Turtle Pose To TitibhasanaKurmasanaTURTLE POSE TO TITIBHASANA Turtle Pose is not tiny by any means.  There is a great deal that goes into its preparation.  At the same time, it’s also an excellent preparatory posture for Titibhasana.  The journey between these two...

      read more
      Full Wheel

      Full Wheel

      Full WheelUrdhva DhanurasanaFULL WHEEL Teaching an intentional class becomes inevitable when following the Chromatic system that Matt created .  In Chromatic, we’re following a system that sets up the body for maximum execution within our fullest potential.  When it...

      read more
      Mastering Bakasana

      Mastering Bakasana

      Mastering BakasanaCrow PoseMASTERING BAKASANA We may never truly master a posture, but as we go on a journey of exploration towards our greatest potential within our asana practice, we most definitely become masters of our own awareness—cultivating the ability to...

      read more
      Tuck Jumps

      Tuck Jumps

      Tuck JumpsHandstandTUCK JUMPS Tuck jumps can be a confidence booster when it comes to preparing for handstands. They're not the first step in the course of preparation, but they're definitely a way of identifying where strength and proprioception require attention.  ...

      read more
      Counter Rotations

      Counter Rotations

      Counter RotationsStabilityCOUNTER ROTATIONS The isolation of specific articulations in a yoga posture can be tricky to implement when we’re still learning how our bodies move. When we begin to explore counter rotations, this layer might feel confusing or even...

      read more

      THE FREE TECHNIQUE PACK

      When You Subscribe, You Will Get Instant Access to

      • the Technique Pack: 15 yoga pose breakdowns
      • exclusive online course discounts
      • exclusive blogs and videos
      • This field is for validation purposes and should be left unchanged.

      King Cobra Pose Tutorial

      KING COBRA POSE 

      YOGA ANATOMY • BIOMECHANICS • TECHNIQUE

      KING COBRA

      5 Key Actions to Decompress Your Spine in King Cobra Pose

      Not all that glitters is gold, and without the right approach, this glorious backbend may not be a shining example of spinal health.

      King Cobra is no doubt a visually stunning yoga posture. When we see the outward execution of the pose, we see strength and confidence, and the pose may even appear to express maximum spinal mobility. It’s important, however, to understand that there are key actions to take in order for all of these things to be true.

      In this King Cobra tutorial, Matt provides a step-by-step process of these actions in order to emphasize the process and the development of the body to prepare for the posture, rather than emphasizing the “achievement” of the pose purely for the aesthetics.

        12 Online Yoga classes to Learn Anatomy

        ANATOMY IN MOTION

        APRIL 2022 Immersion

        • Embody anatomy
        • Learn key muscles, bones, and joints
        • Visualize your movements internally
        • Improve proprioception
        • Sensation-based practices
        • Unlock and strengthen major muscle groups
        • Active, passive, and isometric stretching
        • Improve mobility and stability
        • Get VERY geeky

        $168.00


        ANATOMY

        The awareness of your anatomy is vital for you to understand each step. Understanding your anatomy helps you more clearly and intentionally connect with the sensations in your body, therefore cultivating a more direct line of communication from your brain to your body and from your body to your brain. The development of these signals will promote a more sophisticated body awareness that will help you activate the appropriate muscles (without overdoing it) and know exactly what directions not only to take but also to maintain in a particular part of your body as you layer on each action.

        5 KEY ACTIONS FOR KING COBRA POSE

        You might think that it’s all about your spine and how flexible and/or mobile it is. How we involve our entire body is key, and Matt provides the roadmap with the following 5 key actions to set up King Cobra.

          1. Bring the chest forward. In the first few attempts, it may feel as though not much is happening, but this is where the mind-body connection is developed.
          2. The second action, which may be overlooked, is pressing back through your heels while the feet are in dorsiflexion (this is also important later). Press your heels away from the direction of the chest. What does this do, and why is it important? This is the first step in both the awareness and the action of decompressing the spine. Creating this length is crucial as Matt guides us through the next steps:
            *But let’s pause for a moment and check in with your abdominals–if you are engaging too much here, then this will reduce the amount of expansion in your extension for your backbend, so leaning into a stretch sensation in your front body is helpful.
          3. Next on board are your hamstrings–once you bend your knees, you’ll be firing up and activating your hamstrings. This is how the dorsiflexion of your feet can be a great action to take as you build a relationship with how much and/or how little your hamstrings do activate. In the video, Matt explains that pointing the feet (plantar flexion) may cramp your hamstrings because you are shortening the posterior chain too much. He also notes that once your body has enough mobility to point your feet, there is absolutely nothing wrong with doing it.
          4. In this step, we understand why the layering is important. As the knees are bent and you’re potentially trying to get your feet closer to your head, Matt again emphasizes pulling your spine forward. Your body may feel the need to compress here and shorten. You might feel the desire to actually send your chest and head back to “achieve the desired result.” It’s most important here to come back to the development and preparation for the spine.
          5. This step really goes hand in hand with #4, but pulling your belly up not only makes a significant impact on the experience within you body but also actually brings your head back slightly. (You can see the visual change when Matt layers on this action in the video.) This action is initiated by engaging the deep core muscle called transverse abdominis.
        Online yoga to improve mobility

        MOBILITY

        ONLINE YOGA IMMERSION

        • Key techniques to increase flexibility
        • Strength development for mobility and range of motion
        • Learn postures: Hanumanasana (Splits), Extended Side Plank
        • Active and passive mobility for shoulders, hips, and spine
        • Improve spinal twists, heart openers, shoulder openers, and hip openers
        • Find greater ease in seated postures
        • Improve mobility and posture off the mat
        • When and how to do active, passive, and isometric stretching

        $148.00

        MORE INFORMATION

        TRANSITIONING FROM THE GROUND TO WILD THING

        After all of this, it is now your time to bask in the shine of this delightful backbend. Now there is the expansion, the extension, the confidence that you are safe in this posture, and most importantly, the desired health of your spine in this pose.

        If King Cobra is not quite on the menu yet, click here to build the foundation with Matt’s 3-Part Cobra. Keep in mind that you will also explore 3-Part Cobra in Matt’s next immersion, Anatomy in Motion.

        See you on the mat!

        The 200 Hr. Teacher Training: Click Here to See The Next Start Date

        The 300 Hr. Advanced Teacher Training: Click Here to See The Next Start Date

        Article by Trish Curling

        Video Extracted From: Mobility Immersion

        12 Online Yoga classes to Learn Anatomy

        ANATOMY IN MOTION

        APRIL 2022 Immersion

        • Embody anatomy
        • Learn key muscles, bones, and joints
        • Visualize your movements internally
        • Improve proprioception
        • Sensation-based practices
        • Unlock and strengthen major muscle groups
        • Active, passive, and isometric stretching
        • Improve mobility and stability
        • Get VERY geeky

        $168.00


        Continue Learning

        Janu Sirsasana To Half Lotus

        Janu Sirsasana To Half Lotus

        Janu Sirsasana To Half LotusKurmasanaJANU SIRSASANA TO HALF LOTUS There’s never one single route to a posture we’re exploring.  There are individual specifics we always need to consider.   When it comes to hip opening postures like Janu Sirsasana and Half Lotus we...

        read more
        Turtle Pose To Titibhasana

        Turtle Pose To Titibhasana

        Turtle Pose To TitibhasanaKurmasanaTURTLE POSE TO TITIBHASANA Turtle Pose is not tiny by any means.  There is a great deal that goes into its preparation.  At the same time, it’s also an excellent preparatory posture for Titibhasana.  The journey between these two...

        read more
        Full Wheel

        Full Wheel

        Full WheelUrdhva DhanurasanaFULL WHEEL Teaching an intentional class becomes inevitable when following the Chromatic system that Matt created .  In Chromatic, we’re following a system that sets up the body for maximum execution within our fullest potential.  When it...

        read more
        Mastering Bakasana

        Mastering Bakasana

        Mastering BakasanaCrow PoseMASTERING BAKASANA We may never truly master a posture, but as we go on a journey of exploration towards our greatest potential within our asana practice, we most definitely become masters of our own awareness—cultivating the ability to...

        read more
        Tuck Jumps

        Tuck Jumps

        Tuck JumpsHandstandTUCK JUMPS Tuck jumps can be a confidence booster when it comes to preparing for handstands. They're not the first step in the course of preparation, but they're definitely a way of identifying where strength and proprioception require attention.  ...

        read more
        Counter Rotations

        Counter Rotations

        Counter RotationsStabilityCOUNTER ROTATIONS The isolation of specific articulations in a yoga posture can be tricky to implement when we’re still learning how our bodies move. When we begin to explore counter rotations, this layer might feel confusing or even...

        read more

        THE FREE TECHNIQUE PACK

        When You Subscribe, You Will Get Instant Access to

        • the Technique Pack: 15 yoga pose breakdowns
        • exclusive online course discounts
        • exclusive blogs and videos
        • This field is for validation purposes and should be left unchanged.

        Wild Thing Shoulder Alignment

        WILD THING SHOULDER ALIGNMENT

        ANATOMY • BIOMECHANICS • TECHNIQUE

        Shoulder Alignment

        WILD THING SHOULDER ALIGNMENT

        What is the correct shoulder alignment for the pose we call Wild Thing? To answer this, we would first have to define the guidelines for “right” and “wrong.” The fact is there are many ways you can align the shoulder, and you will be able to find at least one yoga teacher who would validate each alignment as “correct.” We need context and agreed objectives.

        For this discussion, the objective is to access greater mobility by utilizing the strength of the rhomboids. Our context for what is correct is based on two questions:

        1. What will provide us with the greatest access to the pose we call Wild Thing?
        2. How can we minimize the risk of injury in our pursuits of the posture?

        12 Online Yoga classes to Learn Anatomy

        ANATOMY IN MOTION

        APRIL 2022 Immersion

        • Embody anatomy
        • Learn key muscles, bones, and joints
        • Visualize your movements internally
        • Improve proprioception
        • Sensation-based practices
        • Unlock and strengthen major muscle groups
        • Active, passive, and isometric stretching
        • Improve mobility and stability
        • Get VERY geeky

        $168.00


        THE BIOMECHANICS 

        In the video below, you will notice two key points. First is the rotation of the arm bone (external), which pairs with retraction of the shoulder blade. Second, you will see that in Wild Thing, my shoulder is NOT stacked directly above the wrist.

        There are two reasons we focus on external rotation. First, it helps stabilize the arm bone in the shoulder socket (glenohumeral joint), which tends to be challenging for most people — it’s safe to say that most humans are chronically internally rotated at the shoulder. The second reason is that external rotation in this position helps to retract and depress the shoulder blade. As a result of these actions, you will feel your spine move into a backbend so long as you don’t do anything to counteract the movement.

        Wild Thing shoulder alignment is not just about the shoulder; it also helps to prepare your spine for the deep backbend that Wild Thing requires.

        The Risk: If you skip these steps, you will likely wind up with pressure, strain, or pain at the front of the shoulder joint. Additionally, your posture will feel more like a 3-Legged Tabletop than an expansive heart opener.

        THE 3 ACTIONS TO ACHIEVE THIS “WILD THING SHOULDER ALIGNMENT”

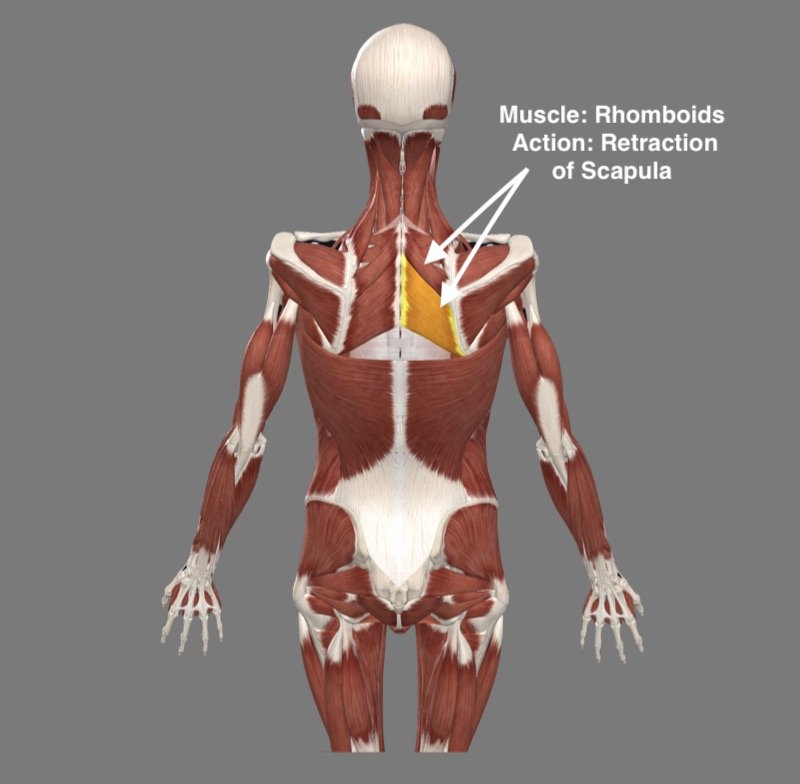
        Essentially, the objective is to get the shoulder back behind you. The primary muscles that will do that are called the rhomboids. The muscles that restrict this movement are called the pectorals. Action 1 helps to unlock the pectorals. The following 3 actions should be done PRIOR to rising up, not after. Additionally, do not stack your shoulder over the wrist.

        THE ACTIONS

        Action 1: Shoulder elevation

        Relax and allow the shoulder to rise up toward your ear. This will turn off your pectoralis major and minor, which will provide greater mobility when you attempt to do Actions 2 and 3.

        Action 2: Retract your shoulder blade

        With the shoulder up toward the ear, pull your shoulder blade toward your spine, this will move the head of the arm bone back, lengthening your chest muscles.

        Action 3: Rotate the arm externally

        Rotate the arm bone outward until you feel your rib cage press forward and your spine move into a back bend. This step will also bring the shoulder blade back down your back (away from the ears). 

        wild thing shoulder alignment
        Online yoga to improve mobility

        MOBILITY

        ONLINE YOGA IMMERSION

        • Key techniques to increase flexibility
        • Strength development for mobility and range of motion
        • Learn postures: Hanumanasana (Splits), Extended Side Plank
        • Active and passive mobility for shoulders, hips, and spine
        • Improve spinal twists, heart openers, shoulder openers, and hip openers
        • Find greater ease in seated postures
        • Improve mobility and posture off the mat
        • When and how to do active, passive, and isometric stretching

        $148.00

        MORE INFORMATION

        TRANSITIONING FROM THE GROUND TO WILD THING

        As you rise up from the ground, you will notice that you will be tempted to undo the shoulder alignment. I suggest filming yourself so you can observe with your eyes, as it can be easy to feel like you are doing one thing while the body is doing another. Rewatch the above video and you will see that as I rise up I am deliberately rotating the arm bone outward and the moving the shoulder blade backward.

        KEY POINT: THE SHOULDER IS NOT STACKED OVER THE WRIST

        Notice that as I rise up, I keep moving my weight into my legs and using the strength of my legs, buttocks, and back to press my body to the sky. This is to take the stress off of the shoulder and minimize the risk of shoulder injury. Using your legs and back muscles will also help you deepen the posture. 

        To learn more about the anatomy, biomechanics, and techniques you can apply to advance your asana practice, join the Anatomy in Motion immersion. This immersion is unique in that each class begins with a visual anatomy tutorial, helping you see how your muscles create movements. Following the tutorial, you learn how to incorporate this knowledge into your practice, and most importantly, you learn to FEEL your anatomy.

        The 200 Hr. Teacher Training: Click Here to See the Next Start Date

        This is for you if you are interested in deepening your yoga practice, building your confidence, learning how to create a class, and sharing this practice with friends, family, or beyond. Yes, it’s for all levels, ages, etc.

        The 300 Hr. Advanced Teacher Training: Click Here to See the Next Start Date

        This training is definitely for you if you are already certified at the 200 or 500 hour level but want to take your teaching career and practice to the next level. In this training, you will learn Anatomy, Biomechanics, Postural Techniques, Intelligent Sequencing, Breathwork, Meditation, Heart-Centered Philosophy, Theming, Business Structure, Marketing, Social Media, Branding, and how to build a sustainable and successful career!

        Article by Matt Giordano

        Video Extracted From: Mobility Immersion

        12 Online Yoga classes to Learn Anatomy

        ANATOMY IN MOTION

        APRIL 2022 Immersion

        • Embody anatomy
        • Learn key muscles, bones, and joints
        • Visualize your movements internally
        • Improve proprioception
        • Sensation-based practices
        • Unlock and strengthen major muscle groups
        • Active, passive, and isometric stretching
        • Improve mobility and stability
        • Get VERY geeky

        $168.00


        Continue Learning

        Janu Sirsasana To Half Lotus

        Janu Sirsasana To Half Lotus

        Janu Sirsasana To Half LotusKurmasanaJANU SIRSASANA TO HALF LOTUS There’s never one single route to a posture we’re exploring.  There are individual specifics we always need to consider.   When it comes to hip opening postures like Janu Sirsasana and Half Lotus we...

        read more
        Turtle Pose To Titibhasana

        Turtle Pose To Titibhasana

        Turtle Pose To TitibhasanaKurmasanaTURTLE POSE TO TITIBHASANA Turtle Pose is not tiny by any means.  There is a great deal that goes into its preparation.  At the same time, it’s also an excellent preparatory posture for Titibhasana.  The journey between these two...

        read more
        Full Wheel

        Full Wheel

        Full WheelUrdhva DhanurasanaFULL WHEEL Teaching an intentional class becomes inevitable when following the Chromatic system that Matt created .  In Chromatic, we’re following a system that sets up the body for maximum execution within our fullest potential.  When it...

        read more
        Mastering Bakasana

        Mastering Bakasana

        Mastering BakasanaCrow PoseMASTERING BAKASANA We may never truly master a posture, but as we go on a journey of exploration towards our greatest potential within our asana practice, we most definitely become masters of our own awareness—cultivating the ability to...

        read more
        Tuck Jumps

        Tuck Jumps

        Tuck JumpsHandstandTUCK JUMPS Tuck jumps can be a confidence booster when it comes to preparing for handstands. They're not the first step in the course of preparation, but they're definitely a way of identifying where strength and proprioception require attention.  ...

        read more
        Counter Rotations

        Counter Rotations

        Counter RotationsStabilityCOUNTER ROTATIONS The isolation of specific articulations in a yoga posture can be tricky to implement when we’re still learning how our bodies move. When we begin to explore counter rotations, this layer might feel confusing or even...

        read more

        THE FREE TECHNIQUE PACK

        When You Subscribe, You Will Get Instant Access to

        • the Technique Pack: 15 yoga pose breakdowns
        • exclusive online course discounts
        • exclusive blogs and videos
        • This field is for validation purposes and should be left unchanged.

        Pin It on Pinterest